

Happy Valentine’s Day, friends! Today’s post comes to you in celebration of all things love and my three beautiful grandchildren who fill my heart to the top every single day! These three are so happy and full of joy it’s a pleasure to spend every moment with them. How lucky I am that all I have to do is walk across the street to see them!


The starting point for this layout was selecting two cut files from Peartree Cutfiles. The Snowflake Heart was an obvious choice for fitting with Valentines Day and the picture I chose. The title All of Me Loves All of You was the perfect fit for how I feel about my grandkids. It simply says it all! The foundation of the page is white textured Precision Cardstock from American Crafts. I opened both cut files in Silhouette software and sized them on the page to ensure I would have enough space to fit both. I slid the title off the cutting area to focus on the snowflake heart. Next, I traced the design and used the Release Compound Path function to allow direct access to all the design components. Finally, I removed the outside cutting line of the large heart before sending the file to cut. I did not want the cut file as a separate element but wanted it cut directly into the white cardstock.
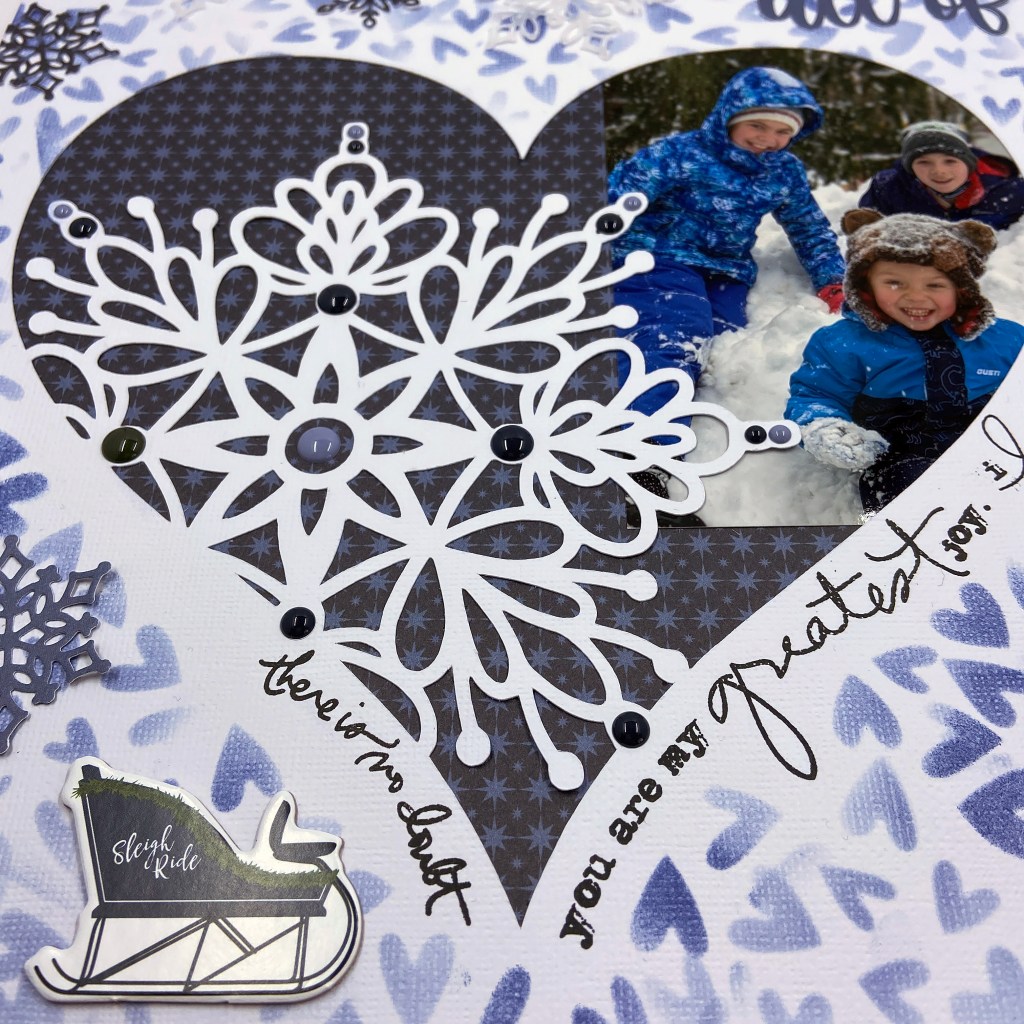
I pulled beautiful Ali Edwards stamps from my stash to stamp around the base of the heart. I pulled from two of her collections for Technique Tuesday, Sweet Baby and Loving Words. My 12″ x 12″ Misti came in handy for this task. This wonderful tool allowed me to bend and wrap my stamps around the cut out design. Once the stamping was complete, I set about inking the blue hearts on the remaining background of the white cardstock. For this task, I used the Lots of Heart stencil from My Favorite Things (MFT). I liked the random whimsical look of this stencil, as it helped mimic falling snowflakes. I chose Tim Holtz’s Chipped Sapphire Distress Ink for the stenciled hearts. I liked the way this shade coordinated with the papers from Carta Bella’s Welcome Winter collection, which were chosen to complement my grandchildren’s snowsuits.

I then moved on to cutting and backing my title for the layout. I chose the Light Blue coordinating solid paper from the Welcome Winter line for the outline. I backfilled the word Loves with a finely dotted vellum from an old collection by Papertrey Ink called Sheer Basics. The completed cut file was then secured to the page before moving to the final stages.


I placed my photo on the upper right-hand side of the Snowflake Heart, behind the white cardstock. I then back-filled the entire background of the cut file with the Winter Wonderland patterned paper from the Welcome Winter collection pack. The remaining elements for this layout were a few chipboard accents from the same collection and a slew of die-cut snowflakes in various sizes and papers from coordinating vellum and solid patterned papers. The beautiful Snowfall Thinlits Dies belong to a set created by Sizzix for Stampin-Up! The final step was adding some enamel dots from the Welcome Winter collection to the large snowflake in the cut file.
This layout did take some time to complete, but I am so happy with the end result. Don’t be afraid to experiment and play while you create your scrapbook pages. It’s a fun way to complete a page, and to strengthen your paper crafting skills!
May your Valentine Day be filled with love and joy! Thanks for stopping by, and until next time, stay safe, stay well, and Happy Scrapping!

