Pink Ukulele

Do you remember the excitement at Christmas and your dreams of that one gift you hoped and prayed would be under the tree? All my Granddaughter Madison hoped for was a PINK UKULELE. Imagine her delight when she unwrapped her pink ukulele on Christmas Morning! It was a sweet moment! She loves her ukulele and regularly practices on it.

I dug into my scrapbooking stash to make this layout. I chose the beautiful soft hues in Cocoa Vanilla Studio’s Midnight collection to document this precious moment. Midnight is an older paper collection, but you may still find some at your Local Scrapbook Store. The photo is backed with coordinating papers from this collection.

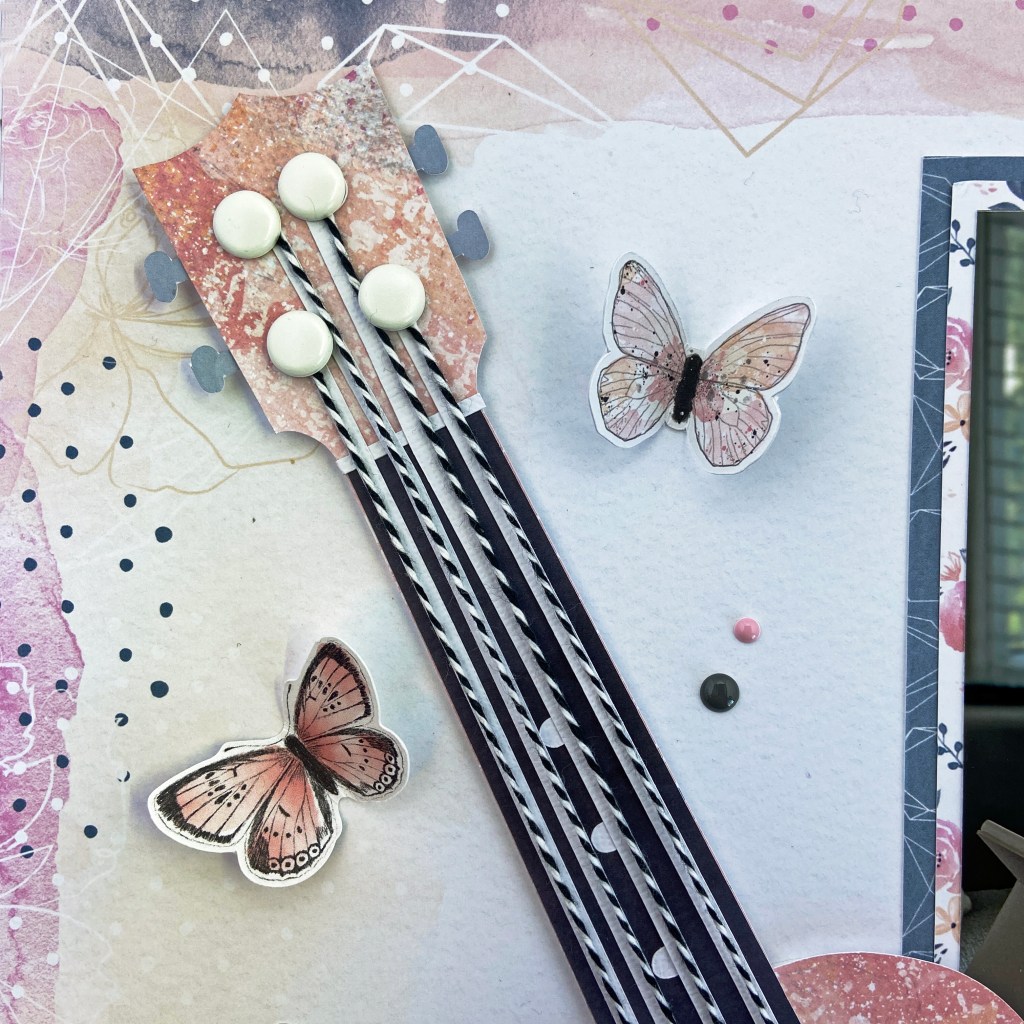
I found a ukulele in the Silhouette Design Store for this page. The cut file is Design ID #159757 by Doodlebug Designs, and the title is ukulele – fun in the sun. I did my best to match the finished paper ukulele to Maddie’s instrument. To create the 3D effect, I attached white brads to the head of the ukulele and tied black and white twine to each brad before securing them firmly in place. Using a wide blunt needle, I threaded each string through to the back at the base of the bridge. The strings were each secured with tape on the backside. Before adhering the cut file to the layout, I backed it with fun foam to provide dimension and enhance the 3D effect. I placed Couture Creations Diecut’N Bond adhesive to both sides of the fun foam, traced the shape and then cut the fun foam. This process provides a smooth, uniform surface to adhere the items to and guarantees that your page will not warp in your scrapbook over time.

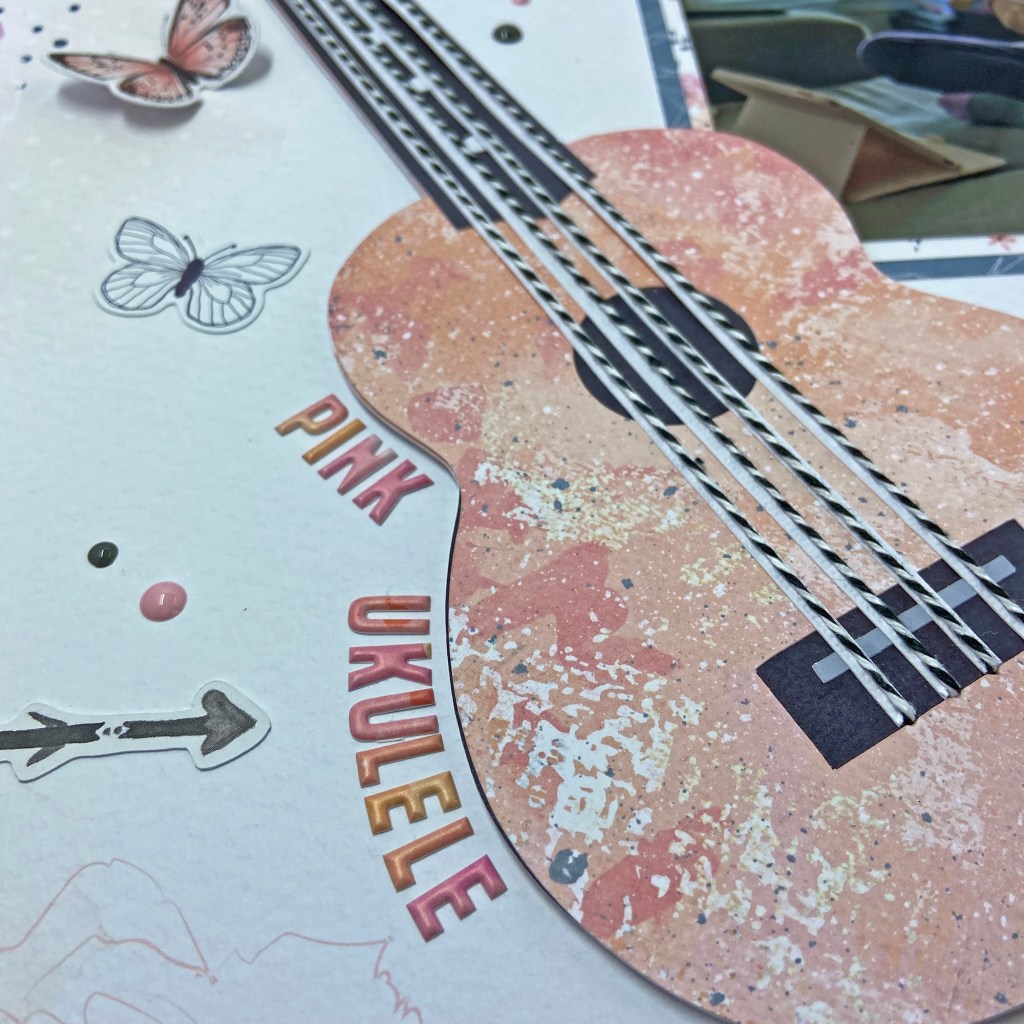
The PINK UKULELE title for this layout was added using Mini Puffy Alpha Stickers from PinkFresh Studio‘s Just a Little Lovely collection (no longer available). The variegated colours in this collection were a perfect match for the Cocoa Vanilla Studio papers. I wrapped the letters around the curving body of the ukulele to pull the eye to this focal point in the design.

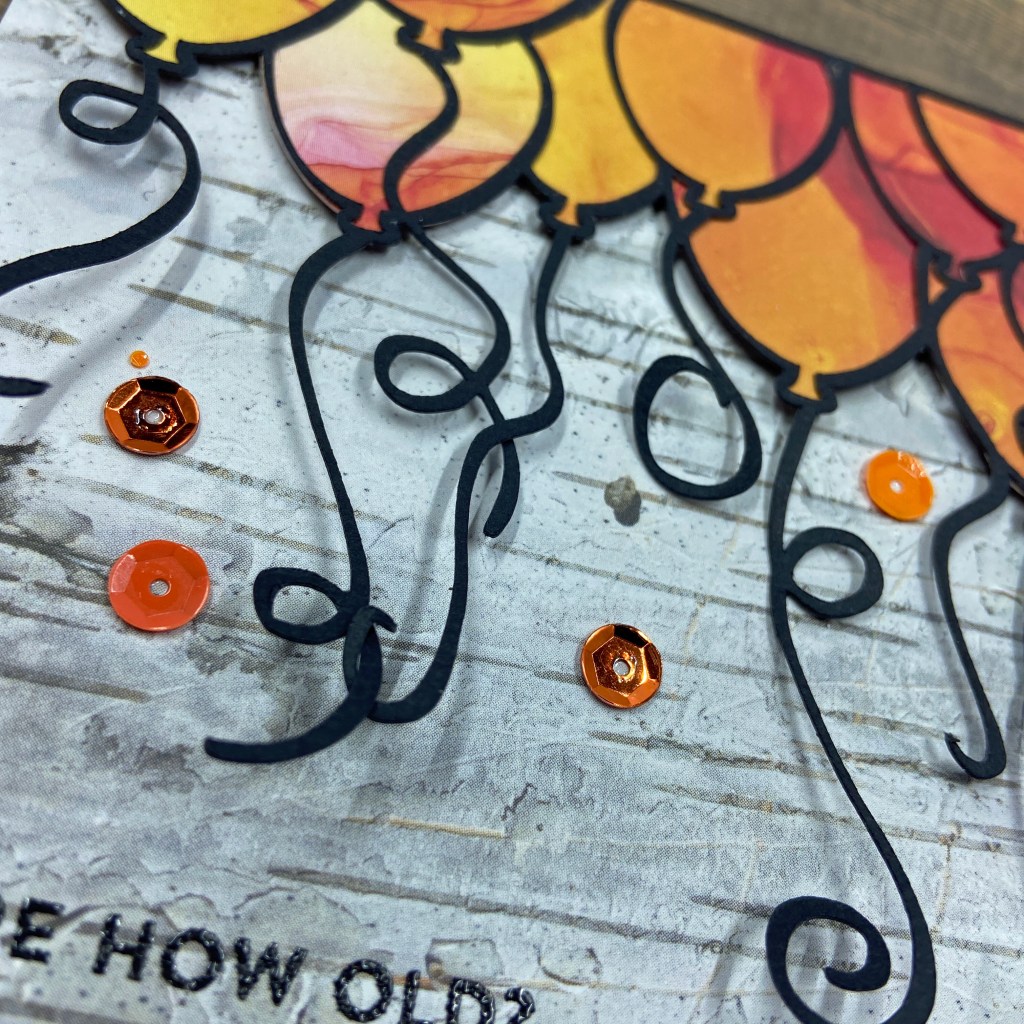
The final touches on this layout involved adding all the ephemera, stickers and enamel dots found on the page. While all the stickers belong to the Midnight paper collection kit, the coloured butterflies, grey heart, and enamel dots belong to Cocoa Vanilla Studio’s Unforgettable collection. I love how these collections can work and enhance each other.

And that’s a wrap on a layout that had me digging deep into my scrapbooking stash! Thanks for stopping by, and until next time, stay safe, stay well, and Happy Scrapping!

Winter Moments

This layout makes me smile for so many reasons. Last winter, my grandson hated winter. Every time my daughter bundled him up and took him out, he’d stand there, stiff as a board and with the saddest face ever! I’m so pleased to say that this winter is a whole new ball game! Ben is in love with winter. He enjoys everything about getting outside to play in the snow. A new world of winter activities has opened up for this young man. This layout celebrates that feeling!

The Winter Market collection of patterned papers, stickers, ephemera and chipboard accents by Carta Bella was used to create this page. The design process for this layout started with the cut file, Winter Moments. It was an exclusive January Pearscription cut file from Peartree Cutfiles. The first step in preparing the cut file for this layout was backing the word Winter with a patterned paper from the Winter Market collection. Next, I carefully punched holes approximately every 1/4″ on the snowflake to prepare it for stitching. Because the arms of the snowflake were not very wide, I used a sharp needle and three strands of white DMC floss to complete the straight stitch. This step did take some time and patience! At this stage, I set the cut file aside to focus on the lower section of the layout.

I planned on ripping patterned paper to create hills to rest the photo. However, I settled on cutting the paper instead. I made a template of the hill shapes first and then traced the designs onto the patterned paper. Each hill was inked on the top edge to add dimension and then stitched with white DMC floss to represent snow. I used six strands of floss and a chain stitch to create a strong effect.

I was aiming for the illusion of looking over rolling hills in this layout. I placed fun foam between the top two layers to help achieve this effect. This also provided a convenient place to tuck the photo and some of the accents.

The next stage in completing this layout was to adhere the Winter Moments title to the layout. Given the layered hills at the bottom, I chose to pop up the title as well. I used double-sided adhesive foam to achieve this effect. I feel this provides better balance and weight to the overall layout. For the smaller letters in moments and the arms of the snowflake, I used Taylored Expressions Foam Sticky Strips.

The final stage in completing this layout was adding the ephemera and accent pieces. Coordinating blue and green sequins were glued to the tips of each snowflake. Taylored Expressions Bits & Pieces Snowflakes were arranged and glued to the dark background paper and picture. I used several Chipboard Accents from the Winter Market collection and tucked them in the rolling hills for a fun, playful effect. The snowman figure was a sticker from the paper collection pack. He was adhered to fun foam to provide the same depth as the chipboard accents. The blue HAPPY SNOW DAY! square came from the coordinating Frames & Tags ephemera pack.

I’m really tickled with how this layout turned out. Every stage was a delight to create and I hope Ben thinks it’s fun as well! Thanks for stopping by and until next time, stay safe, stay well, and Happy

’twas the Night Before Christmas

I couldn’t resist scrapbooking one more Christmas page. This picture is just far too cute to leave until next season! There’s nothing quite like the build-up to Santa’s big arrival for children. Christmas Eve was so special this year. The smiling faces of my grandchildren in this picture says it all – it was a wonderfully joyous evening! It was the first year our youngest grandchild Ben understood the concept of Santa Claus. He was very excited and, when asked what he asked Santa for this year, he’d always say “a Hammer!”.

I created this layout using three separate cut files from Peartree Cutfiles. The Snowflake Background cut file was cut from white cardstock to fill the entire page. I layered it directly on top of a piece of Twill cardstock from Bazzill.

Black cardstock was used to cut the outline of the title, ’twas The Night Before Christmas. I used coordinating patterned papers from Photoplay Paper‘s Christmas Cheer collection to fill the cutout letters. I chose to backfill the word “Christmas” and used Talyored ExpressionsFoam Sticky Strips to adhere to the word “Night”. The result provided texture and dimension to the upper section of the layout.

The third cut file used is called Stockings. I downsized the file considerably to fit my project. Doing so made backing the presents a bit tricky, but not impossible. Before cutting this file, I completed a mock-up in Silhouette Studio to ensure I would be happy with the sizing. Glitter paper backfills each of the presents and holly in this garland.

The final touches on the layout included adding some strategically placed holographic snowflakes and a couple of stickers from the Christmas Cheer patterned paper collection. The stickers were dusted with baby powder to remove the sticky side and then glued to some fun foam for dimension. The holographic snowflakes were attached using small white brads.

I couldn’t be happier with the results of this layout. It is the first time I’ve utilized three cut files on one page. Thanks for stopping by today, and until next time, stay safe, stay well and Happy Scrapping!

Hugs

There are times we feel helpless when friends are hurting. Life can be so hard sometimes. Add a pandemic into the mix, and those who suffer can feel isolated and alone. Reaching out to them is helpful in any form. Today I felt the need to let someone I know how much I love and care for them. Making and sending a card is such an easy thing to do when you can’t physically be with them.

The pretty papers in this card came from Cocoa Vanilla Studio‘s These Days collection. I often purchase the A5 Paper Stack in these collections, as they are excellent for card making. I chose butterfly paper to cover the whole card front. Next, I used two Stitched Scallop Basic Edged 2 dies (currently not available) from My Favorite Things to shape the soft green leafy paper.

The HUGS sentiment comes from Papertrey Ink, and I have had it in my collection for at least a decade. It is a timeless set that I will continue to use for many years to come. I purchased the coordinating stamp set for these dies and used the word SENDING for the front of the card. Each letter of the word HUGS has intricate cutouts. I wanted these cutouts filled with coordinating colours of this collection. The easiest and quickest way to achieve this was to cut the coordinating papers and back these sections. I layered the completed die cut on fun foam to provide a bit of texture and dimension to the card.

The final touch was adding a few hearts from the These Days Puffy Stickers sheet. I’m very happy with the end result and hope my friend feels the love I’m sending with it.

Thanks for stopping by, and until next time, stay safe, stay well, and Happy Scrapping!

You’re How Old?

Happy Birthday to my wonderful husband! Because he’s older than I, I always like to tease him over his age. I’m always willing to let him go first in the age game, so generous of me!

This year, I’ve challenged myself to use more of my cut files to make cards. It is a great way to stretch the investment in your electronic cut files. I used the Balloons cut file from Confessions of a Paper Addict (COAPA) to make this card.

I resized the cut file in Silhouette software to fit the front of the card, and then cut it from black cardstock. I chose coordinating papers from the Harvest Festival collection by Honey Bee Stamps for the card base and the balloons. I love the vibrant colours in the balloons.

The next step was to emboss the greeting “You’re How Old?” on the card front. This stamp belongs to the Bitty Birthday Wishes stamp set by My Favorite Things (MFT). I then used adhesive foam to layer the balloons to the front of the card. I wanted the tails of the balloons to flow freely from the card, providing more texture and movement.

The final touch was adding some sequins in different hues of orange to coordinate with the balloons. I adhered them to the card front using Glossy Accents, as it provides an extremely firm hold. Overall, I found this card quite quick and easy to pull together.

Thanks for stopping in today, I hope I’ve encouraged you to look at using your cut files in new and different ways. Until next time, stay safe, stay well, and Happy Scrapping!

Get Lost in a Good Book

For as long as I can remember, I have loved reading. For me, the best part of reading is the ability to let your imagination paint the picture from the written word. I’ve yet to meet a movie that did a book proper justice. Reading and scrapbooking have a lot in common. Both hobbies take me away from the stress found in everyday life. I read before going to sleep every night, even when the light annoys my husband! It’s part of my nighttime ritual that helps me relax, unwind and put the troubles of the world aside.

For several years now, I’ve made a list of each book I’ve read within a calendar year. January 1st, I take a picture of all the books I’ve read throughout the previous year. I’ve always had grand plans of scrapbooking the photo, and this year those plans became a reality. I dug into my stash of patterned paper for this layout and used the 12″ Noel Joy paper by BoBunny for the foundation of the page. I’ve always loved the antique books on this patterned paper.

I chose the Get Lost in a Good Book cut file from Peartree Cutfiles to document my reading list from 2020.

I began by cutting the file in black cardstock and then backed the words with a gorgeous patterned paper by Bazzill Basics Paper called Antique Script. I love how the title stacks on top of a book. Because some of the books I read in 2020 were quite old copies, it is hard to see their titles in the picture. I wanted to include the book titles in this layout and decided on creating a little book from the book base in the cut file.

I started by cutting a duplicate book cover to mimic the front and back covers. Next, I cut multiple “pages” from heavy vellum to fill the book. I used these vellum pages to record the names of each book found in the picture. Using vellum tape, I adhered these pages together on the left-hand side and secured the second book cover to the top to complete the book. The result is a 3D embellishment that mimics a book.

To help balance the weight of the newly created book on the right-hand side of the layout, I mounted the picture on fun foam before adhering it to the background paper. I found coordinating stickers from the Photoplay Holiday Cheer paper pack to create the subtitle 2020 Reading List. The final touch was adding the three chipboard stars found around the picture. These stars also came from a very old paper collection in my scrapbook stash – My Mind’s Eye, Vintage Christmas.

And that’s a wrap on my first layout for 2022! I appreciate you stopping by and hope I’ve enticed you to look at cut files in new and different ways.

Until next time, stay safe, stay well, and Happy Scrapping!