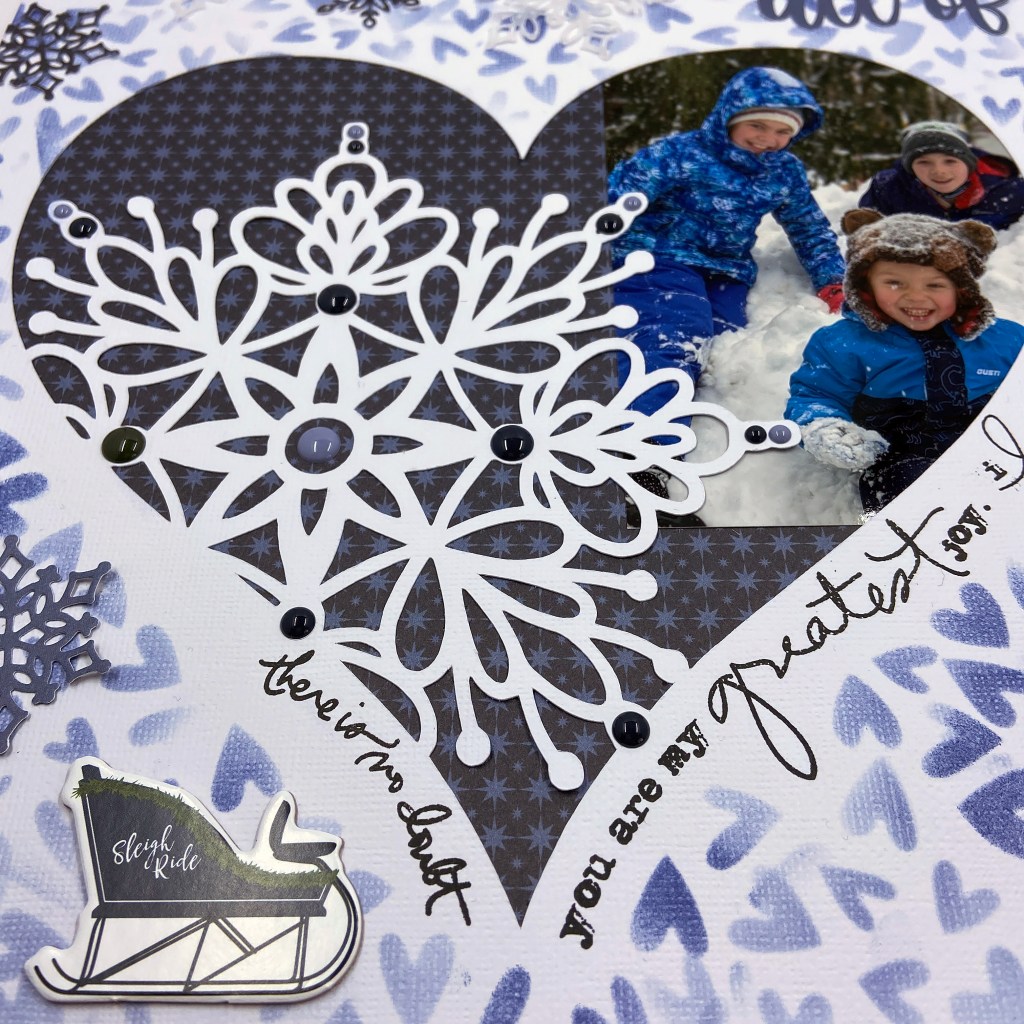
Happy Valentine’s Day to one and all! This scrapbook page is my 2024 Valentine’s tribute to my loving husband and partner of 43 years! Thank you for making me stretch my skills and push through barriers I never thought possible. I will treasure this travel memory for the rest of my life, and I couldn’t have done it without you….
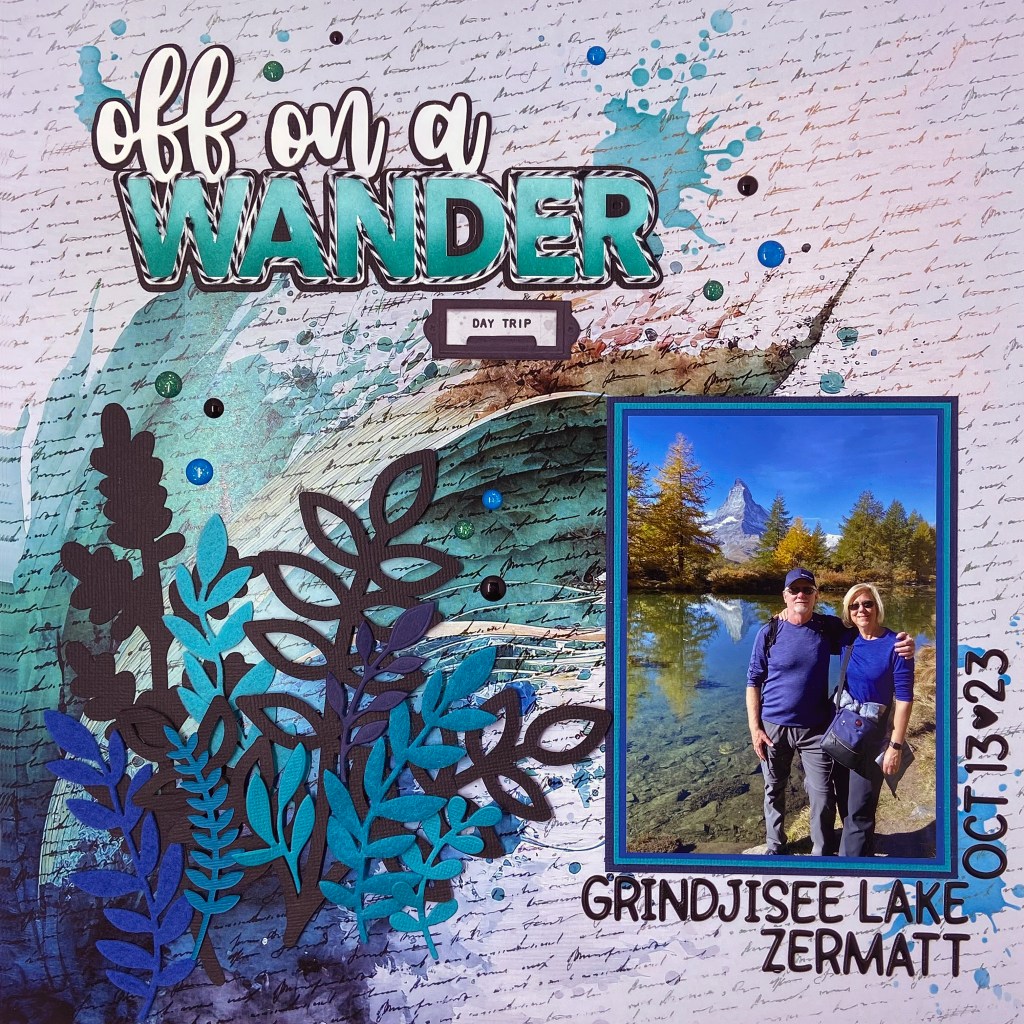
We’ve had the good fortune to travel quite a bit in 2023. Of all our adventures, this five-and-a-half-hour hike in Zermatt, Switzerland, is now considered epic in our memories. We planned a day to complete the Five Lake Trail, offering unforgettable views of the Matterhorn. Our original plans, as laid out by our hotel concierge, were to take the underground funicular to Sunnegga and then switch to a gondola to Blauherd. From Blauherd, we were to follow the hiking trails down the mountain, visiting the five beautiful lakes.
But all good travel plans can quickly go awry, and this day was no exception! The underground funicular was a quick and easy ride to Sunnegga. The gondola, however, had been shut down for the season just two days before our arrival. Not being travellers to be easily discouraged, we quickly rearranged our plans and decided that if we couldn’t hike down, we would hike UP! It seemed like a sensible decision at the time! With the original hiking time estimated at two-and-a-half hours going down the mountain, we estimated it would likely take us three hours to go up and around the trail. Amateurs! Ha! If we only knew, would we have started at all?
We did not plan nor pack a lunch for our hike. Armed with water bottles and a small bag of peanuts, we hit the trail confident that we would complete the journey as planned. My husband, who moves like a gazelle on the slopes, thoroughly enjoyed his day. I, on the other hand, have a severe fear of heights. The literature describing this hike identified the hike as “easy – with a few moderately difficult sections”. Hmmm, while there were some manageable sections, there were times we had to follow the “Alpine Trail”, with very narrow dirt paths, more switchbacks than Italy, and protruding boulders that made the path extremely narrow. Thank goodness for my husband and his patience and humour that kept me going step after step! I won’t lie; we did have moments when we wondered if we would ever find our way back.
Thank goodness for Google Maps and faith that the Sunnegga station would come into view eventually. As we got closer to the station, in quite a challenging section of the trail, we came across an elderly (80+ years old) gentleman and his daughter sitting on a lookout bench. The only way these two arrived at the lookout was to climb. How he managed it, I will never know. But I was so thankful to see him there. I knew then that I, too, would make it back! Our reward on arriving at Sunnegga (aside from the fantastic pictures we took along the way) was a fabulous bowl of pasta for lunch. Add in two Gaterades and two coffees, and it only cost us the equivalent of over $100 Canadian. Nothing in Switzerland is cheap! Quite frankly, I was starved and so relieved to be back that I didn’t care what it cost then!

For those interested in my design process, I turned to Paper Rose Studio’s Artsy Print collection for the layout’s background. This paper collection is stunning! I chose the title Off on a Wander from Peartree Cutfiles. It was a phrase that assisted me in poking a little fun at our lengthy hike!

After cutting the title in white cardstock, I created another in black cardstock, offsetting it slightly to help it stand out on the page. The letters in the title were ink blended with two shades of ink from Papertrey Ink (Tropical Teal and Hawaiian Shores). I was looking for a very bold title effect on this layout and chose to outline each letter with white and black twine to achieve this effect.
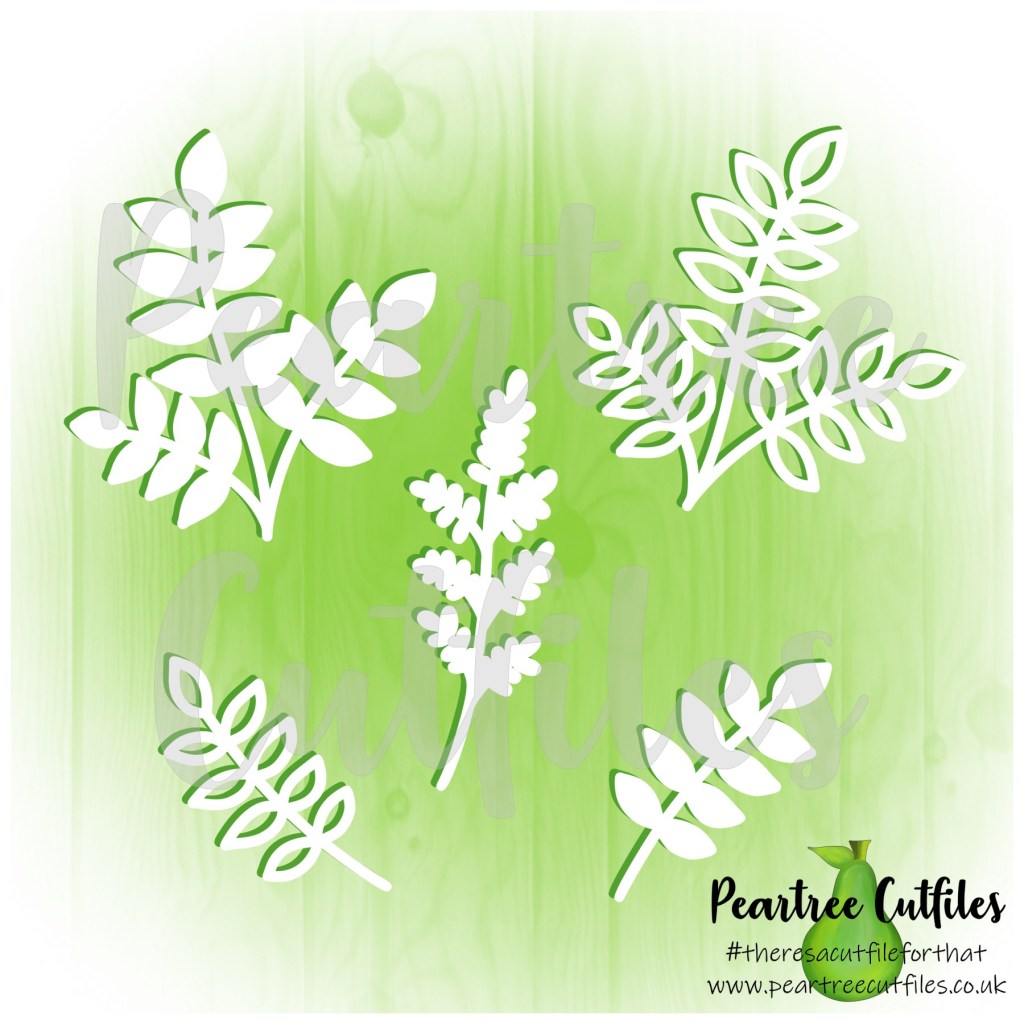
I triple-matted my photo to coordinate the colours in the image and the background paper. I utilized another cut file from Peartree Cutfiles, entitled Leaves Buildable 2. Two of the leaves in this cut file became the black anchor for the cluster of colourful leaves on the bottom left-hand side of the design.

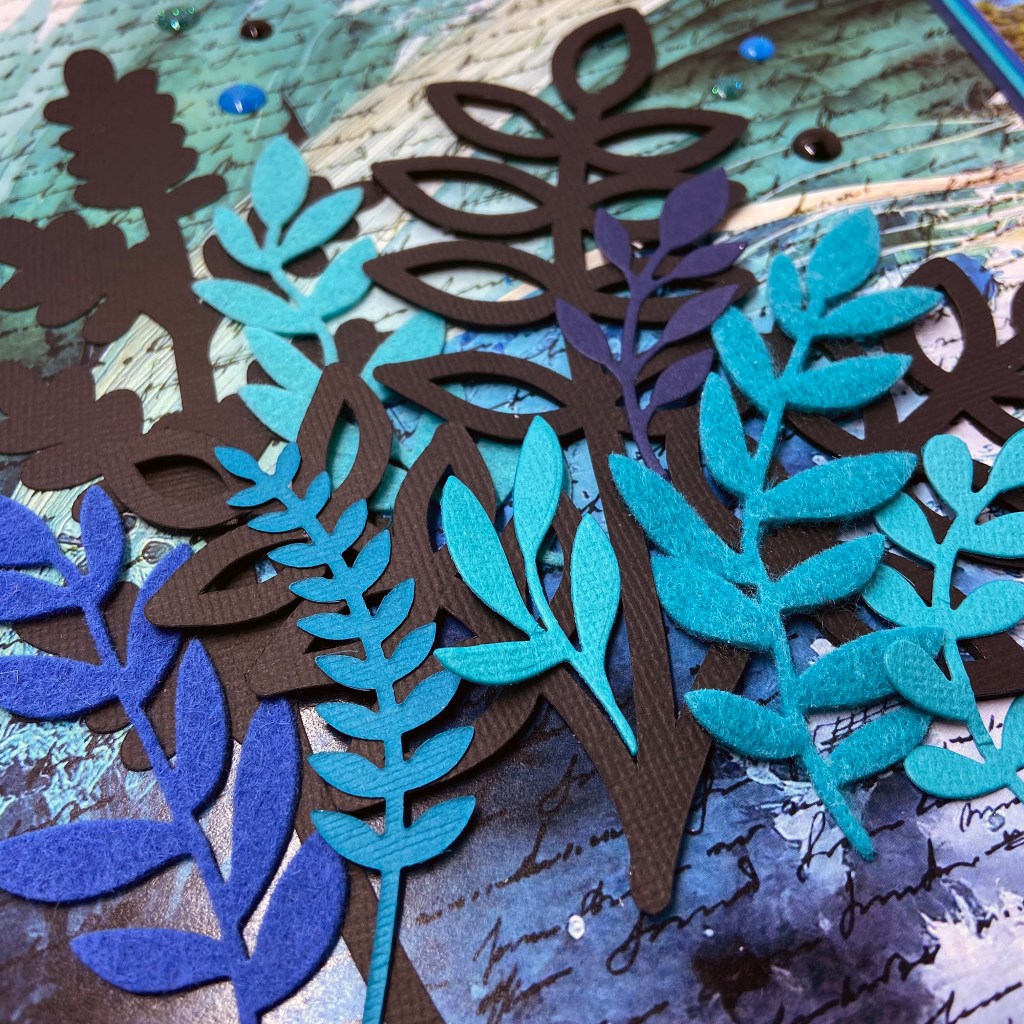
I die-cut additional leaves using Die-Namics from My Favorite Things (Grand Greenery and Grande Greenery). I cut three leaves from felt to add visual texture and interest and die-cut the remaining leaves from coloured cardstock. Once the leaves were all cut and ready to assemble, I backed one of the larger black leaves with black foam from Scrapbook Adhesives. The leaves were then layered and adhered to the background paper.

I added some paint splatters using a Tim Holtz stencil entitled Splatters using Mermaid Lagoon and Peacock Feather Distress Inks. For the final touches, I included the Day Trip ephemera from 49 and Market’s Everywhere Laser Cut Elements and the enamel dots from a mixture of Carta Bella, Your Next Stamp Gumdrops and Doodlebug Designs Winter Assortment Sprinkles.
And that’s a wrap on how I’ve memorialized this epic vacation adventure! I have no regrets about taking on this challenging and fulfilling hike. I will be forever grateful for my husband’s patience, perseverance and love that helped me overcome my fears that day. Would I do it again? Not likely! My mountain climbing days are over until the next great adventure presents itself!
I wish you all the very best this Valentine’s and thank you for stopping by to read about our travel shenanigans. Until next time, stay safe, stay well, and Happy Scrapping!