Sweet Moments

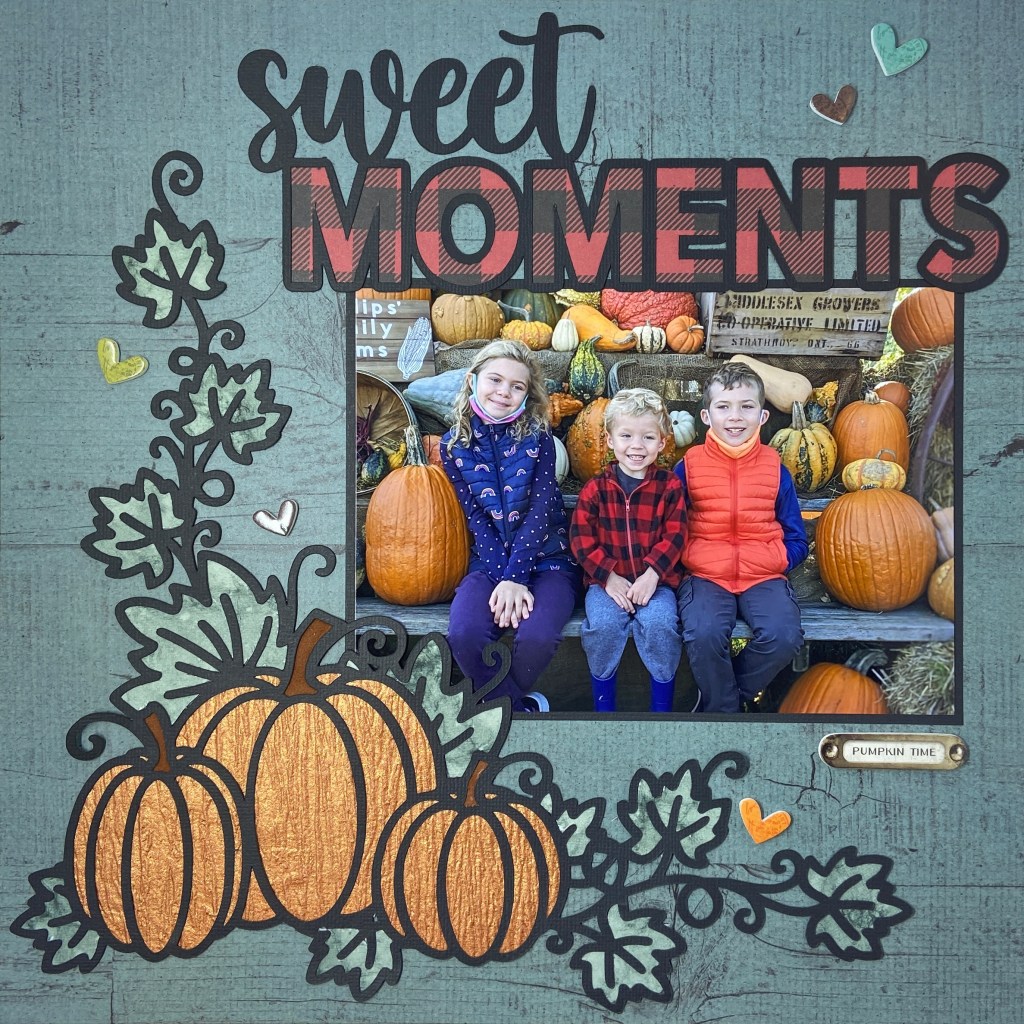
How can it be December already? I’m not quite ready to jump on the Christmas bandwagon just yet. So today, I’m sharing another Fall layout using some of my October Peartree Pearscription files. It was a family tradition to take our children to the Pumpkin Lady each year to pick out the best pumpkin we could find. I’m so thrilled that my daughter carries on this tradition with her family. I love everything about this photo she captured from this year’s trip to the pumpkin patch. I wonder what my grandchildren’s children will say when they see their parents with face masks. We can only hope and pray that this pandemic will be a story from their past.

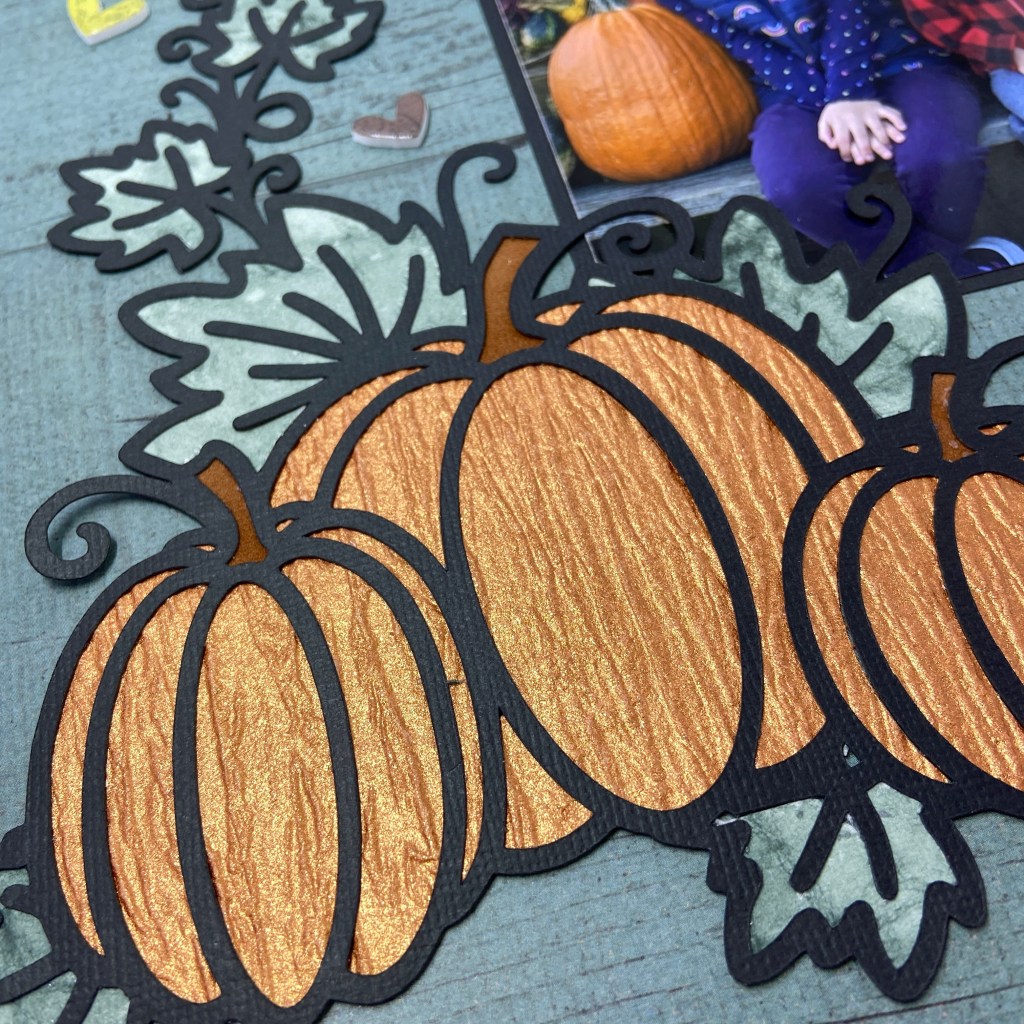
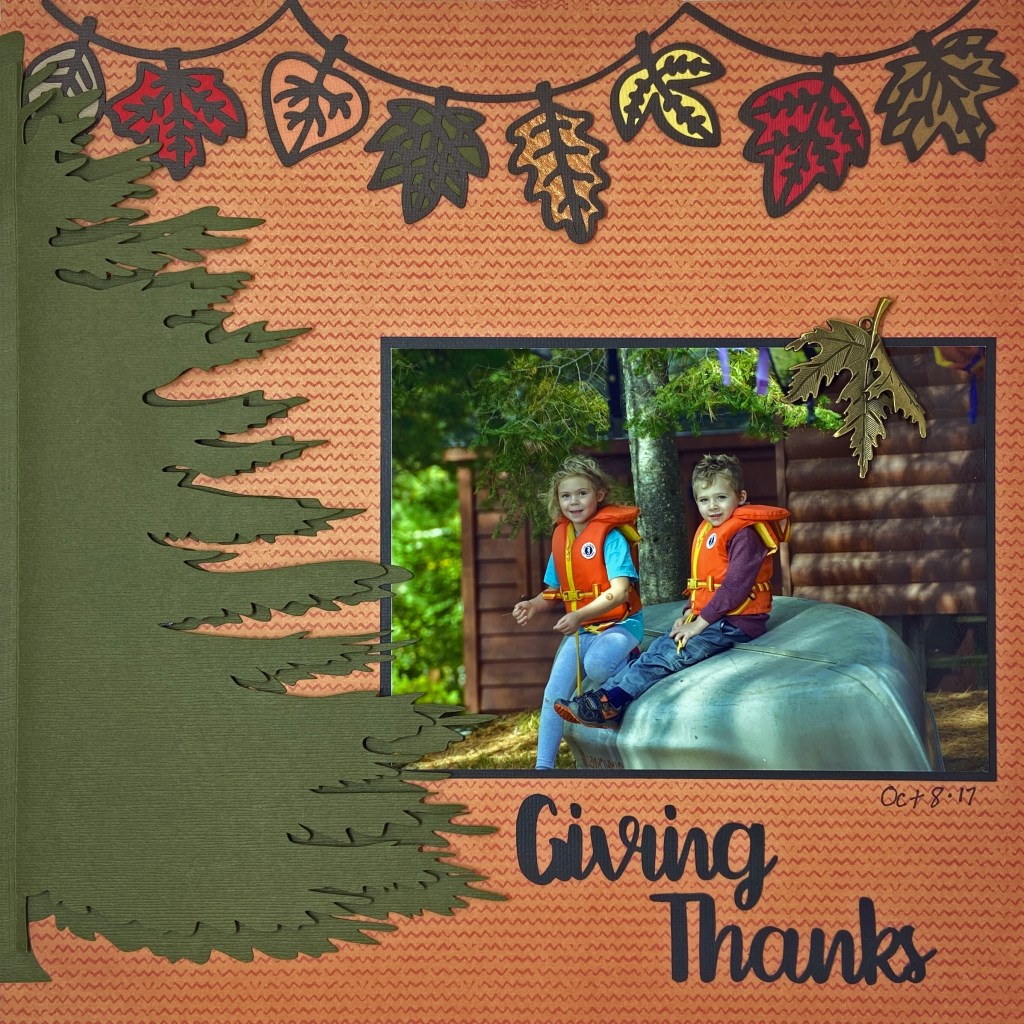
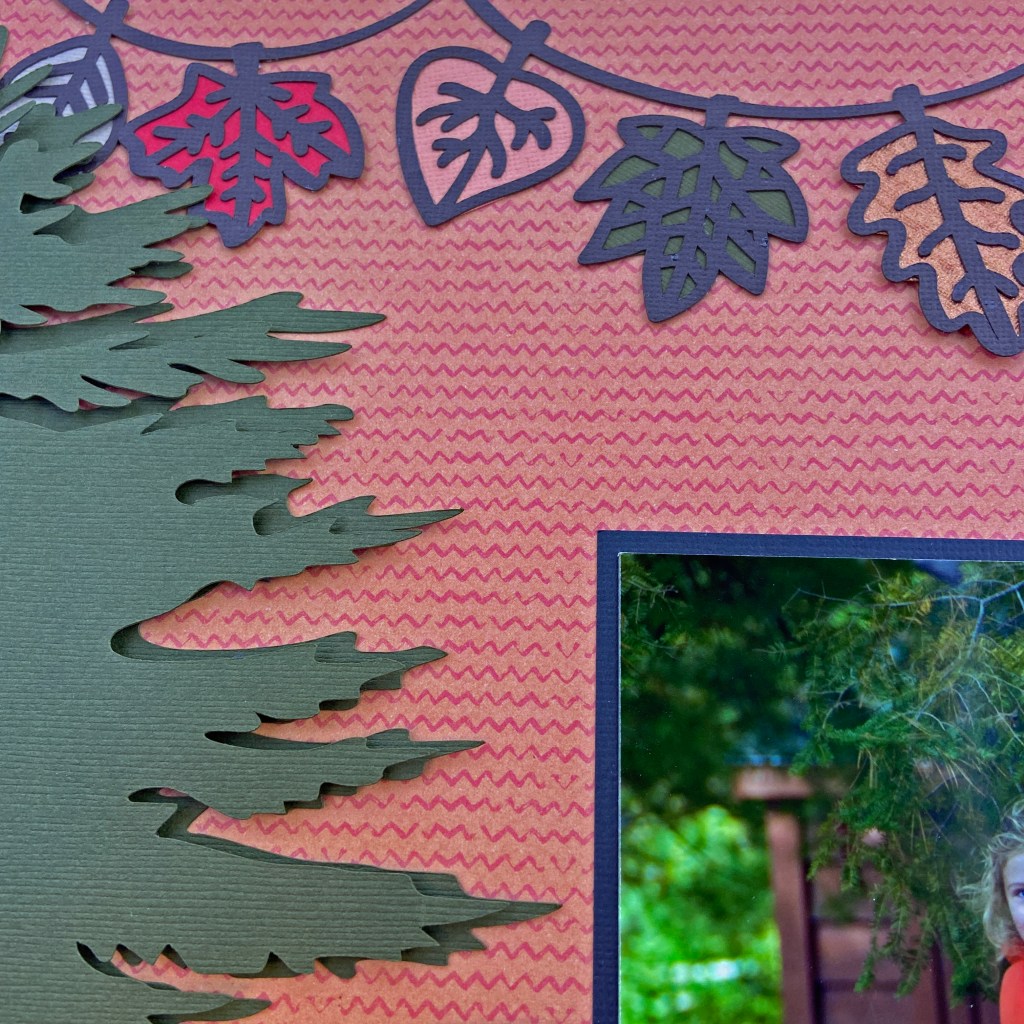
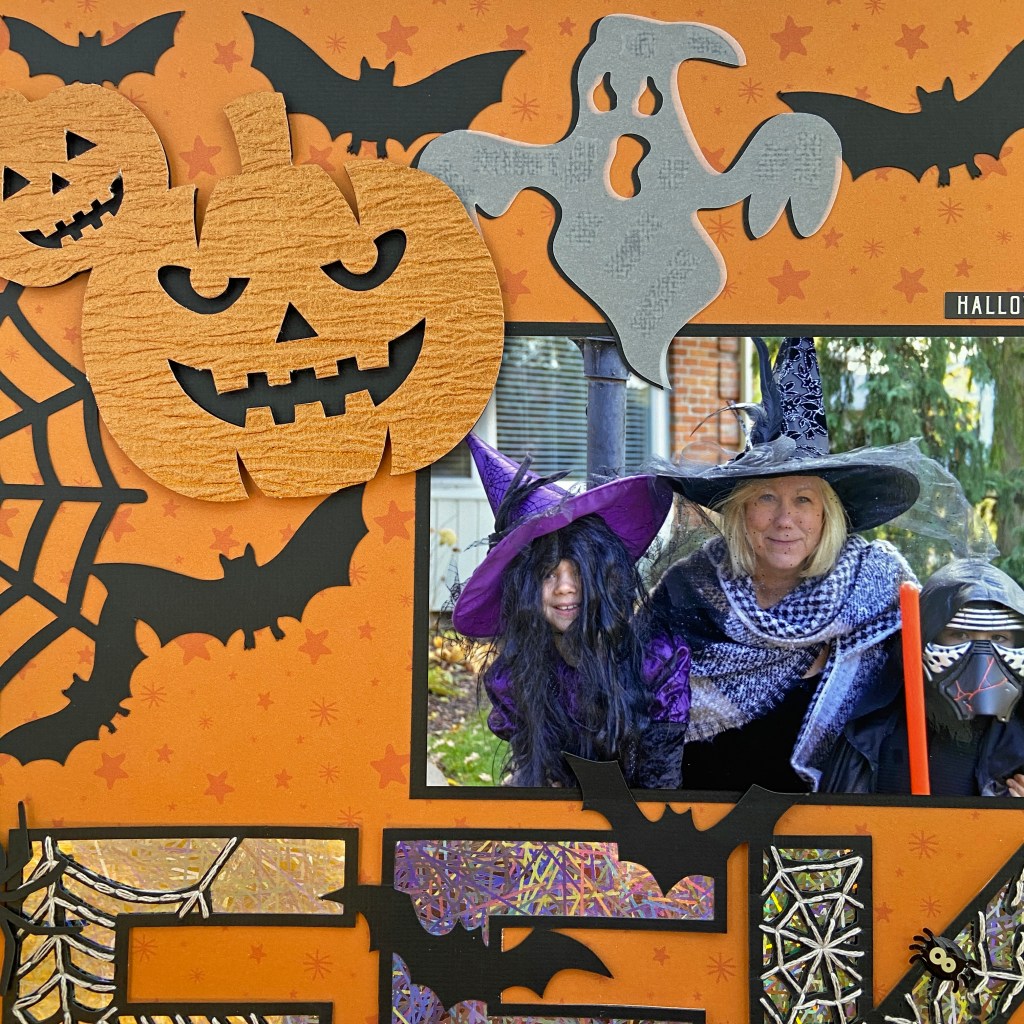
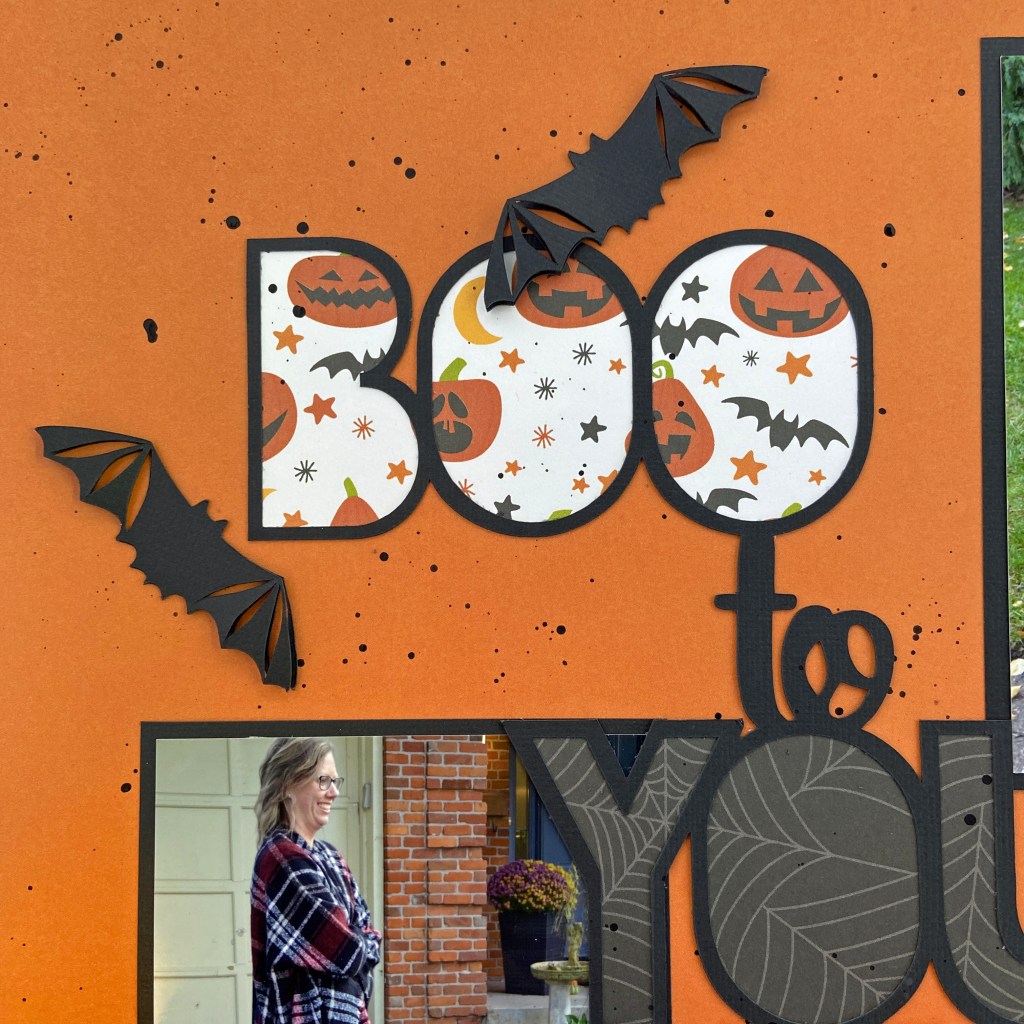
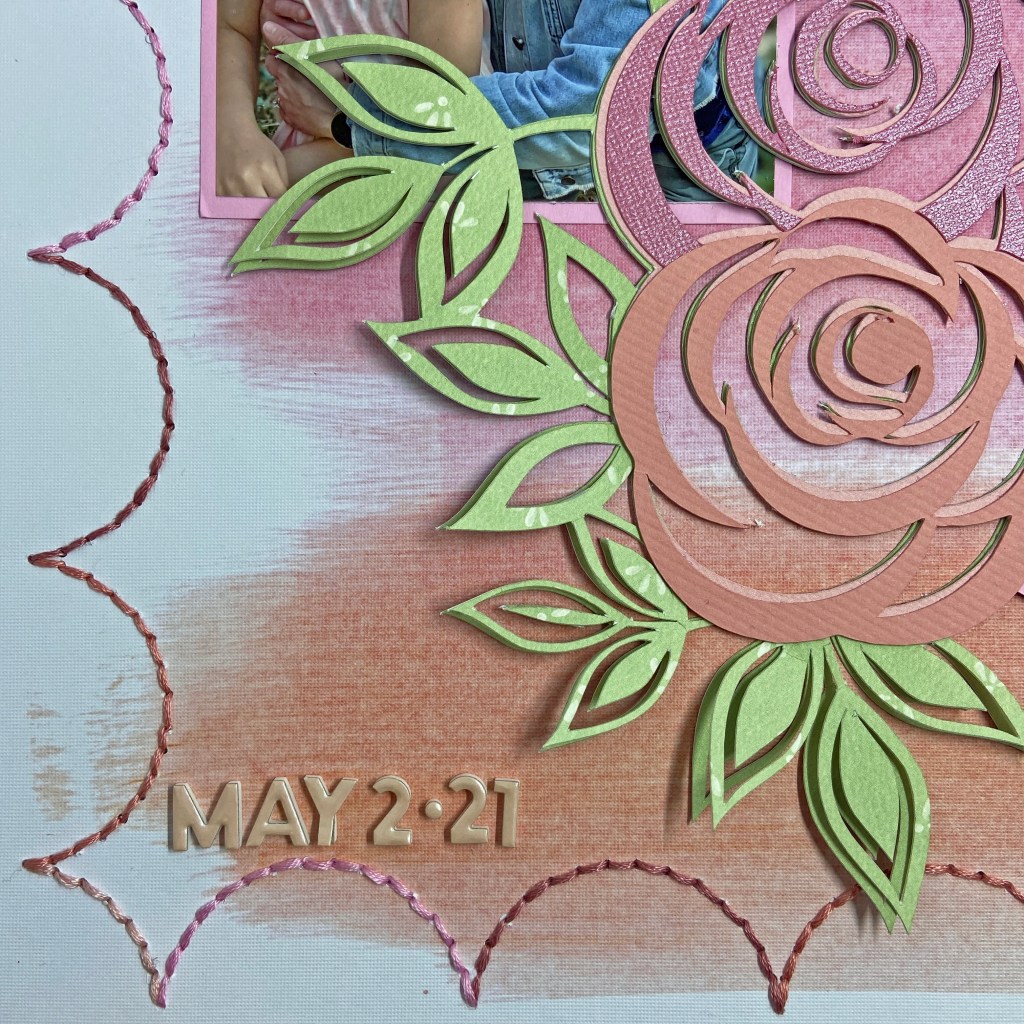
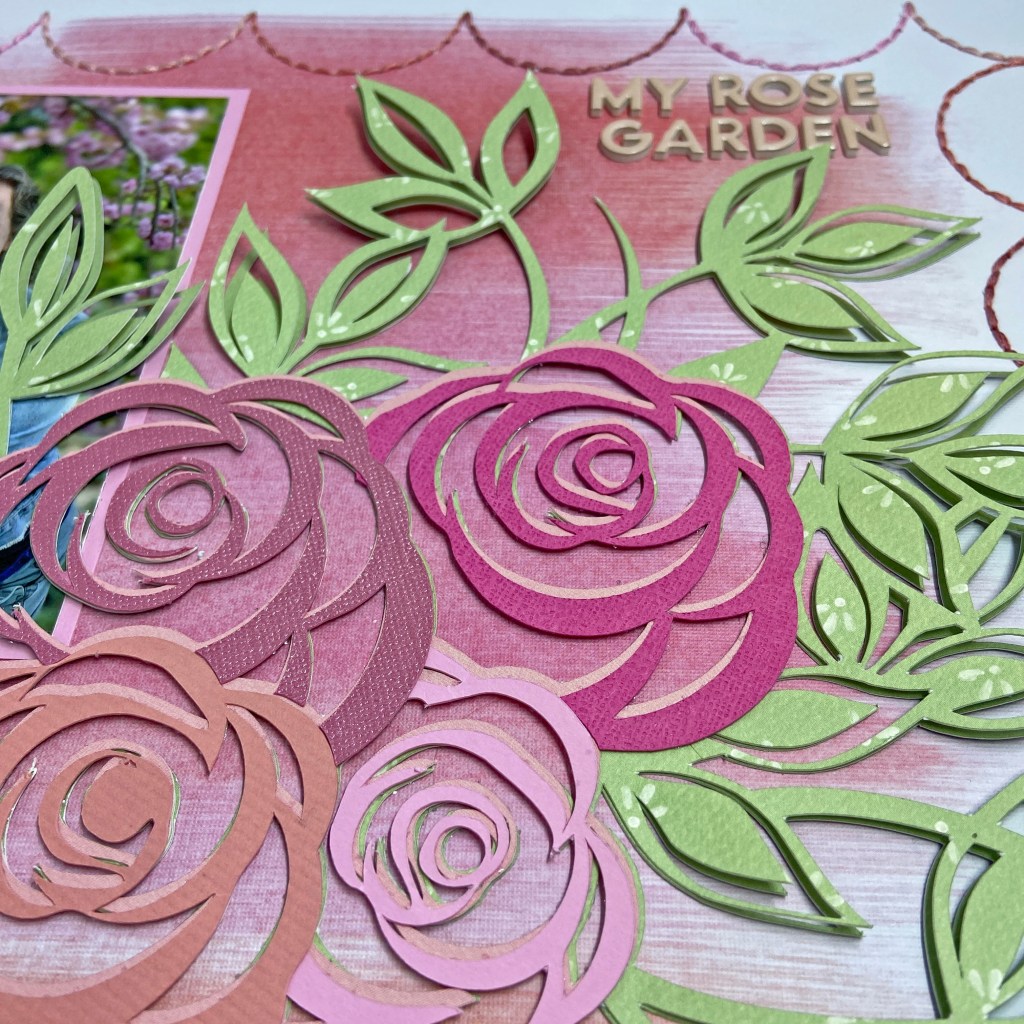
The stunning Pumkin Corner from the October Pearscription was a foundation piece for this layout. I dug into my stash of textured papers to create the warm Fall feeling for this cut file. The pumpkins were backed with a heavily textured burnt orange cardstock and the leaves were backed with a suede style paper with a green tye-dyed effect.

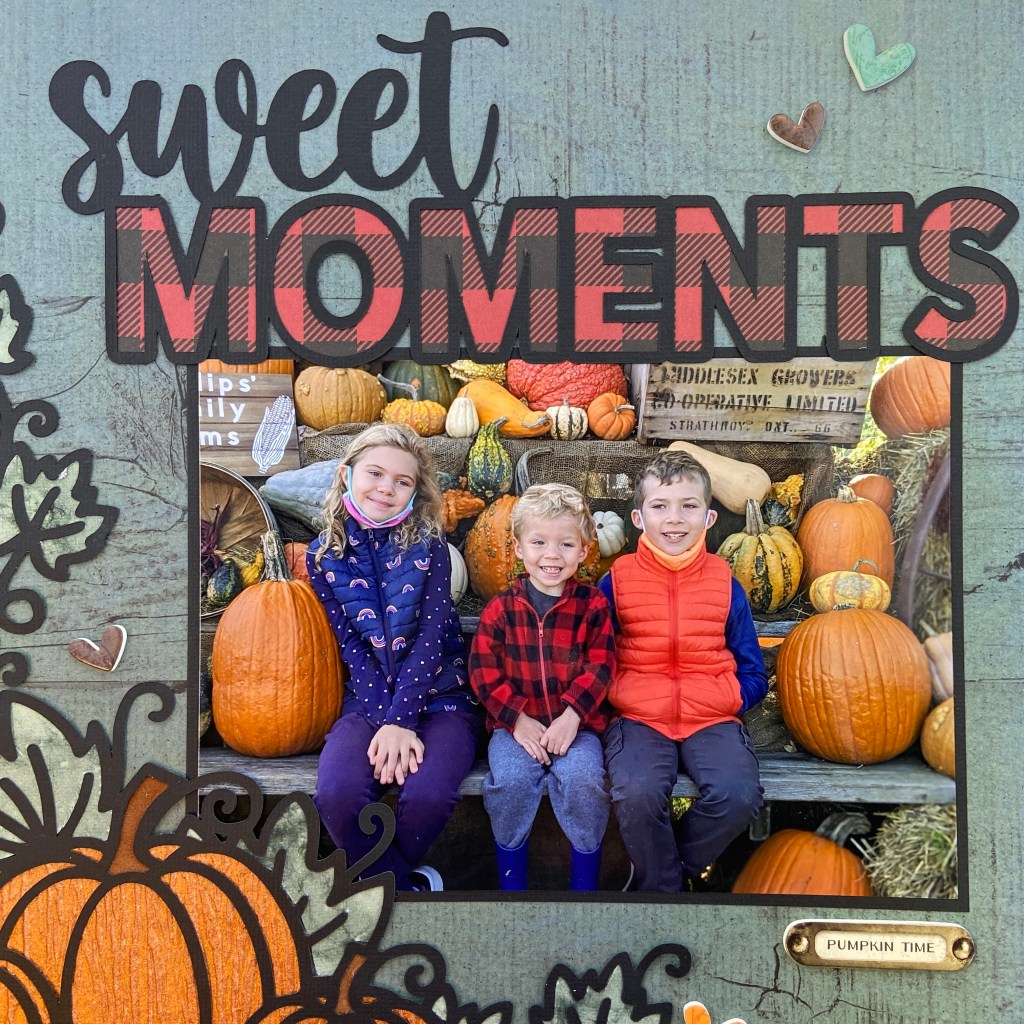
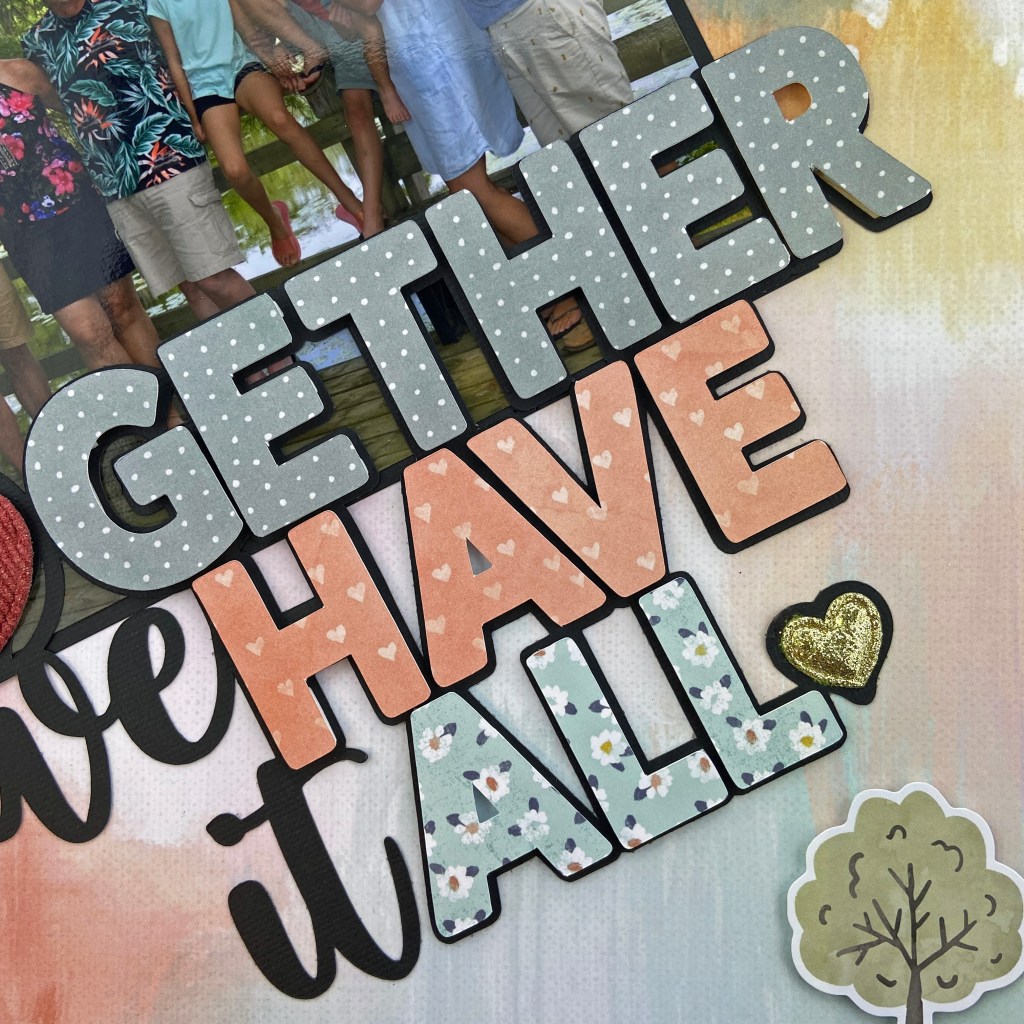
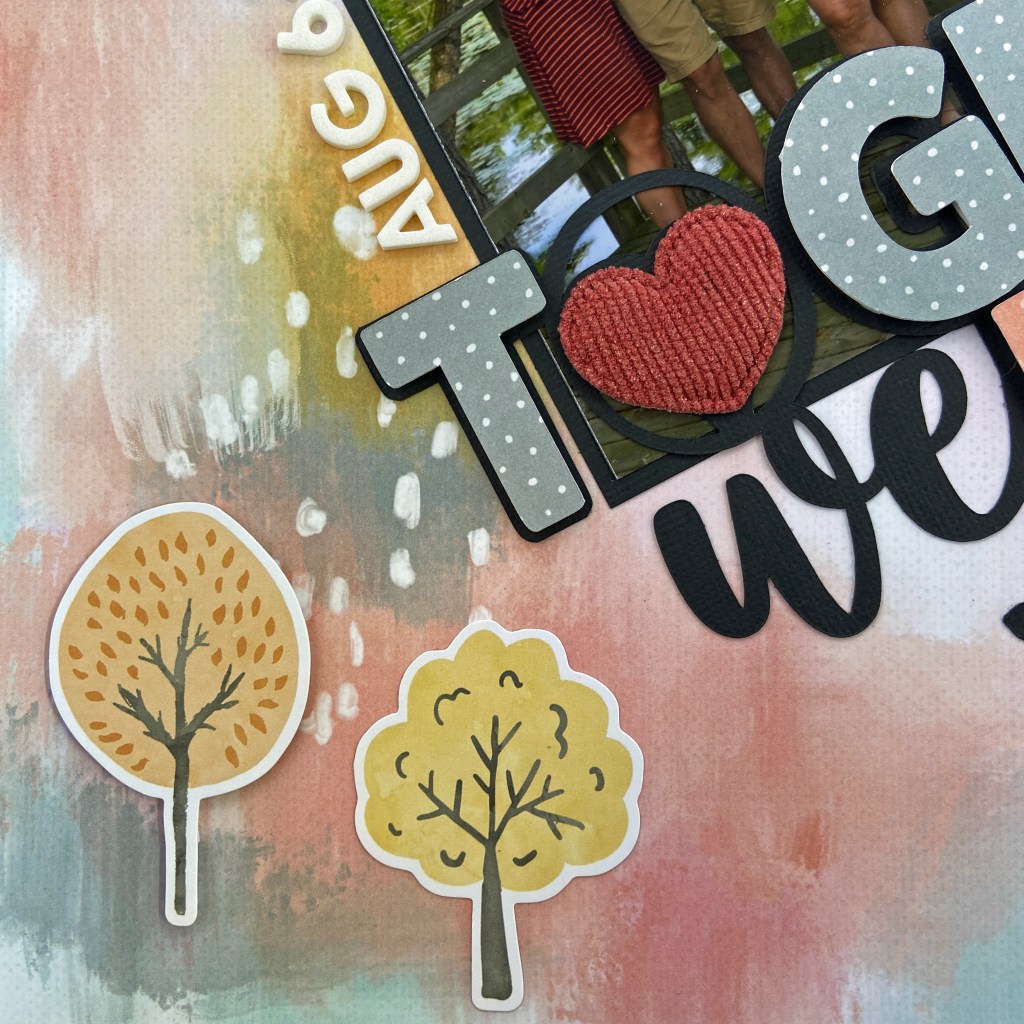
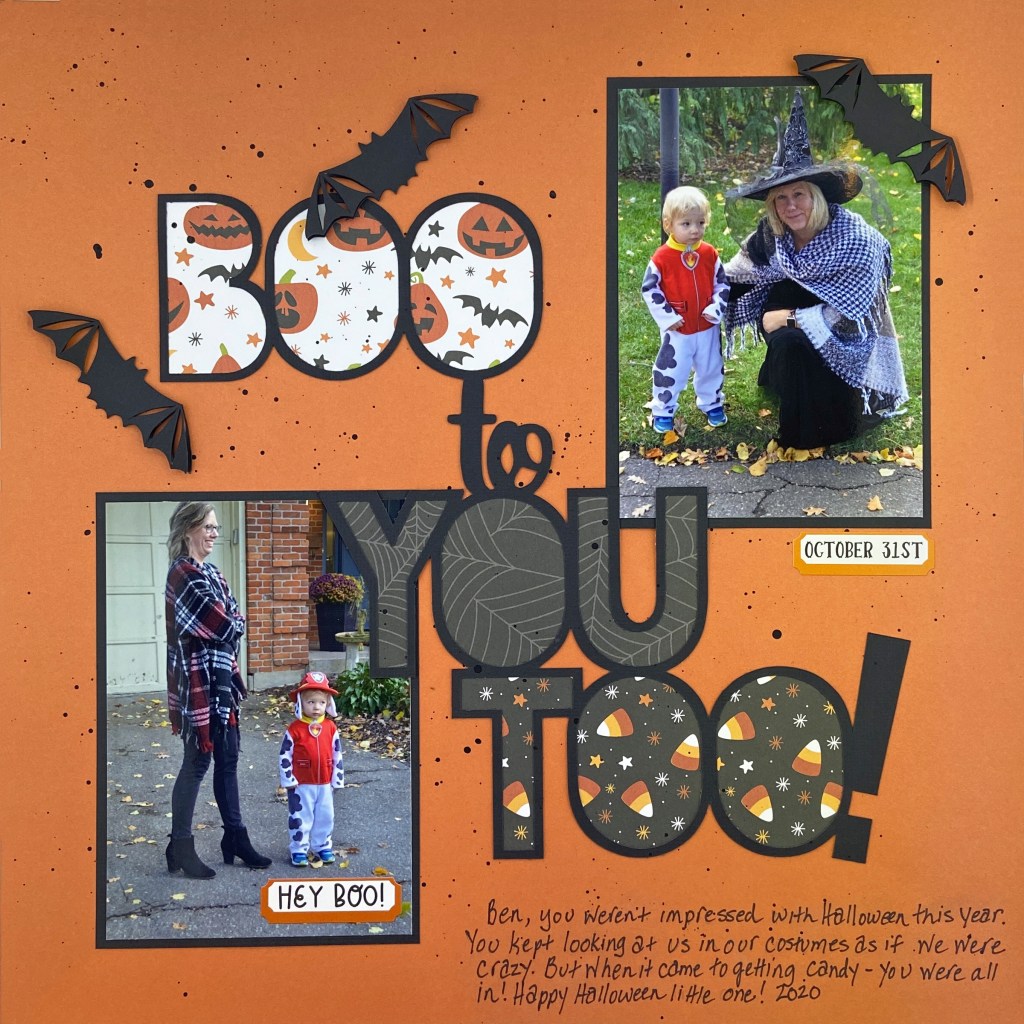
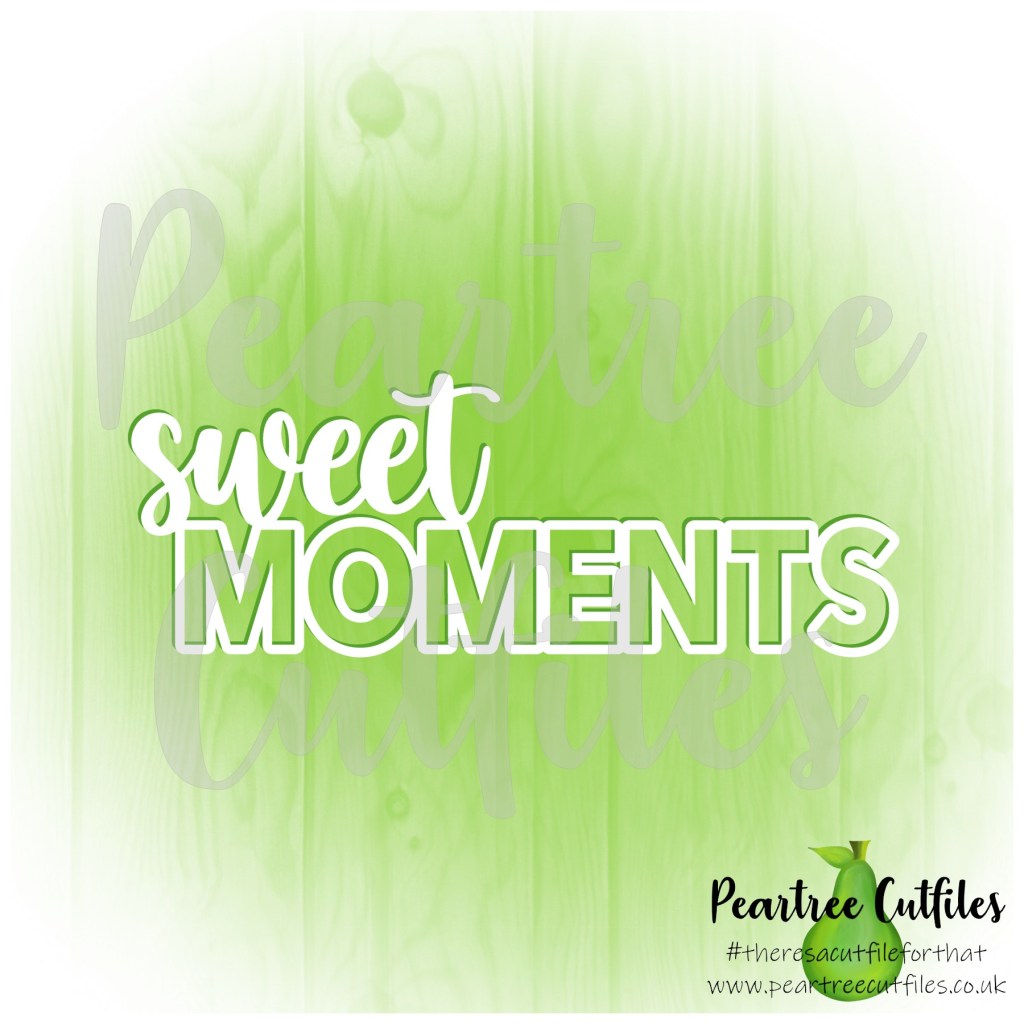
The title for this layout, Sweet Moments, was the free cut file offered by Peartree Cutfiles in October (purchase 5 cut files, receive one free). It’s highly versatile and could be used on so many different layouts. I highly recommend taking advantage of the monthly freebie from Peartree. When you sign up for the monthly Pearscription, it is included automatically with your purchase. A pretty “sweet” deal! I chose to back the title with a buffalo plaid patterned paper that coordinated with my youngest grandson’s jacket.

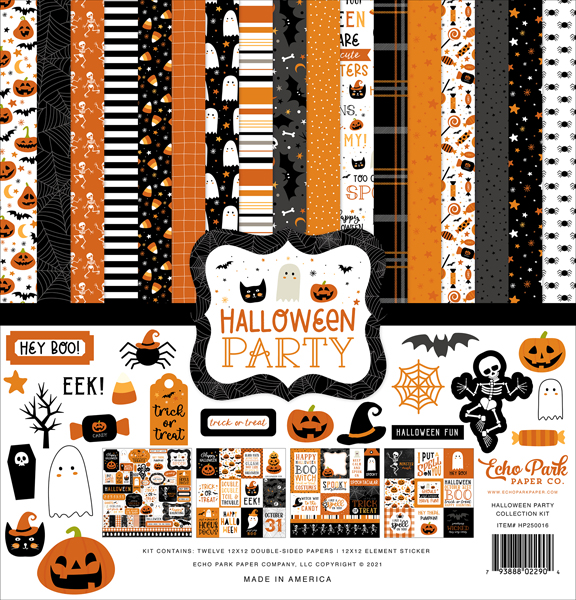
The large picture and cut files were placed on patterned paper from Simple Stories from their Simple Vintage Country Harvest collection pack. The specific paper is Item #16309, called Give Thanks. I chose this paper for its rustic feel and the way it offsets the picture.

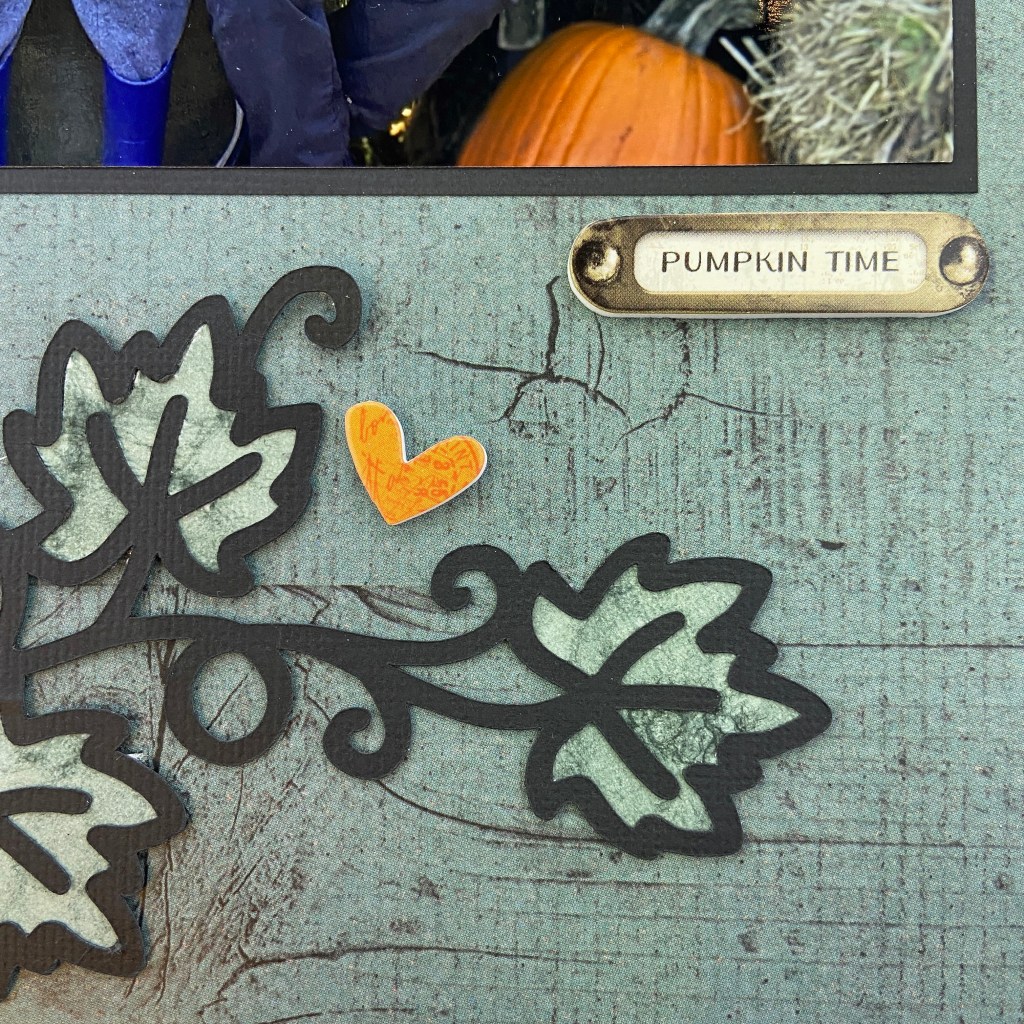
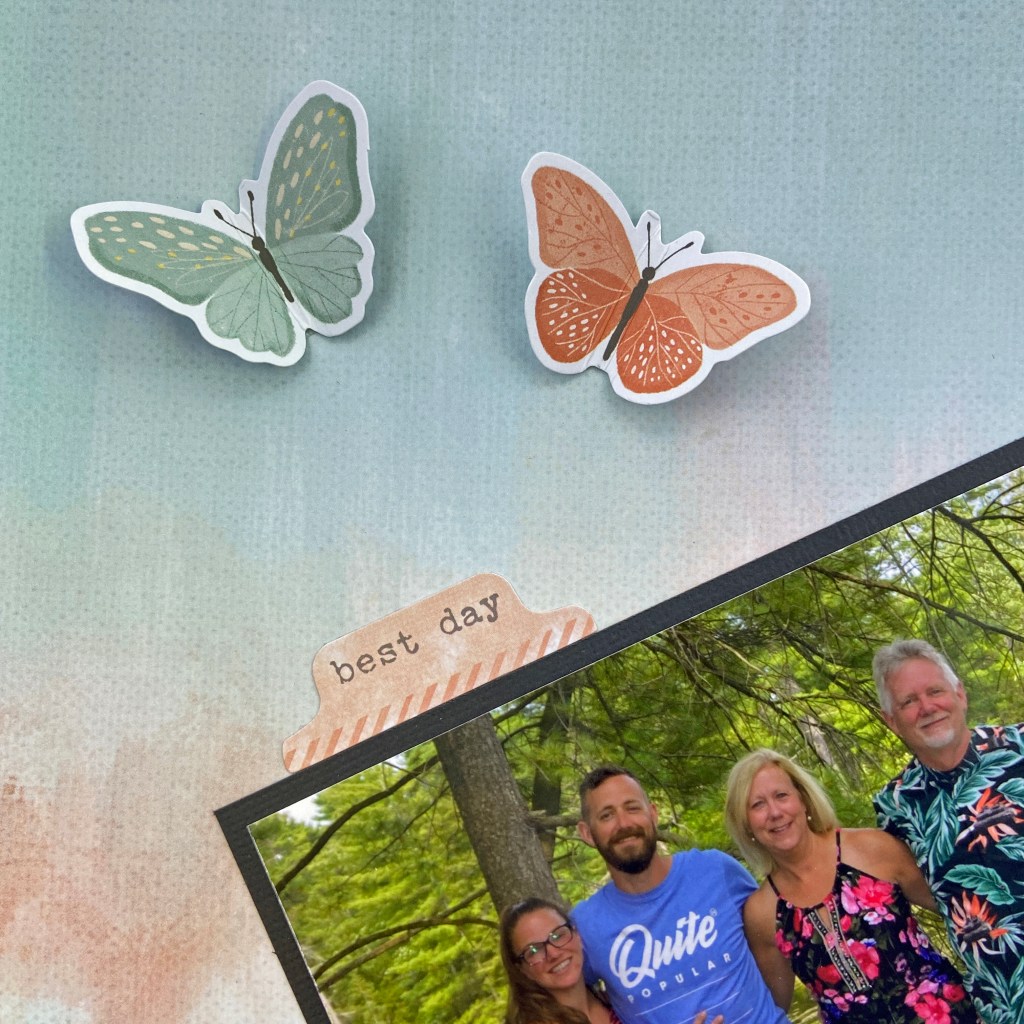
Just a few embellishments were added to complete the layout. I selected the Pumpkin Time phrase and several hearts in different sizes and coordinating colours from the Foam Stickers that belong to this Simple Stories collection to complement the picture and cut files.

Overall, this was a fairly easy layout to assemble and I am thrilled with the result. Perhaps next year my grandchildren will be able to visit the Pumpkin Lady without wearing a face mask!

Thanks for checking in, and until next time, stay safe, stay well and Happy Scrapping!

Together We Have It All

This.

Like all mothers out there, I am proud of my family and all their accomplishments. What I admire most is their ability to be positive and focused, regardless of what life presents. Core to our relationship is an understanding that one of the most important aspects is our strong connection. We are here for each other through thick and thin, for better for worse. Our strong relationship makes us rich in so many ways. This foundation is what matters most to us. When life throws us a monkey wrench, we carry on together.

This summer, I felt like one of the luckiest women in the world. After many months of separation due to COVID, my family reunited in August! Sean and Tanis travelled from Edmonton to join us at the cottage. It has been six long years since Sean had the opportunity to spend time there, and the first time Tanis was able to travel east during the summer. Honestly, having everyone together at our happy place was a dream come true!

As I began designing a layout concept to document this event, I came up with the title but was unable to source it out. I turned to Marie Hurst, owner of Peartree Cutfiles, and asked for her help. Not only did she agree to design the cut file Together we Have it All, but she also exceeded all my expectations! I’m simply in love with the result! Thank you, Marie, I’m so deeply grateful!

I utilized two Cocoa Vanilla Studio collections in this layout, Daydream and These Days. I love how the collections work well together and allow for the mixing and matching of embellishments. All papers in this layout came from the Daydream collection. The background paper is Sweet Serenity, and those used in the title are Garden Variety (backside), All Aflutter and Daisy Days, respectfully. To create the completed title, I offset the letters slightly and then adhered them on top of the base title using Taylored Expressions Foam Sticky Strips. I filled the two cut out hearts with puffy hearts from both the Daydream and These Days collections. They were a perfect fit and complement to finish off the title.

A selection of embellishments from the These Days Die Cut Ephemera package completed the layout. To create the dimension on the butterflies, I placed score lines on either side of the butterfly’s bodies and then gently folded the wings up. Scor-Tape was then applied in the thin centre channel to adhere the butterflies to the page.

The best thing we have in life is to hold on to one another. No matter where we go, what life throws our way, together, we truly have it all. Thank you, Marie, for helping me document a very special time this summer!

Until next time, stay safe, stay well and Happy Scrapping!

Giving Thanks

Fall is such a gorgeous season! It’s so refreshing to feel the temperature cool down and inspiring to see the leaves changing colour. There’s nothing better than spending time at the cottage during this season. It is a quiet time to relax and take in the beauty of our surroundings. We celebrate Thanksgiving at the cottage each year. It is the weekend we close for the season and say goodbye until the spring. We reflect on a great year of new memories and give thanks for such a wonderful summer getaway.

The Fall Words cut file from Marcy Milly SVG was the perfect compliment to the photo of my grandchildren on a beautiful fall day. This cut file is very versatile, providing multiple words for multiple layout options. I chose Cocoa Vanilla’s Legendary collection for the base page of this layout. The specific paper is called One Way. The large fir tree caught my attention immediately. I knew the tree would be one of the focal points on the layout. To provide some depth and texture, I layered the tree. First, I flipped the cut file horizontally to provide the proper placement on the left-hand side of the layout. Next, I enlarged the cut file to approximately 11″ in height and cut it from Bazzill Cardstock called Capers. I then resized the tree slightly smaller (3/4″) and cut it again. I made a 1/4″ score line along the straight edge of the smaller tree and used a 1/8″ Scor-Tape to adhere the two trees together. Before adding fun foam and pop dots between the trees for dimension, I adhered the tree to the layout first. I’m very happy with the overall effect this created, giving the feel of a real fir tree.

To help fill the blank space at the top of the layout, I used Paige Evan’s Leaf Banner. It can be purchased from the Silhouette Studio Store and is Design ID #383307. Brown cardstock was used to cut the file and I backed it with several coordinating fall colours of cardstock. The stunning brass folded leaf charm was a recent find at a Local Scrapbooking Store, The Scrapbook Shop in Listowel, ON. This was my first trip to this store, and my first visit to a Local Scrapbooking Store since COVID began. I will be back, it is a gem!

The layout was completed by adding the title using the Giving Thanks words from the Marcy Milly SVG cut file. It was so appropriate, as this picture was taken on Thanksgiving Weekend, 2017!

Thanks for popping in, and until next time, stay safe, stay well, and Happy Scrapping!

EEK

I hope you all had a wonderful, safe and fun Halloween yesterday. I love dressing up as a witch and handing out candy to all the excited children. Today’s post focuses on another picture from last year’s celebrations. With Covid restrictions and a ban on trick-or-treating, we celebrated in our driveway. Thank goodness for good weather!

I utilized Echo Park’s Halloween Party collection kit once again. The background for this layout is the backside of patterned paper HP250004 entitled Something Wicked. It is such a fun collection of papers and stickers. I’m sure I’ll be using it for many layouts.

The title for the layout, EEK, is a Silhouette Design Store cut file by Jillibean Soup (Design ID #386850). I resized the file to make it a bit bigger and cut it out of black cardstock. I love creating layers, textures, and stitching on my layouts. The spider webs in the cut file provided the perfect backdrop for adding in some soft stitching. The first step was to pierce holes in the spider webs found in the letters E and K. The spider webs were stitched using three strands of light silver DMC floss (#762). To enhance the spooky feel of the layout, the title was backfilled using Lawn Fawn’s Metallic Cardstock in Holographic 2.0. Ranger’s Glossy Accents was used to adhere the stitched cut file to the holographic background.

The large cut file at the top of the layout is entitled Halloween Corner by StudioIlustrado. It is also in the Silhouette Design Store (Design ID #65854). It was cut from black cardstock and the pumpkin eyes, noses, and mouths were kept to create a shadow effect. I choose to highlight the pumpkins and the ghost, leaving the bats flat on the page. This created continuity in the layout as the bats in both cut files appear to merge into one big cut file, encircling the photo. I used the knife tool in the Silhouette Studio software to isolate the ghost and pumpkins. This allowed me to cut the specific part of the cut file I desired, rather than having to waste paper by cutting out the entire cut file in another medium. The ghost was cut from vellum and adhered slightly offset with vellum tape. The pumpkins were cut from heavy orange textured cardstock and adhered with 3D foam squares by Scrapbook Adhesives.

A few simple elements were added to complete the layout. Two spooky spiders from Doodlebug Designs shape sprinkles were placed in the upper left and lower right spider webs. The small black and white sticker entitled Halloween Fun was placed above the picture on the right-hand side. The sticker was included in the Halloween Party collection pack.

Thanks for stopping in and until next time, stay safe, stay well, and Happy Scrapping!

Boo to You Too!

With Halloween just around the corner, it’s time to get your Boo on! Last Halloween, Benjamin was only two, and he wasn’t much impressed with Halloween – until the candy came out! We did our best to coax a smile out of this sweet boy, but he wasn’t having any of it. He was the saddest Marshall from Paw Patrol you ever did see. Whether happy or sad, it’s still important to document these moments in our lives. I know Ben will find this moment amusing when he’s a bit older.

The Boo to You Too! cut file from Marcy Milly SVG was an excellent fit for documenting this story. 

Echo Park’s Halloween Party patterned paper collection and stickers provided the foundation for this layout. The background page is the orange/black sheet, and three patterned papers – Gleaming Gourds, October 31st, and Candy Corn Craze, were used to back-fill the words in the title cut file. Once the title was complete, it was centred and adhered to the orange background. Some space was left free to slide the pictures underneath. Before securing the pictures, the entire page was sprinkled with black Liquidex Heavy Body Acrylic paint. The small black paint splotches help fill in some of the empty spaces and enhance the Halloween mood.

I love the bat in this cut file and like how there are cut-outs in the wings to give it the effect of flying. To emphasize this on the layout, I cut the bat six times. The next step was to create three bats from the six cut files. To create this look, adhere two of the bats together with a strong, permanent adhesive at the centre of the body only. Be careful to leave the wings free of glue. To produce the illusion of flapping wings, place small black 3D foam squares by Scrapbook Adhesives between the wings of each bat.

To complete the layout, I added a couple of stickers from the coordinating sticker sheet found in the patterned paper collection. The final touch was to add personalized journaling in the bottom right-hand corner.

Ben’s all ready for Halloween this year and looking forward to being a penguin! I’m hopeful I’ll manage some pictures with him smiling in his costume this year. But if not, you can be sure, I’ll be scrapbooking it anyways! I hope you have a safe and fun Halloween with those you love.

Until next time, stay safe, stay well, and Happy Scrapping!

The Girls!

With summer just around the corner, it’s time to share a highlight from summer 2020. We’ve just come out of a very long lockdown and I can’t wait to make some fun memories this summer with my family and friends! This photo is one of my favourites from last summer as it captures 3 generations. We get so busy having fun together that we often forget to pause for a minute to take some pictures. This picture includes me, my daughter and granddaughter on a beautiful summer day at the cottage – our favourite place to be in the warm weather! I’m so thrilled that Marcy Milly SVG designed thegirls! cut file. It was exactly what I was looking for! This title lends itself to so many possibilities – sisters, reunions, weddings, sororities, girls night out, and many more – so many options!

I decided to use the Vicki Boutin Color Study paper, ephemera, and stickers for this layout. The bright bold colours remind me of beautiful summer days. I cut the title in Fushia cardstock and then offset the title 2 separate times to layer it in coordinating (orange and teal) cardstock. This also helps draw more attention to the title cut file. Once my picture was printed and matted I added fun foam to the back of the cut file to pop it up further and to create some dimension on the layout.

The rest of the layout came together quite quickly. Several embellishments came from the Vicki Boutin Color Study Journal Ephemera and Icon Ephemera packages. I also utilized a sticker (This is the Stuff That Matters) and the gold foil dots came from the 6 x 12 Sticker sheets that belong to the same collection. The date was added using teal glitter foam letter stickers from Thickers called Sunny.

As we start to see daylight in this pandemic, I hope the summer of 2021 is one of love and laughter for you. I can’t wait to hug so many important people in my life!! And don’t forget to grab pictures of your reunions and events that bring us back together. This is going to be a summer to celebrate!

Until next time, stay safe, stay well, and Happy Scrapping!

Everyday Moments

Even though we’ve been living through a pandemic for well over fifteen months now, it’s still easy to find joy in everyday moments. My daughter is so good at sending me random pictures of our grandchildren, and she knows every picture brings a huge smile to my face. Back in May 2019, she sent me this picture of herself and her youngest, Ben. I was overjoyed to see her beautiful face in this photo. Her two oldest children were in online school at the time, and nothing special was going on. It was just a perfect moment to capture Mom and baby in a photo for prosperity. This picture just fills me with love and joy!

I used Carta Bella’s Flora No 3 collection pack for all of the patterned papers in this layout. I love the soft feel of this paper line and it coordinated beautifully with the shirts Ben and Lindsay were wearing. The background paper is the reverse side of Elegant Stems patterned paper. The layout frame and matching cutouts for the title and floral cluster came from the Elegant Large Floral patterned paper. The photo was matted using the backside of two coordinating patterned papers from the collection called Elegant Small Floral and Elegant Journaling Cards.

I chose two cut files from Peartree Cutfiles for this layout. The title cut file Everyday Moments was cut from white cardstock first. It’s such a versatile cut file and was one of the free weekly cut files from the Peartree Cutfiles Facebook Group. Usually, I offset the cutout letters and back fill the title, but for this layout, I decided to keep them the same size as the original title. First, they were cut from coordinating patterned paper and then they were backed with Taylored Expressions Foam Sticky Strips to provide the texture and dimension.

I altered the second cut file called Floral Bunny Ears to suit my needs for this layout. By using the knife tool in Silhouette Studio Design Software, I was able to separate the bunny ears from the gorgeous floral cluster. This technique is also a great way to stretch some of your cut files. Once the floral cluster was sized properly, it was also cut from white cardstock. I used the Silhouette Studio software and the Fill Pattern function to plan out which coordinating patterned papers would be cut to back the cut file. I use this function often when backing an intricate cut file.

The final touches on the floral cluster were adding a few acrylic dots from various collections. The date was added to the left of the photo using rose-coloured thickers from American Crafts, called Happy Life.

I’m so pleased with the delicate feel of this layout. It helped me preserve a very precious moment in time between Mother and Son. If you’ve hesitated scrapbooking day to day moments, jump in! Our scrapbooks should be filled with memories of everyday moments, good and bad, in addition to the highlights like birthdays and vacations. What will you work on next? Until next time, stay safe, stay well, and Happy Scrapping!

Even Super Heroes Need Naps

And now for something on the funny side! Our youngest grandson Ben is 2 & 1/2 and at that stage where he’s outgrowing naps. Most days he does just fine and gets recharged at dinner time. But some days he just can’t hold on and needs to have a little nap to get through the rest of his day. Easter Sunday was a busy and exciting day for him. So it was no wonder that this was one of those days he needed a little nap to refuel for the rest of the day. Around 4 pm, my daughter and son-in-law were busy in the kitchen making dinner when they noticed it was suddenly very quiet. My son-in-law went to check on Ben and found him in this position. Ben was so tired he appeared to have simply “fallen over” onto the couch! The poor little guy didn’t even get his legs up there to properly stretch out.

Virginia Walker, the creative mind behind Confessions of a Paper Addict (COAPA Cutfiles), had the perfect cut file for this page. The Even Super Heroes Need Naps was exactly the title I needed to tell this story, and the whimsical font was also reflective of the mood I was looking for.

I chose the Super Kid – Burst patterned paper by Scrapbook Customs for the background of this layout. The Spider-man sticker in the top left-hand corner comes from the Spider Superhero Sticker sheet from the same company. I was still looking for more whimsical effects on this page and found them in two cut files in the Silhouette Design Store. The BAM! (Design ID #329165) and POW! (Design ID #329148) cut files were both designed by Sarah Bailey. Once these designs were cut and assembled, they were placed on fun foam to give them a bit of punch and dimension.

The final touch was adding the string of zzz’s in the top half of the layout to place added emphasis on the fact that this little cutie was fast asleep. Completed knocked out, as they say! They were created using Silhouette Studio software.

I hope I’ve given you a giggle today! And if you need a nap, by all means, take one. Just be sure no one is around with a camera! Until next time, stay safe, stay well, and Happy Scrapping!

Family – Stitched Together by Love

We’ve always encouraged our children to follow their passion as they grew up. It’s so rewarding to see them do it, but so tough when that passion takes them far away from home! Our son Sean followed his passion into the military and has been posted in Edmonton for several years now. And how lucky for him, and us, that he was posted out west, because this is where he met his incredible fiance, Tanis!

Late last summer we traveled out to Alberta to visit with Sean and Tanis. It was our first opportunity to meet Tanis’ family and we had an incredible trip. We were so warmly welcomed by this family from the moment we arrived. From welcome flowers and cards to multiple gatherings, game nights and wonderful meals together, this family made us feel loved and special throughout our entire stay! We can’t thank them enough for making our visit so special from beginning to end. You know when you meet people and you just know you’re going to be good friends? It’s so rare and such a gift to treasure. And the very best part of this relationship was seeing first-hand how much this family loves our son and welcomes him into their lives. The picture in this layout was taken during our last get together on that trip, and it includes Tanis’ parents, Linda and Ted. I love how it represents both sets of parents as pillars in their lives. We all know how tough this life can be and how important it is to surround ourselves with people who love and support us.

A good part of this strong connection between us all is the things we have in common. Tanis’ Grandmother Donna, definitely has a soft spot for Sean, and so did my Mother! It was so tough losing my Mom several years ago, but how lucky for Sean to now have another Grandmother in his life that cares so deeply for him. One of the most striking similarities between these two Grandmothers is that they both are/were quilters. I can’t think of a better gift to receive than a homemade quilt. Each time you wrap it around you, it’s like getting a loving hug from the woman who dedicated hours, weeks and months to stitching the quilt just for you. It is the love of these women for their families, and their passion to quilt, that inspired me to create this page. My vision was to represent two families coming together by bringing two quilts together on one page.

The top quilt in this layout is a free cut file designed by the talented Paige Evans. It is called Patchwork and is found on the Scrapbook and Cards Today (SCT) website under Bonus Files – Spring 2021. SCT offers multiple free cut files with each new edition, so be sure to check them out! I cut this file from white cardstock and backed it with coordinating papers from Cocoa Vanilla Studio’s Happiness collection. The colours in this collection were a great fit for the colours in our family picture (and it was just luck that we coordinated so well that day!).

I also wanted another background that represented quilting and the Stitched Diamonds cut file from Confessions of a Paper Addict (COAPA) was just want I was looking for. I used 8 coordinating colours of DMC floss to stitch this foundation page (DMC #500, 502, 820, 825, 991, 992, 3844, 3846). As most of the bottom page would be covered by the top quilt, I only stitched the first 3 sections from the outside in.

Before securing the top quilt to the bottom foundation page, fun foam was adhered to the backside to provide further dimension and texture to the layout. I find this product ensures a smooth and secure look for years to come. Something you can’t achieve by using foam dots.

The title was created using cut file #154615 from Silhouette Design Store entitled family saying – flea market.studio by Doodlebug Design. I created and printed the add on – Stitched together by love – using Microsoft Office Word.

Our love for our children has brought us together and we are all so excited to see them begin to build a life together. While we can’t have Sean close to home, we are certainly blessed that he has a family out west that loves him as much as we do! We left that vacation with the feeling that our family had just doubled in size. We can’t wait to make another trip out west to spend time with this loving and caring family.

Wishing you all a Happy Victoria Day! Until next time, stay safe, stay well, and Happy Scrapping!

My Rose Garden

Thank goodness Spring has finally arrived in all its glory! Our gardens are beginning to grow and we can look forward to beautiful summer days ahead. These two beauties make me smile every day. They are my perpetual garden that just keeps blessing me day after day. The Bouquet of Roses cut file from Marcy and Milly SVG was a perfect fit for this recent photo. It is a 3 layer cut file and I found it very easy to assemble.

The pink blossoms in the photo and the peach in my granddaughter’s shirt were the inspiration for the colours in this layout. I chose the soft peach/pink combination background from the Vicki Boutin Ready-to-Use Mixed Media Paper pad entitled Enjoy Today. I love these papers, they have beautiful colour combinations and a lovely texture. They are also perfect for scrapbookers like me who remain a bit intimidated by the whole mixed media process! I matched the colours of the roses in the cut file to this pretty background paper.

To create some texture and dimension on this layout I cut the base leaf section of this cut file twice. The bottom level is sage coloured (formally the Green/Black paper) and came from the Carta Bella Flower Garden coordinating cardstock package. The top leaf level was cut from the backside of the 3×4 Journaling Cards paper found in the same collection. I liked the small flecks of white in this patterned paper. These papers were layered one over the other. To create the dimension, small foam squares were added between the leaf layers in the areas that fell outside of the centre roses.

As I create a layout I usually get all the elements ready first before committing to adhering them in place. This allows me to move things around and decide on the final positioning and determining if anything else should be added. I always find that the final layout is not exacting what I envisioned at the beginning. This process is something I love about creating, it allows me to continually grow and develop skills. When I laid out the cut file and photo on this beautiful background paper, I felt the edges of the layout were missing something. There was just too much white space on the borders for my liking. I settled on a stitched border to fill this void. I’ve stitched for many years and find it very relaxing and rewarding. It also provides another level of texture to the completed layout. To create this border I altered the Stitched Diamonds cut file from COAPA Cut Files. I removed all the cut lines from the centre of the file to leave the scalloped border. This scalloped border was stitched using DMC floss that coordinated with the background paper and roses. I used colours 605, 760, 893 and 895. I changed the colour for each singular scallop, so it did take a bit of time to complete the border. I feel this border helped pull the whole page together.

With the border completed the photo and cut file were added to the page. It was at this stage that I added the foam adhesive squares to the leaves. The final touches included adding the title and date using Thickers Happy Life foam letter stickers. These pale rose coloured stickers blended in beautifully.

I’m so glad you stopped by today and I hope I’ve inspired you to create with this gorgeous cut file! Until next time, stay safe, stay well, and Happy Scrapping!