Here we are one week away from Christmas, and thanks to Omicron, we’re facing yet another Christmas of restrictions. The recent developments in this new variant is a worry for the world. Here in Ontario, we are disappointed that our plans to try and return to a “normal” Christmas are dashed once again. I decided to turn my negative feelings from this recent development into positive creative energy. For me, Omicron reminded me of Mr Grinch, Dr Seuss’ immortalized character that tried to keep Christmas from coming.
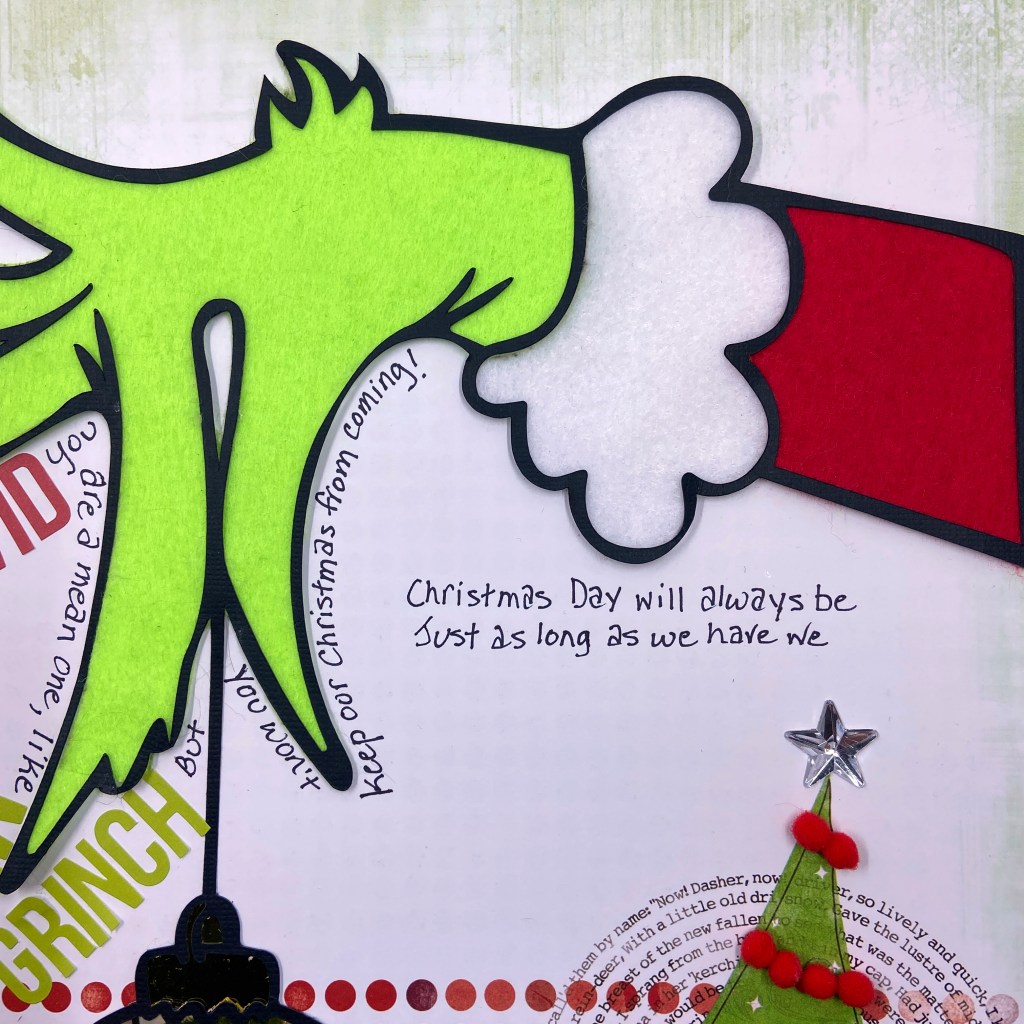
The background paper for this fun layout came from an older collection of patterned papers called Mistletoe by Bo Bunny. I used Sophie Gallo’s Christmas Grinchy Ornament cut file found on Etsy to create this layout. The Grinch’s arm and hand were created by tracing the outline of the cut file onto coordinating coloured felt and cutting by hand. I adhered it to the paper cut file using Ranger’s Glossy Accents. To complete the preparations on the cut file, I used glossy gold cardstock to back the top of the Christmas ornament. I used Silhouette Studio software to accurately size my photo to fit the hanging ornament before printing. Once these steps were completed, the cut file was adhered to the background paper using large Glue Dots. To further the whimsical feel of the layout, I placed my journaling around the Grinch’s fingers. To emphasize COVID and MR GRINCH, I turned to colour coordinating letter stickers from Simple Stories. The text reads: Dear COVID, you are a mean one, like MR GRINCH. But you won’t keep our Christmas from coming!
The Christmas Tree, found in the bottom right-hand corner, was embellished with small red felt pompoms and a clear acrylic star.
The final element for the layout was adding a direct quote from Dr Seuss’ How the Grinch Stole Christmas:
Christmas Day will always be
Just as long as we have we
Try as you might COVID, you WILL NOT stop our Christmas from coming! It’s going to look different for sure, but these happy faces will have a wonderful day, just the same!
Thanks for checking in today. From the bottom of my heart, I wish you and yours the merriest of holiday seasons!
Every year, at the eleventh hour of the eleventh day of the eleventh month, we stand together to honour those who fought and fell to protect our freedom. Their sacrifices were far-reaching and continue to impact many families today. A simple thank you one day a year is inadequate to the men and women who’ve made such a sacrifice. I will be forever grateful every day of my life.
Today I also recognize all our military members, past and current, who continue to put our safety before themselves. While we go about our day to day lives, they continue to focus on serving others. They make sacrifices most of us would never consider – including deployments and continual training in the field that keeps them away from their family and friends for months at a time, every single year. My son Sean has just passed his tenth anniversary in the military. I stand in awe of his commitment and passion for his career. One of Sean’s arms bears the tattoo DUTY BEFORE SELF. He embodies this motto every single day. A mother couldn’t ask for more than seeing her children follow their passion. Thank you, Sean, for following yours. Thank you for your service.
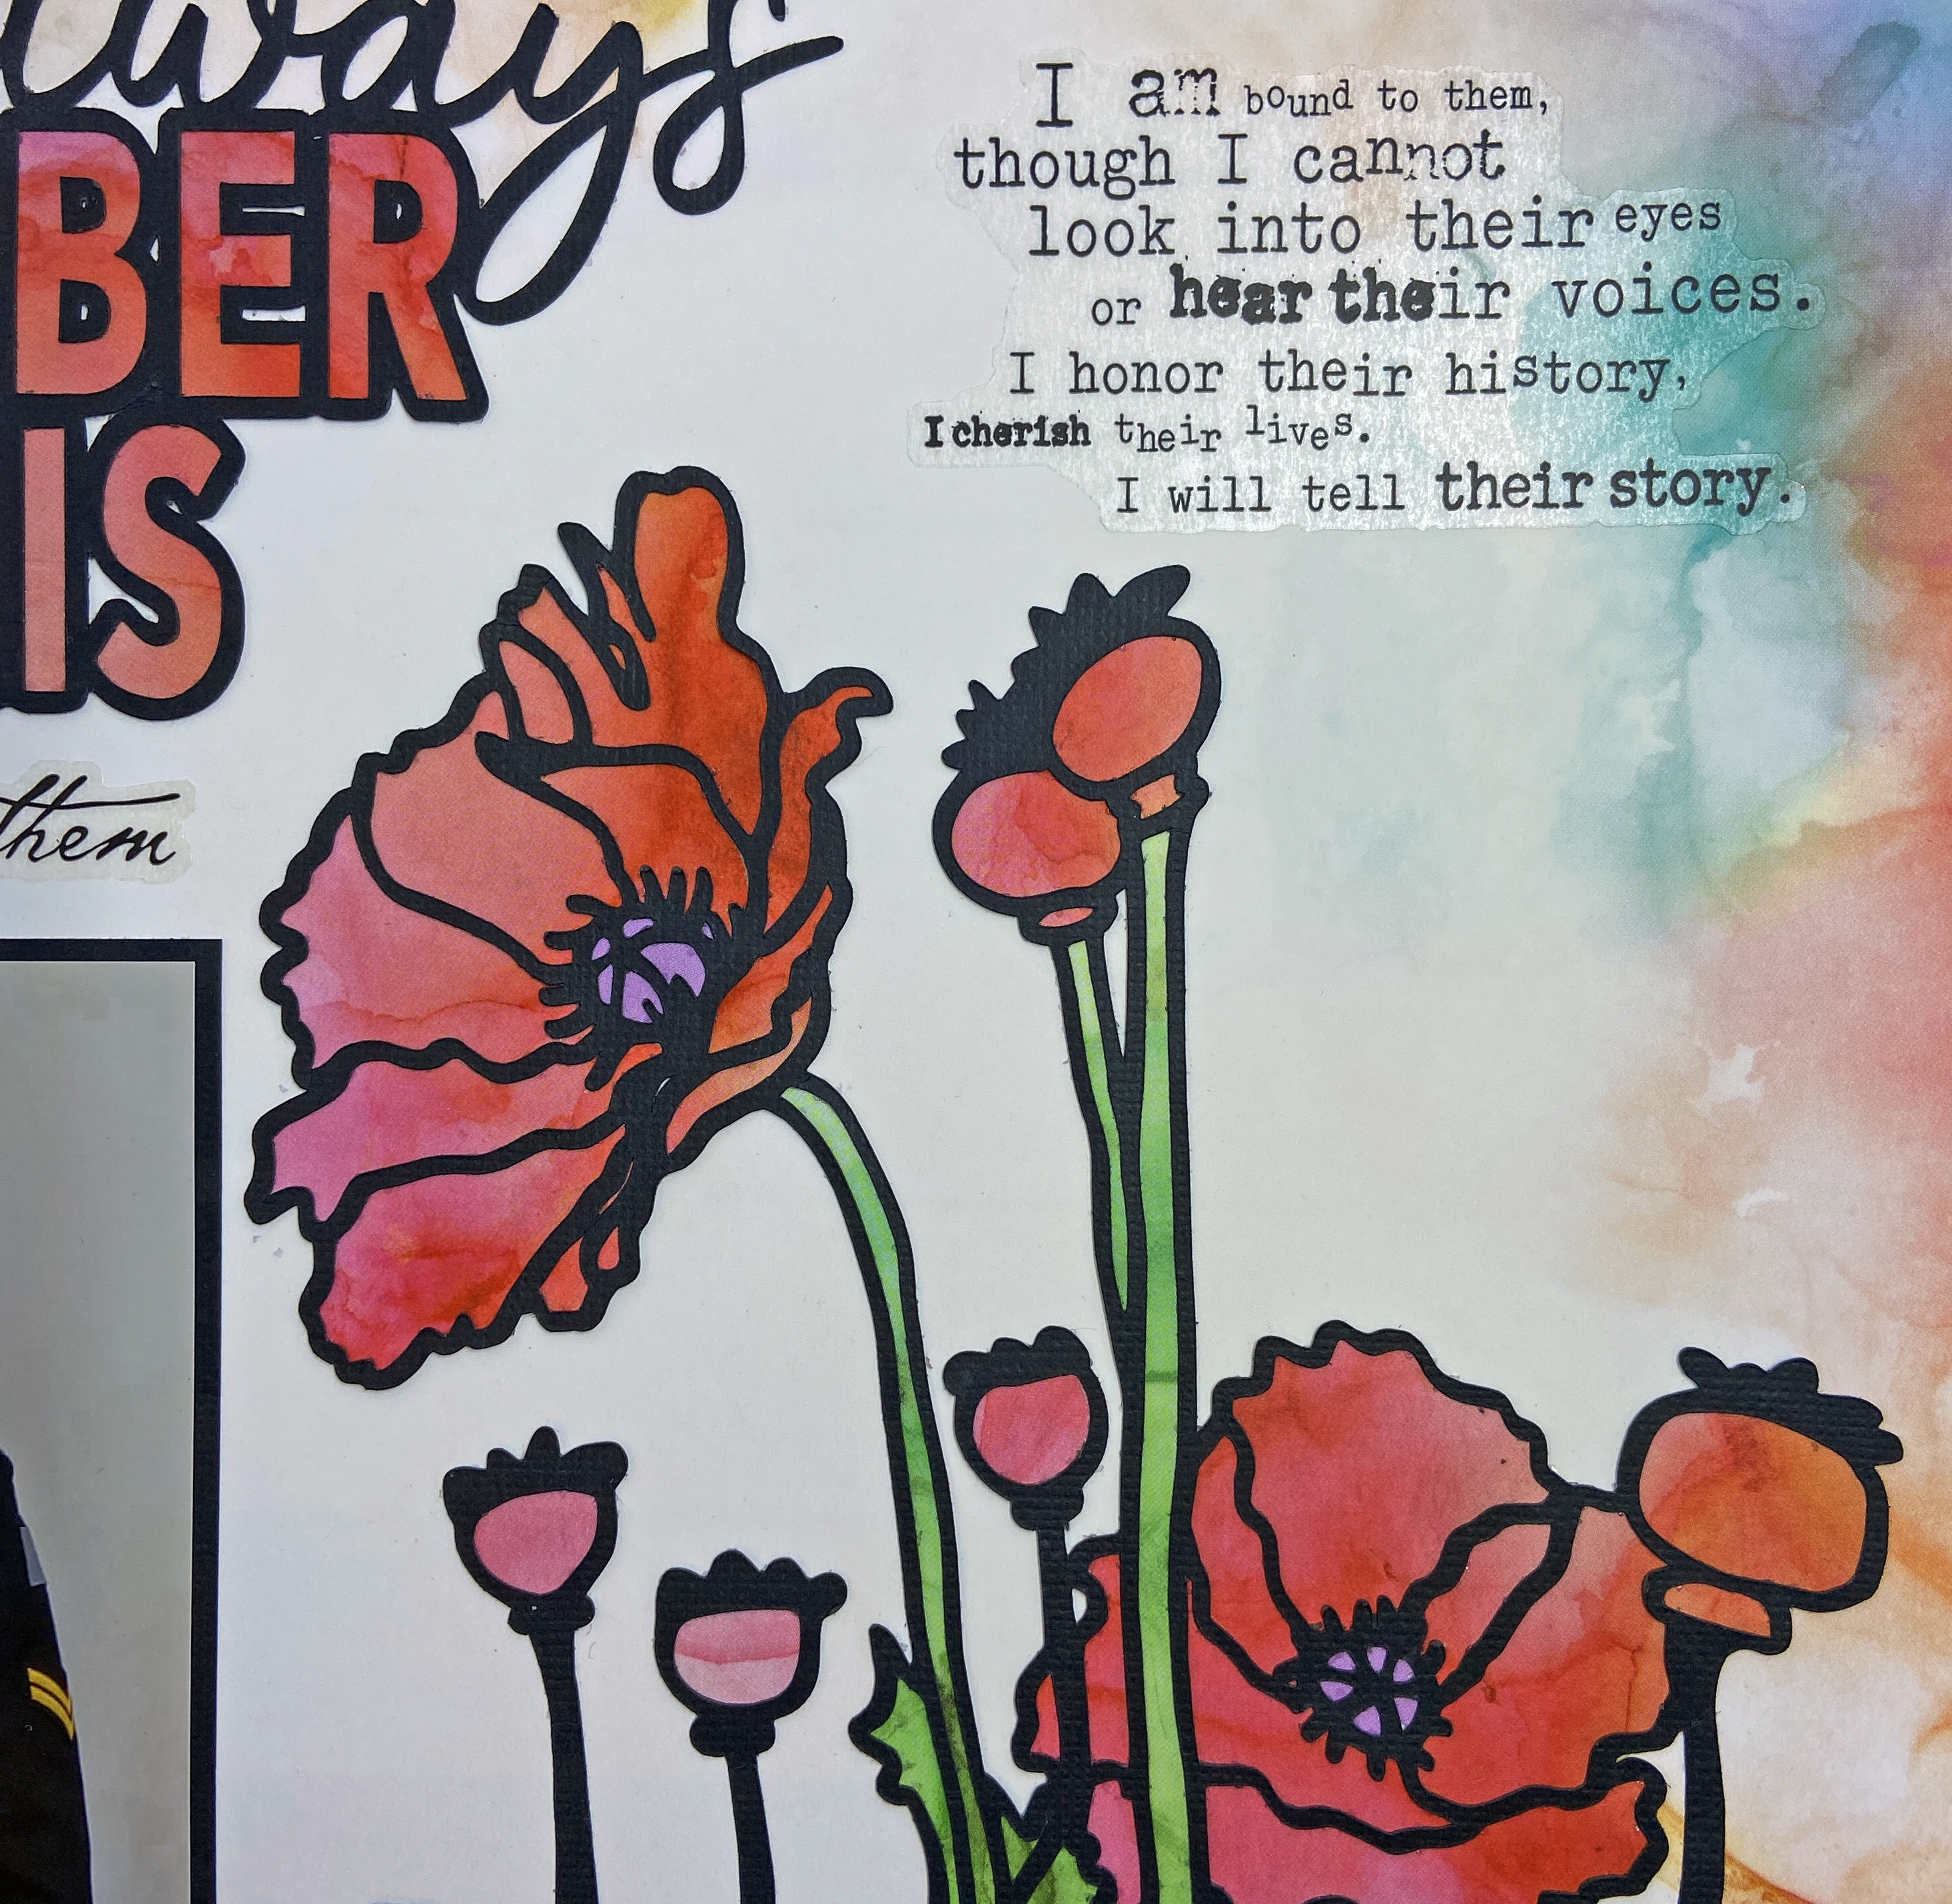
Anett Gelencsér of AnettsDesigns created this stunning Poppies cut file. It is the focal point of this layout in honouring past and current military members. After cutting the file from black cardstock, I backed it with red and green papers from the Rainbow Inks paper pad purchased at Michaels. I also used one of these papers for the background. These watercolour papers provided the soft, warm feel I was looking for in this layout.
I returned to the Peartree CutfilesAlways Remember This cut file for the title of the layout. As you can see, it has the versatility to be used in so many ways. I used the red watercolour papers from the Rainbow Inks collection pad to back the title as well.
I dug into my scrapbook stash to find the clear stickers that complete the layout. They come from Karen Foster Design and belong to the Heritage Quotes sticker sheet. While this sticker sheet is at least fifteen years old, the quote is timeless and perfect for this layout.
Thanks for joining me today. Let’s join together in remembering those who gave so much. “To the loved ones we have lost. You are forever in our hearts and minds. Your service and sacrifice will never be forgotten.”
Fall is such a gorgeous season! It’s so refreshing to feel the temperature cool down and inspiring to see the leaves changing colour. There’s nothing better than spending time at the cottage during this season. It is a quiet time to relax and take in the beauty of our surroundings. We celebrate Thanksgiving at the cottage each year. It is the weekend we close for the season and say goodbye until the spring. We reflect on a great year of new memories and give thanks for such a wonderful summer getaway.
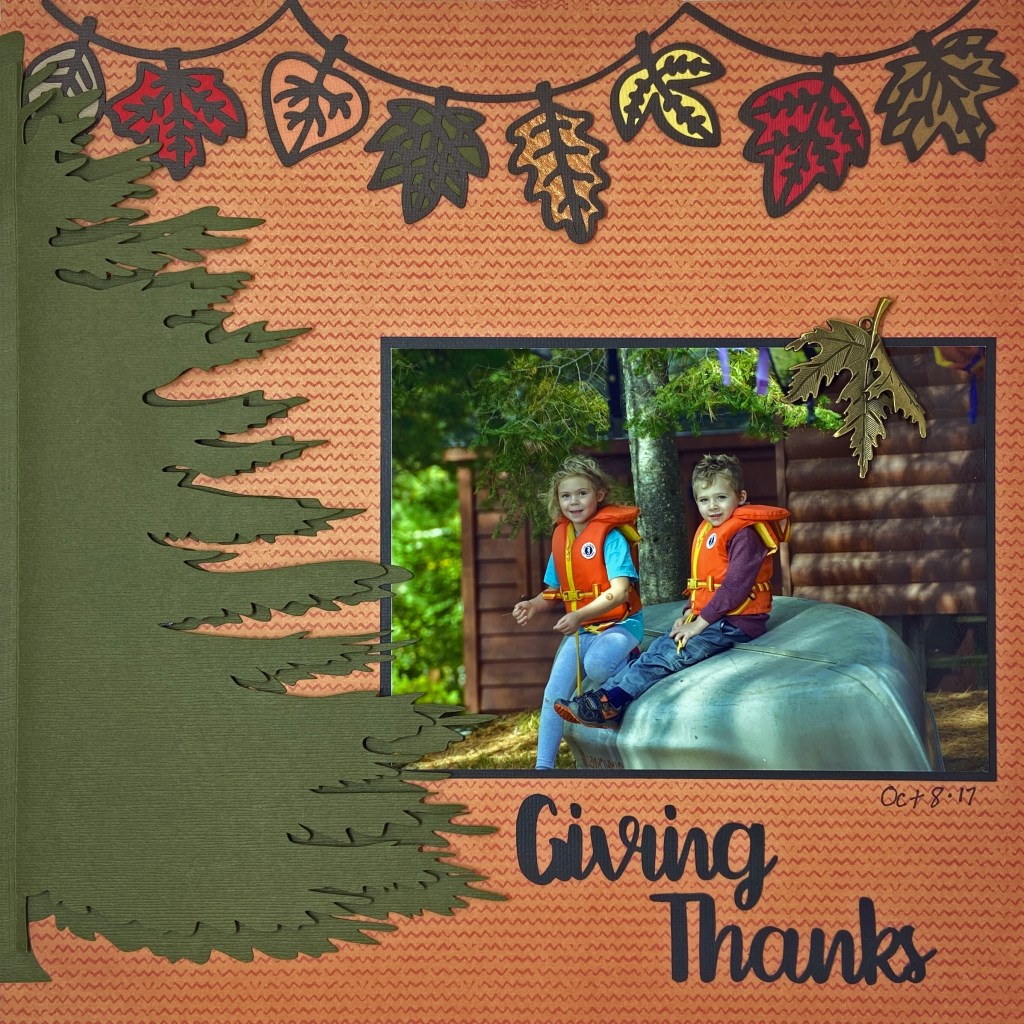
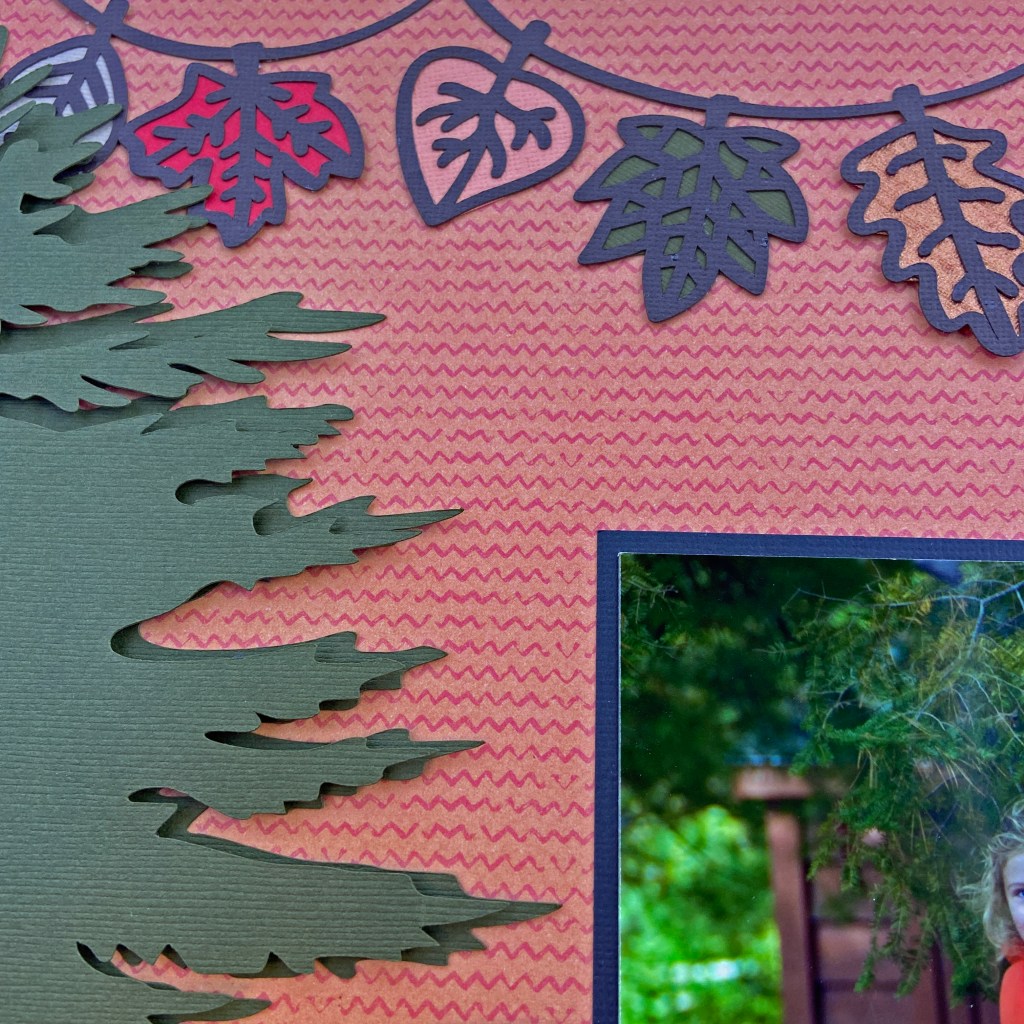
The Fall Words cut file from Marcy Milly SVG was the perfect compliment to the photo of my grandchildren on a beautiful fall day. This cut file is very versatile, providing multiple words for multiple layout options. I chose Cocoa Vanilla’s Legendary collection for the base page of this layout. The specific paper is called One Way. The large fir tree caught my attention immediately. I knew the tree would be one of the focal points on the layout. To provide some depth and texture, I layered the tree. First, I flipped the cut file horizontally to provide the proper placement on the left-hand side of the layout. Next, I enlarged the cut file to approximately 11″ in height and cut it from Bazzill Cardstock called Capers. I then resized the tree slightly smaller (3/4″) and cut it again. I made a 1/4″ score line along the straight edge of the smaller tree and used a 1/8″ Scor-Tape to adhere the two trees together. Before adding fun foam and pop dots between the trees for dimension, I adhered the tree to the layout first. I’m very happy with the overall effect this created, giving the feel of a real fir tree.
To help fill the blank space at the top of the layout, I used Paige Evan’s Leaf Banner. It can be purchased from the Silhouette Studio Store and is Design ID #383307. Brown cardstock was used to cut the file and I backed it with several coordinating fall colours of cardstock. The stunning brass folded leaf charm was a recent find at a Local Scrapbooking Store, The Scrapbook Shop in Listowel, ON. This was my first trip to this store, and my first visit to a Local Scrapbooking Store since COVID began. I will be back, it is a gem!
The layout was completed by adding the title using the Giving Thanks words from the Marcy Milly SVG cut file. It was so appropriate, as this picture was taken on Thanksgiving Weekend, 2017!
Thanks for popping in, and until next time, stay safe, stay well, and Happy Scrapping!
I hope you all had a wonderful, safe and fun Halloween yesterday. I love dressing up as a witch and handing out candy to all the excited children. Today’s post focuses on another picture from last year’s celebrations. With Covid restrictions and a ban on trick-or-treating, we celebrated in our driveway. Thank goodness for good weather!
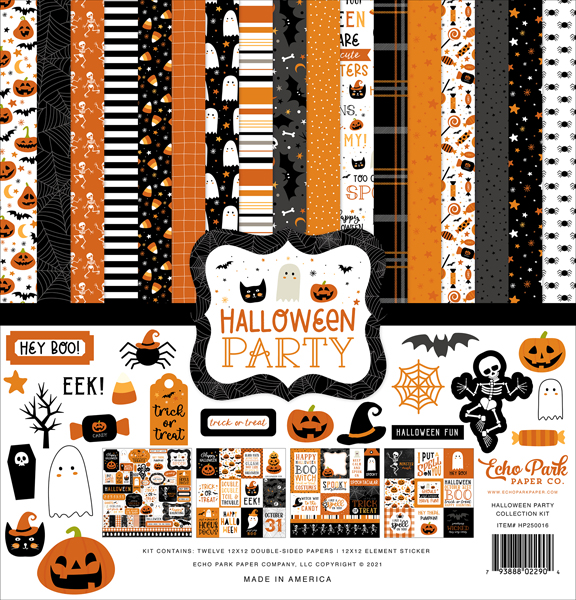
I utilized Echo Park’s Halloween Party collection kit once again. The background for this layout is the backside of patterned paper HP250004 entitled Something Wicked. It is such a fun collection of papers and stickers. I’m sure I’ll be using it for many layouts.
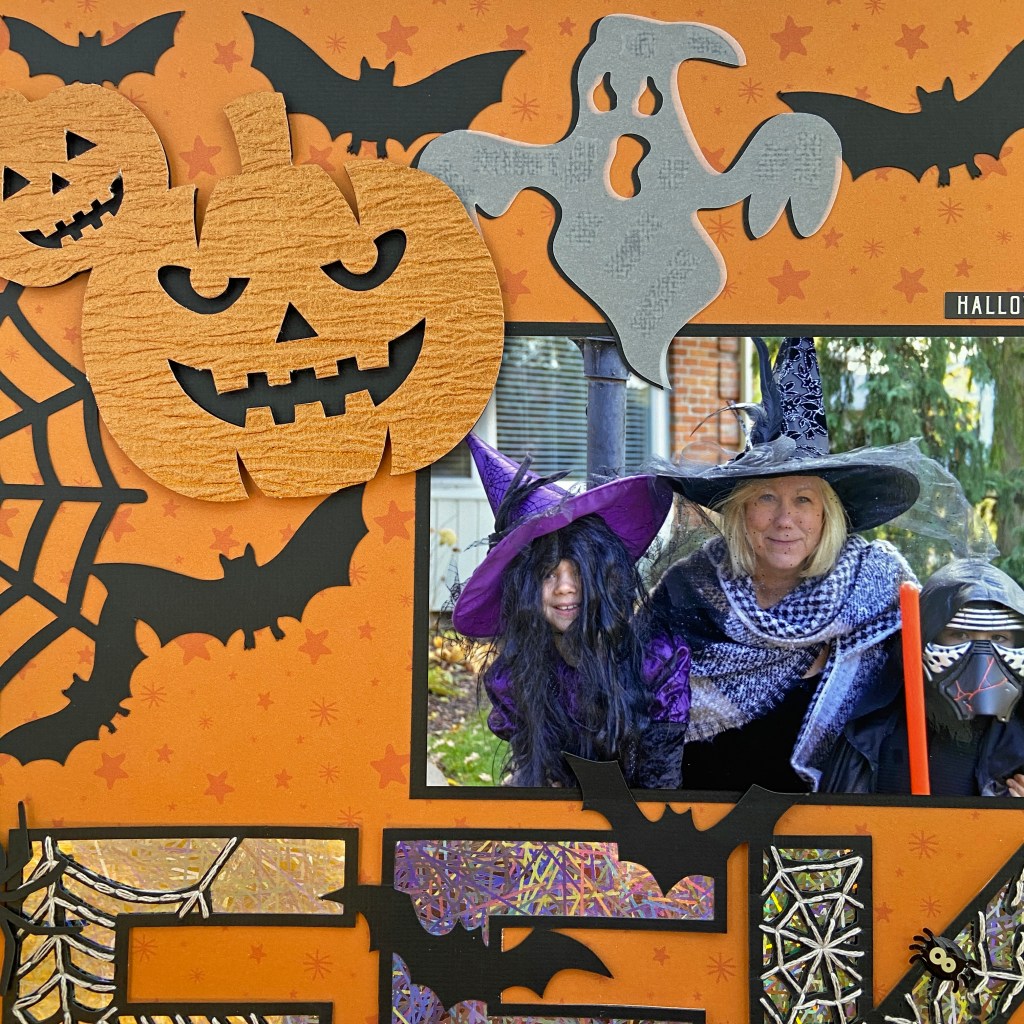
The title for the layout, EEK, is a Silhouette Design Store cut file by Jillibean Soup (Design ID #386850). I resized the file to make it a bit bigger and cut it out of black cardstock. I love creating layers, textures, and stitching on my layouts. The spider webs in the cut file provided the perfect backdrop for adding in some soft stitching. The first step was to pierce holes in the spider webs found in the letters E and K. The spider webs were stitched using three strands of light silver DMC floss (#762). To enhance the spooky feel of the layout, the title was backfilled using Lawn Fawn’s Metallic Cardstock in Holographic 2.0. Ranger’s Glossy Accents was used to adhere the stitched cut file to the holographic background.
The large cut file at the top of the layout is entitled Halloween Corner by StudioIlustrado. It is also in the Silhouette Design Store (Design ID #65854). It was cut from black cardstock and the pumpkin eyes, noses, and mouths were kept to create a shadow effect. I choose to highlight the pumpkins and the ghost, leaving the bats flat on the page. This created continuity in the layout as the bats in both cut files appear to merge into one big cut file, encircling the photo. I used the knife tool in the Silhouette Studio software to isolate the ghost and pumpkins. This allowed me to cut the specific part of the cut file I desired, rather than having to waste paper by cutting out the entire cut file in another medium. The ghost was cut from vellum and adhered slightly offset with vellum tape. The pumpkins were cut from heavy orange textured cardstock and adhered with 3D foam squares by Scrapbook Adhesives.
A few simple elements were added to complete the layout. Two spooky spiders from Doodlebug Designsshape sprinkles were placed in the upper left and lower right spider webs. The small black and white sticker entitled Halloween Fun was placed above the picture on the right-hand side. The sticker was included in the Halloween Party collection pack.
Thanks for stopping in and until next time, stay safe, stay well, and Happy Scrapping!
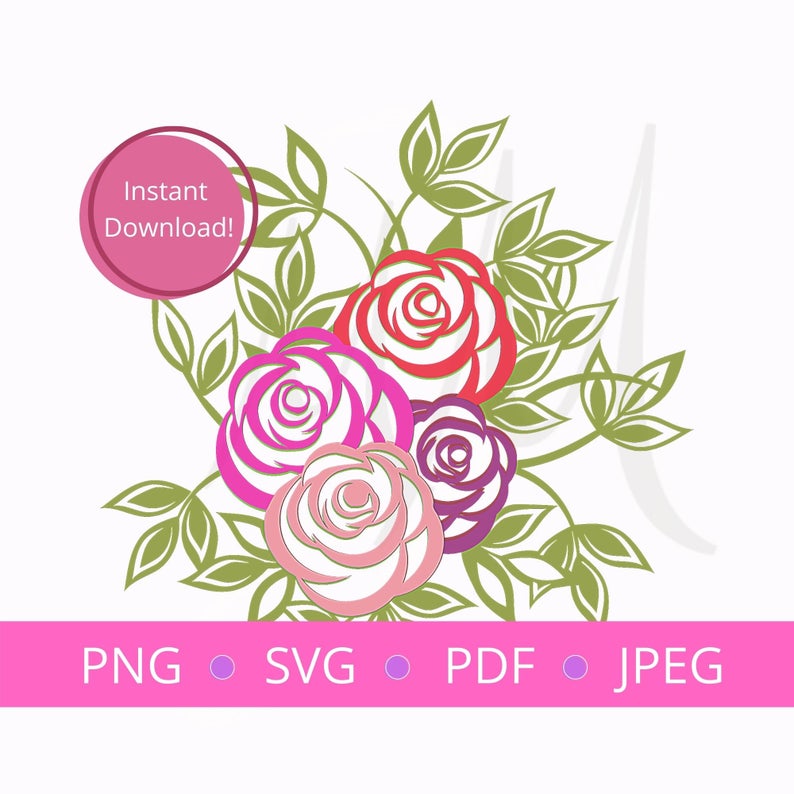
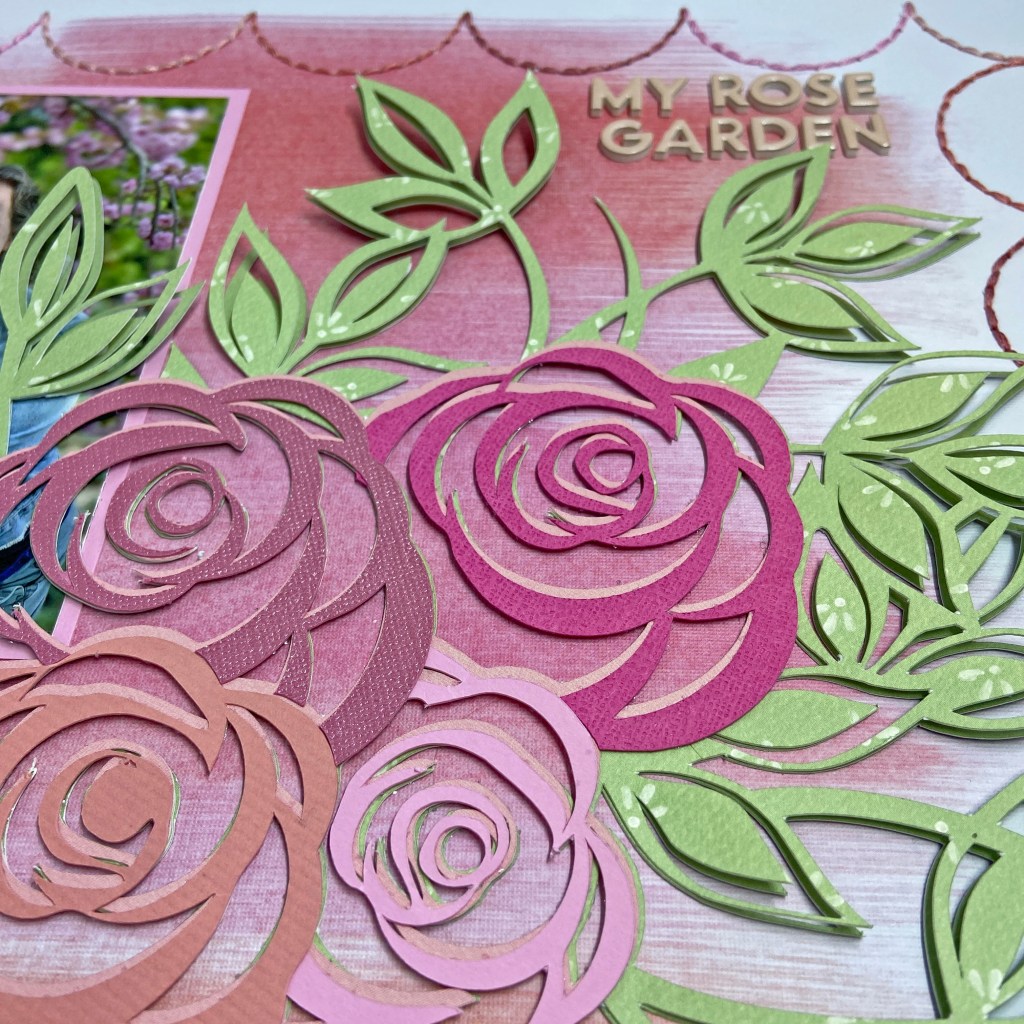
Thank goodness Spring has finally arrived in all its glory! Our gardens are beginning to grow and we can look forward to beautiful summer days ahead. These two beauties make me smile every day. They are my perpetual garden that just keeps blessing me day after day. The Bouquet of Roses cut file from Marcy and Milly SVG was a perfect fit for this recent photo. It is a 3 layer cut file and I found it very easy to assemble.
The pink blossoms in the photo and the peach in my granddaughter’s shirt were the inspiration for the colours in this layout. I chose the soft peach/pink combination background from the Vicki Boutin Ready-to-Use Mixed Media Paper pad entitled Enjoy Today. I love these papers, they have beautiful colour combinations and a lovely texture. They are also perfect for scrapbookers like me who remain a bit intimidated by the whole mixed media process! I matched the colours of the roses in the cut file to this pretty background paper.
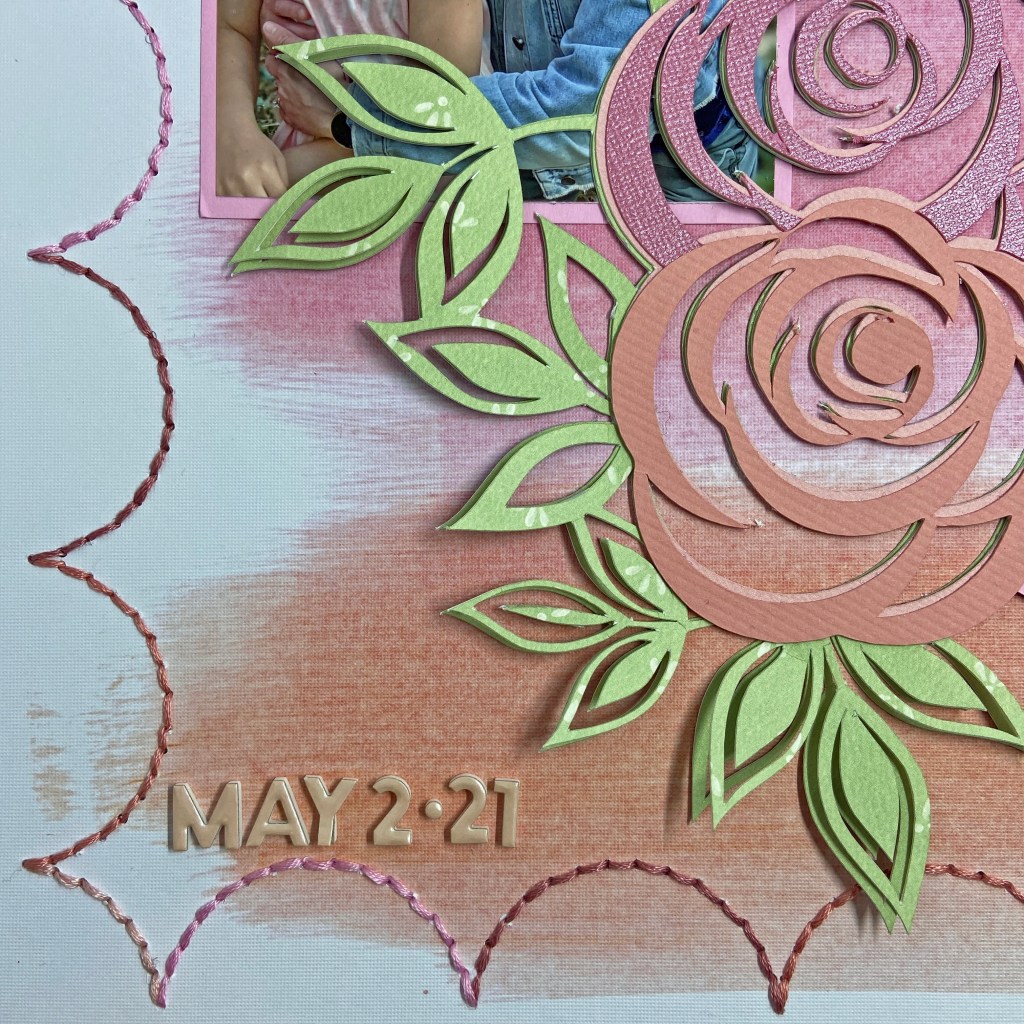
To create some texture and dimension on this layout I cut the base leaf section of this cut file twice. The bottom level is sage coloured (formally the Green/Black paper) and came from the Carta Bella Flower Garden coordinating cardstock package. The top leaf level was cut from the backside of the 3×4 Journaling Cards paper found in the same collection. I liked the small flecks of white in this patterned paper. These papers were layered one over the other. To create the dimension, small foam squares were added between the leaf layers in the areas that fell outside of the centre roses.
As I create a layout I usually get all the elements ready first before committing to adhering them in place. This allows me to move things around and decide on the final positioning and determining if anything else should be added. I always find that the final layout is not exacting what I envisioned at the beginning. This process is something I love about creating, it allows me to continually grow and develop skills. When I laid out the cut file and photo on this beautiful background paper, I felt the edges of the layout were missing something. There was just too much white space on the borders for my liking. I settled on a stitched border to fill this void. I’ve stitched for many years and find it very relaxing and rewarding. It also provides another level of texture to the completed layout. To create this border I altered the Stitched Diamonds cut file from COAPA Cut Files. I removed all the cut lines from the centre of the file to leave the scalloped border. This scalloped border was stitched using DMC floss that coordinated with the background paper and roses. I used colours 605, 760, 893 and 895. I changed the colour for each singular scallop, so it did take a bit of time to complete the border. I feel this border helped pull the whole page together.
With the border completed the photo and cut file were added to the page. It was at this stage that I added the foam adhesive squares to the leaves. The final touches included adding the title and date using Thickers Happy Life foam letter stickers. These pale rose coloured stickers blended in beautifully.
I’m so glad you stopped by today and I hope I’ve inspired you to create with this gorgeous cut file! Until next time, stay safe, stay well, and Happy Scrapping!
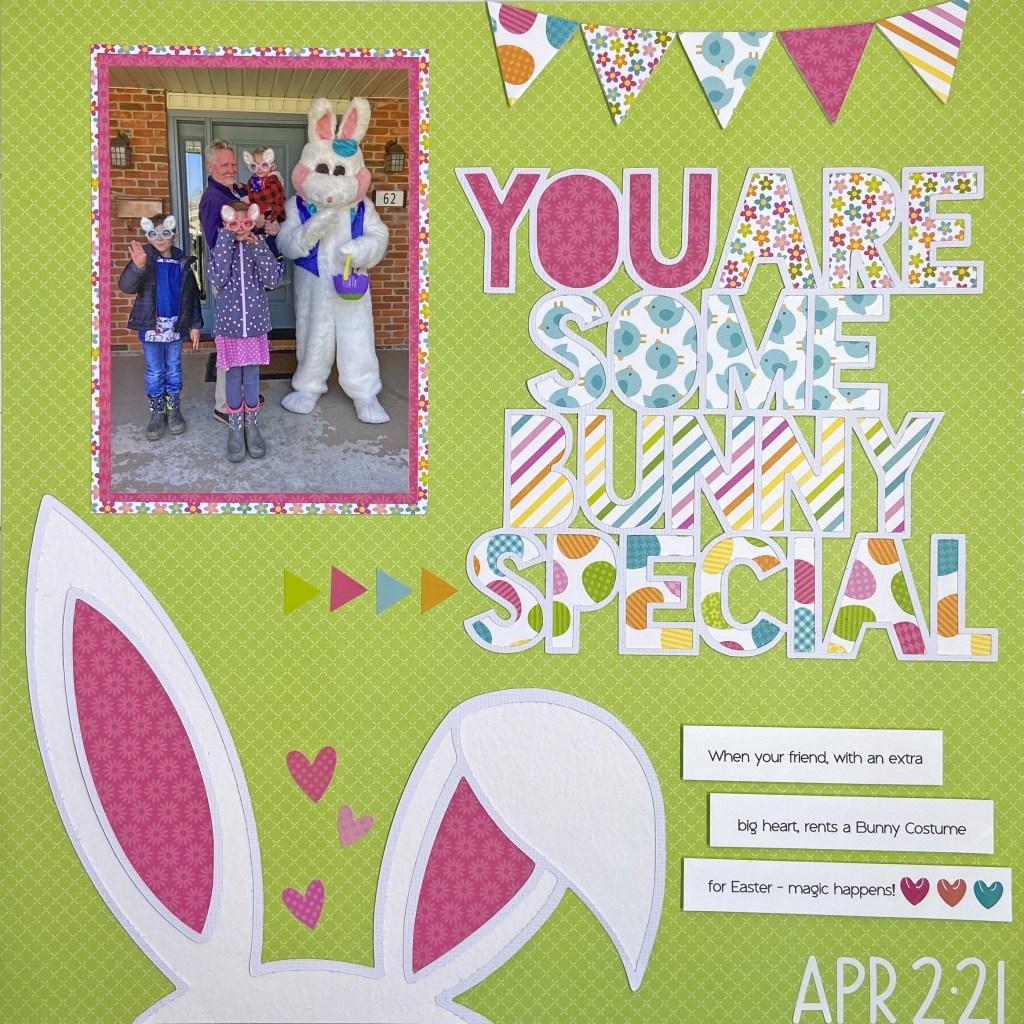
Did you know the Easter Bunny is 6′ tall and that he has a kind and generous heart equally as large? I am very lucky to have a dear friend Gerry, who rented an Easter Bunny costume to spread some joy to young and old this past Easter. He offered to come and surprise our grandchildren and even brought the chocolate eggs to spread more cheer! We were very honoured to be on his list of visits this past Easter. Maddy and Owen couldn’t figure out who was in the costume. Owen asked me where he came from and I replied that I found him hopping around in my backyard. Owen quickly responded with “No Nana, he drove here – I can see his van in your driveway!”. That boy doesn’t miss a trick! Ben was quite taken with the Easter Bunny. After the visit was over, he kept asking his Mom if the Easter Bunny could come to Easter Dinner! Wouldn’t that be something to see!
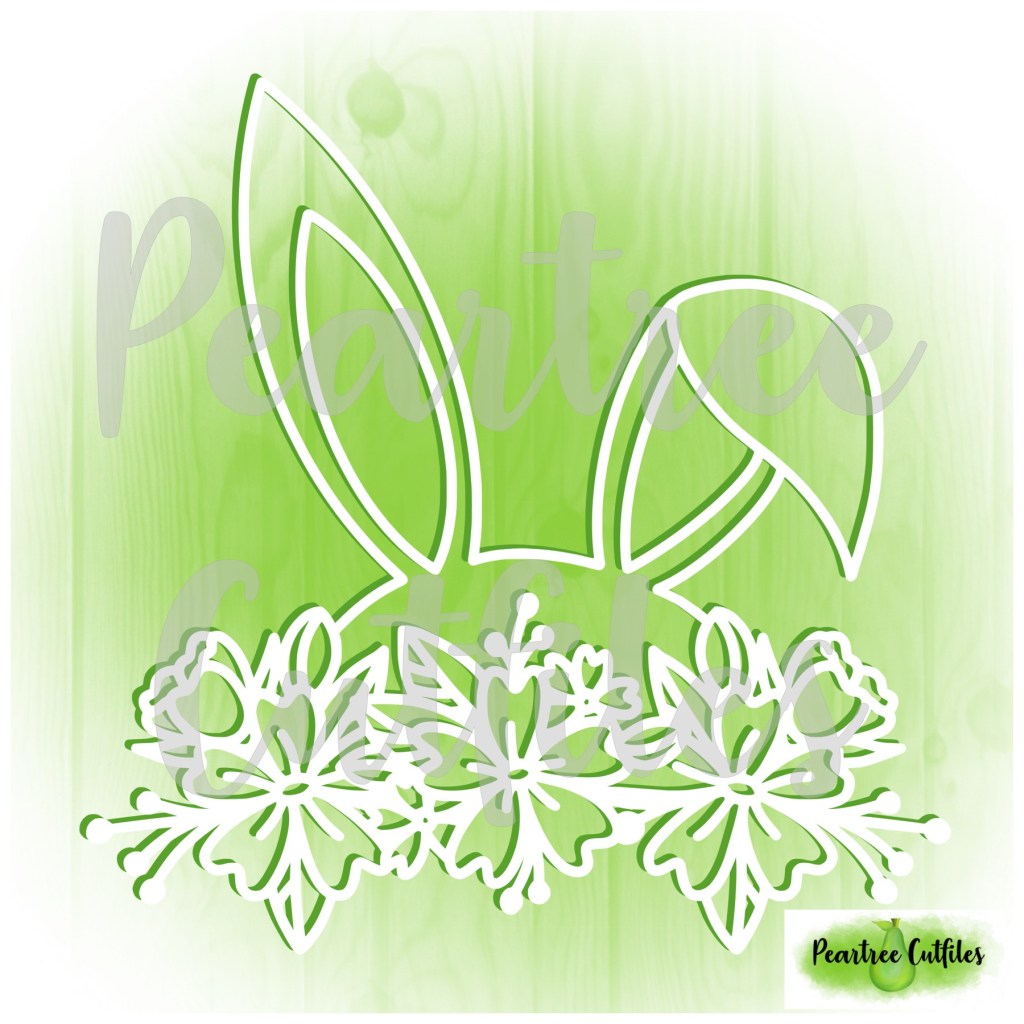
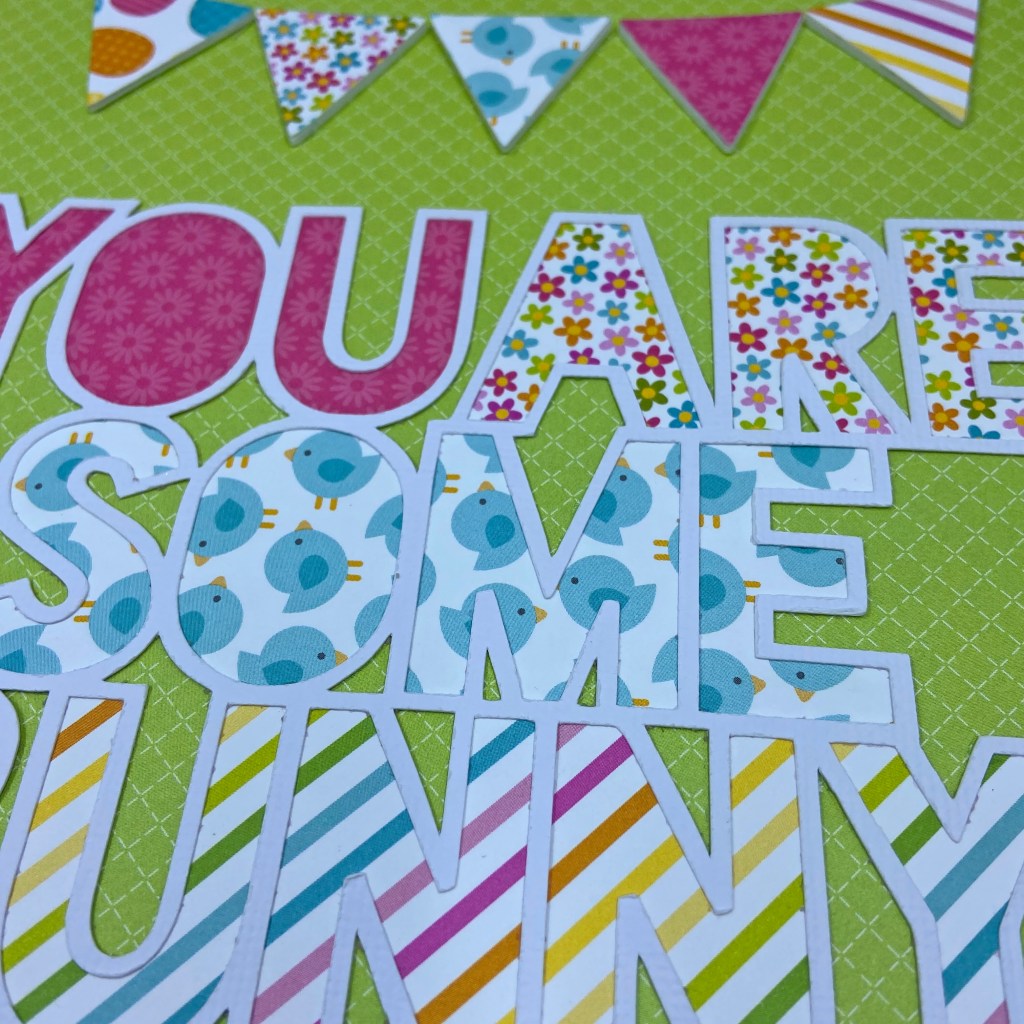
Coordinating papers from 3 separate Doodlebug Designs collections were used to complete this layout; Springtime, Hello Spring and Easter Parade. Two cut files were used to create this fun page. The large title cut file comes from Cut to You and is called Some Bunny Special. You can find it here https://createdbygwen.com.au/product/some-bunny-special-title-cut-file/. I selected 5 coordinating patterned papers from the 3 collections listed above to back the title and add further whimsy to the layout.
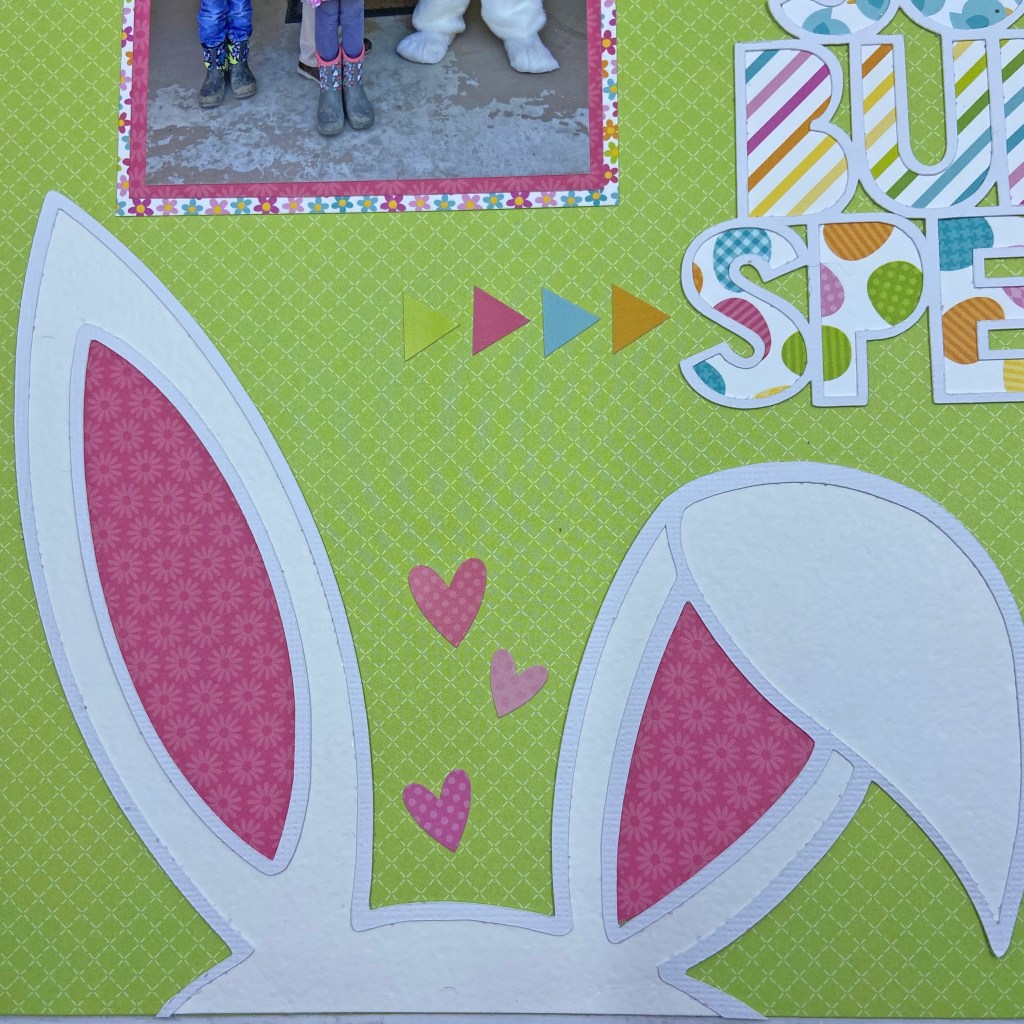
I only wanted to use the head and ears of this file and did not want the floral sections. To achieve this and minimize wasted paper, I positioned the cut file at the bottom of the white cardstock, leaving the floral portion outside the cutting area of the Silhouette mat. Hopefully, this tip will have you looking at some of your cut files a bit differently and get you thinking about how you can manipulate them to fit the vision of your project. The bunny ears were cut from white cardstock and backed with a soft textured white cardstock and coordinating pink patterned paper. This picture provides a closer look.
The banner in the top right of the layout was made by cutting 5 triangles from coordinating patterned papers. Each of these was backed with fun foam to add some dimension to the project.
The finishing touches on the layout included adding sticker hearts (between the bunny ears) and sticker arrows to the left of the word SPECIAL in the title. The photo was matted with 2 coordinating patterned papers. The journaling found in the bottom right was printed on white cardstock and cut to size. These strips were also backed with fun foam. The 3 hearts found at the end of the journaling come from the Rainbow Hearts Shape Sprinkles by Doodlebug Designs. The date was added using Doodlebug stickers called Sunshine.
It has been such a tough year with COVID, the ongoing restrictions, and multiple lockdowns. Thank you Gerry for providing a welcome diversion from our current situation. Your kindness and generosity were so deeply appreciated! This visit by the Easter Bunny was such a bright spot this Spring and a reminder of better times to come. Maybe next year the Easter Bunny will get to come to Easter Dinner! Until next time, stay safe, stay well, and Happy Scrapping!
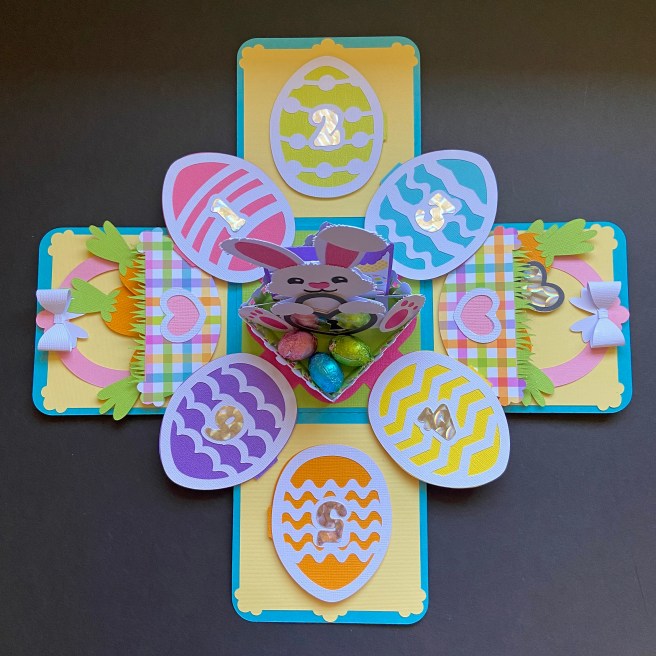
Giuly from Les Pensées en Papier has done it again! I recently made this Easter House Box for my grandchildren to enjoy this coming weekend. At first glance, you may think it’s just another explosion box – but look again, and you’ll see that it is much more than that! This incredible project is an explosion box and a game all rolled into one pretty package! https://www.etsy.com/ca/listing/976845153/easter-house-box-svg-easter-eggs-hunt?ref=shop_home_active_2&crt=1
Giuly put a very high level of thought, detail, and organization into this project. Her sample and instructions are all made from cardstock. You will find each of the cut files labeled by colour, making this a very simple project to cut and prepare for assembly. I chose to swap out some of the cardstock with patterned paper. This did slow my overall process down, but I feel the final result made it well worth the investment in time and preparation. I worked with Doodlebug Designs Inc., Hippity Hoppity paper pack, and the coordinating Spring Solid Assortment of cardstock. I also used 3 sheets of Bazzill’s Artesian Pool cardstock for the house base. Aside from the paper, the only other main supplies utilized were coordinating Spring Assortment Sprinkles, also from Doodlebug Designs Inc., and some small foam dots.
Each piece of the project fits beautifully in place. The supporting video is clear, and easy to follow, making the construction of this project seamless.
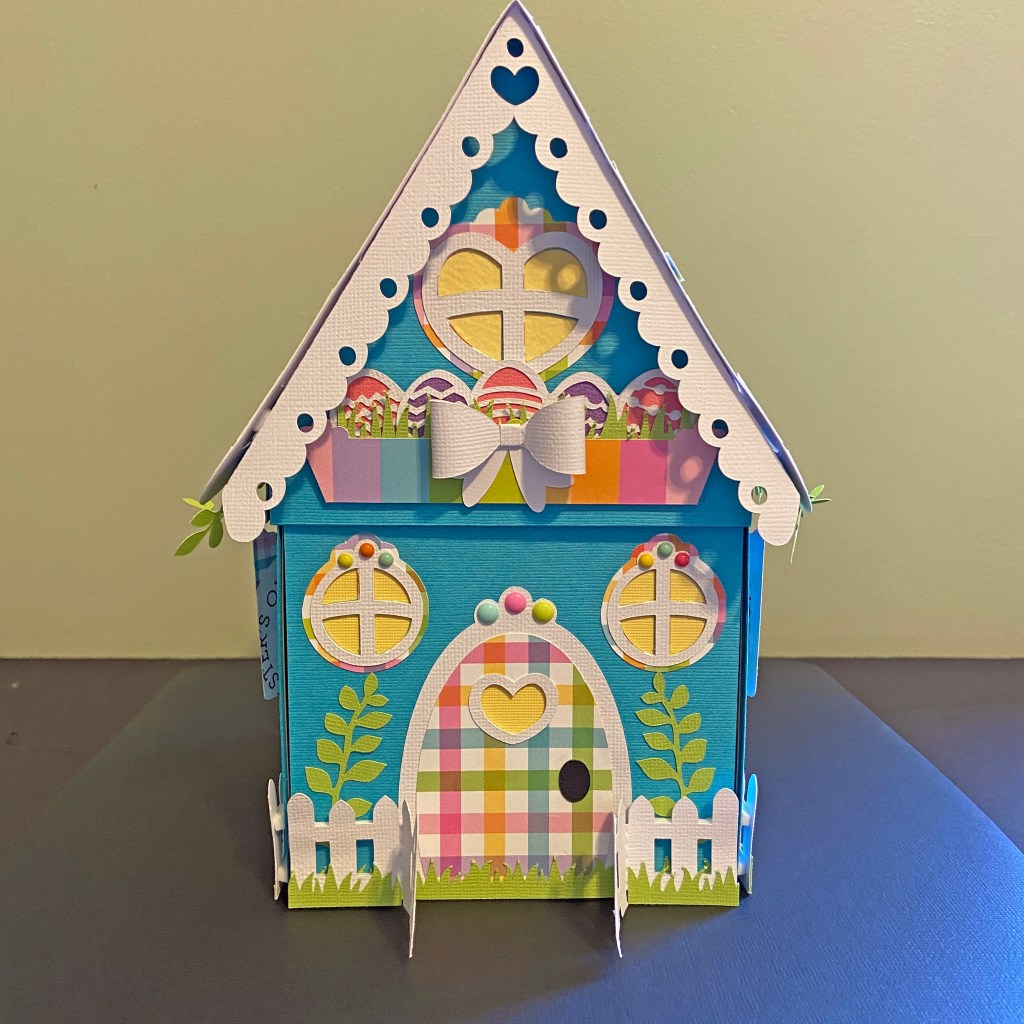
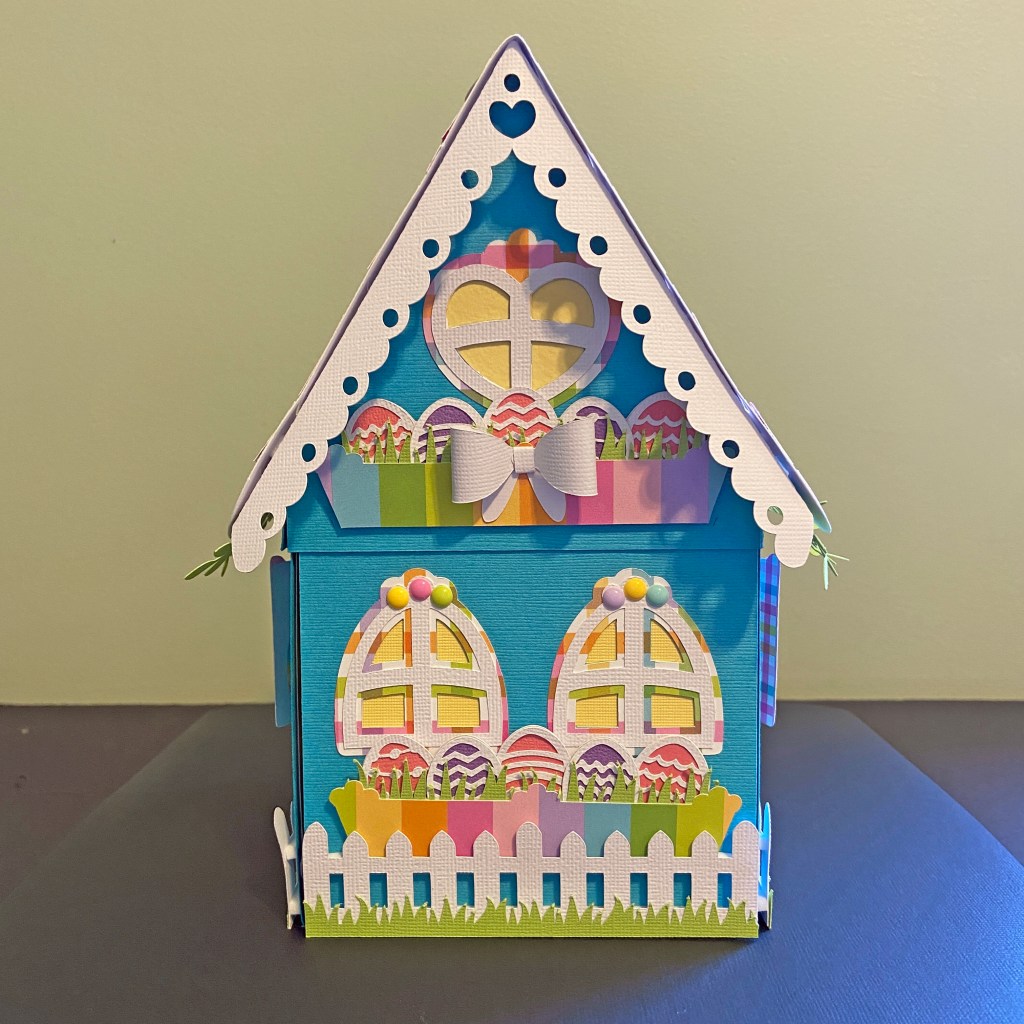
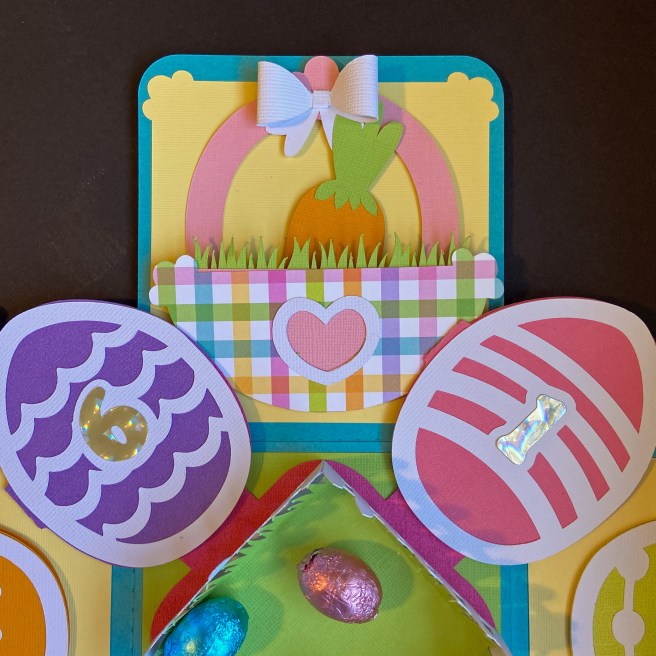
From start to finish the detail in this project is outstanding. The view of the front of the house highlights several of the intricate details put into this finished project. Not only do you have a layered door and windows, but you can also see the picket fence with grass, and the lovely window box above with more foliage and decorated Easter eggs. This detail follows through the entire house and inside the house as well.
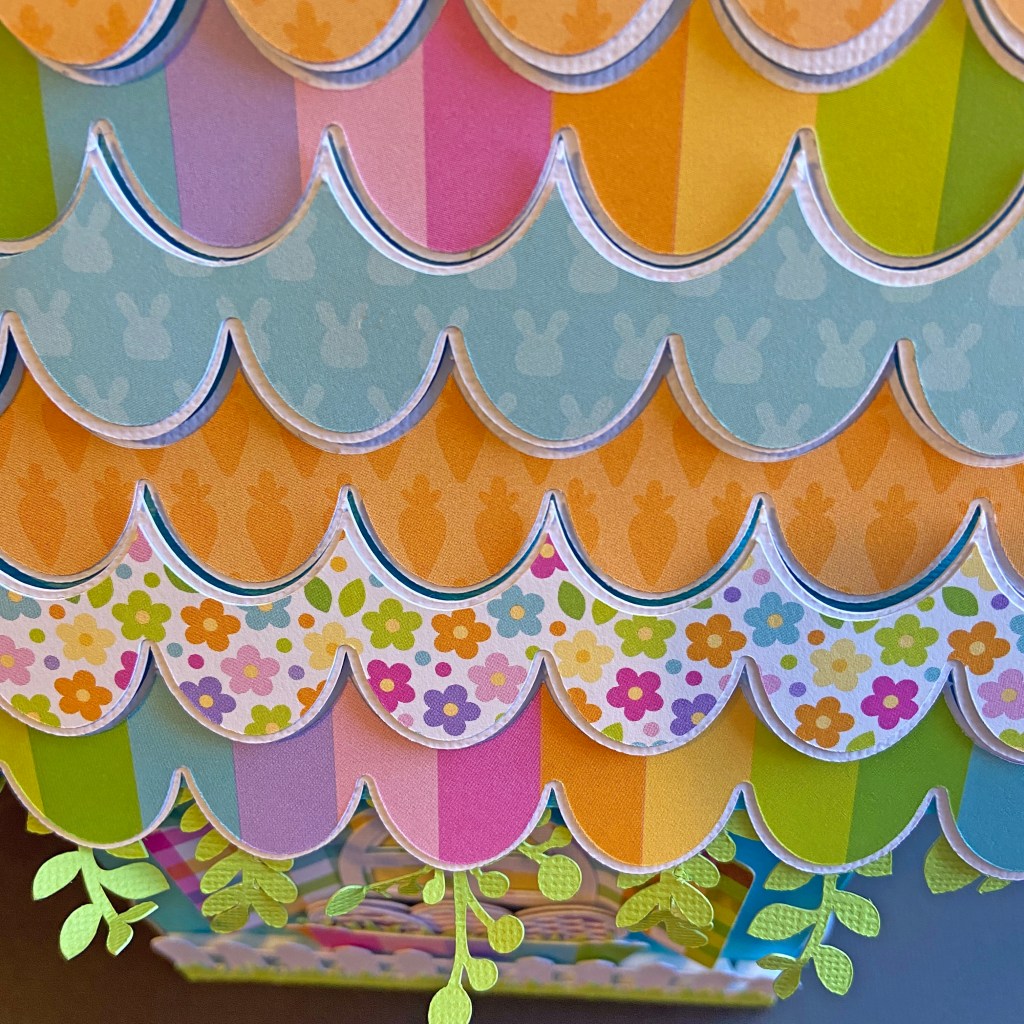
The roof of the house is equally detailed with a “thatched” roof, gingerbread gable, and ivy hanging from the edges. Small foam dots in strategic places add more texture to the thatched roof.
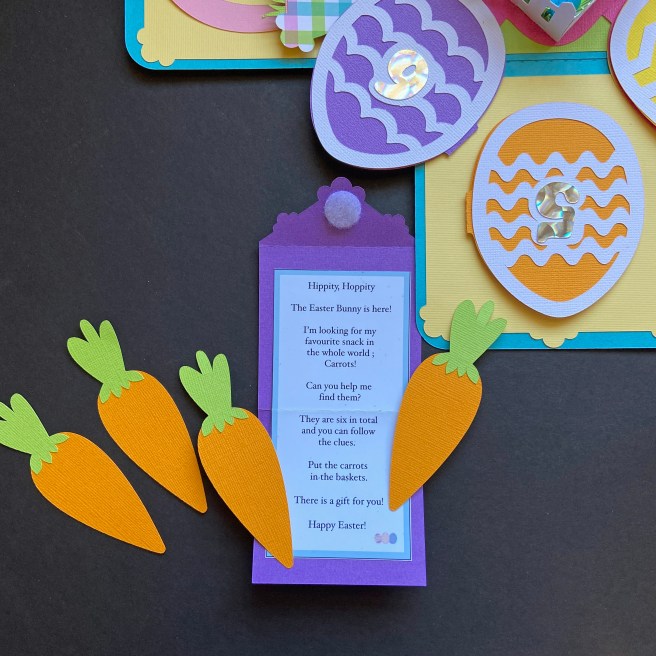
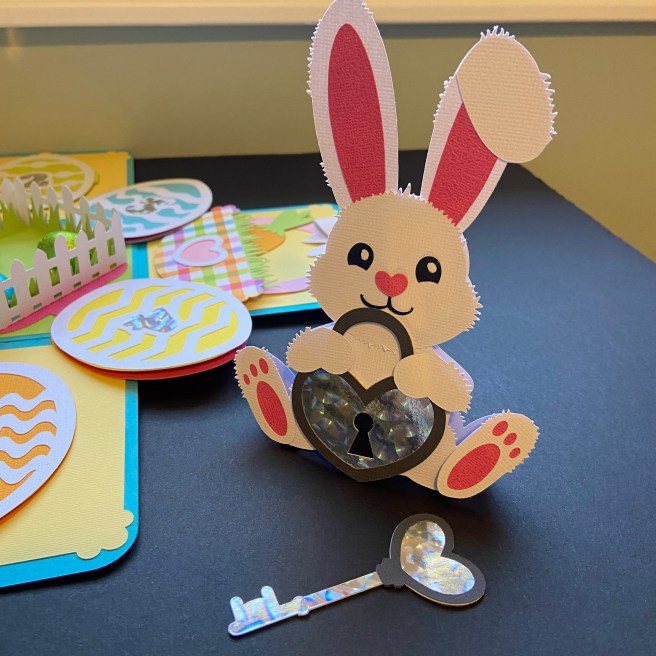
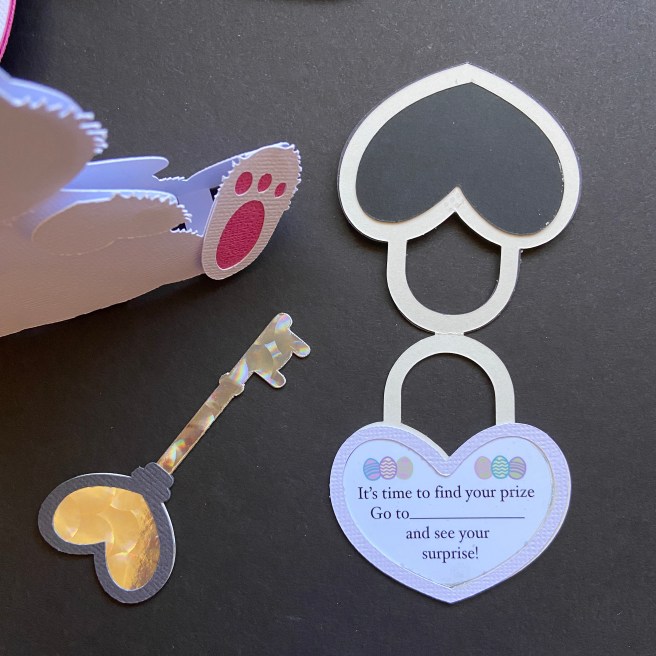
When the roof is lifted from the house, it reveals a hidden game. Inside the house lay 6 Easter eggs with hidden clues, the Easter Bunny, 2 Easter baskets, game instructions, and a lock and key. The game participants must work their way through 6 clues, gathering hidden carrots along the way. Once all 6 carrots are collected, they’ve won the key and can open the lock to discover where their surprises are hidden. Nine clues are included with the purchase of this project, making it easy to print and select the ones that best suit you. There is also a template to make your own clues if you wish to fully customize this part of the game.
House Explosion
Game Instructions
Easter Basket to Collect Carrots
First Clue
Easter Bunny with Lock and Key
Opened Lock
I can’t wait to watch my grandchildren have fun with this! I highly recommend this project and know that you’ll be amazed at the thought and detail that went into designing it. Thanks for stopping by today, and I hope you’ve enjoyed my take on the Easter House Box. Wishing you all a lovely Easter Weekend! Until next time, stay safe, well, and Happy Scrapping!
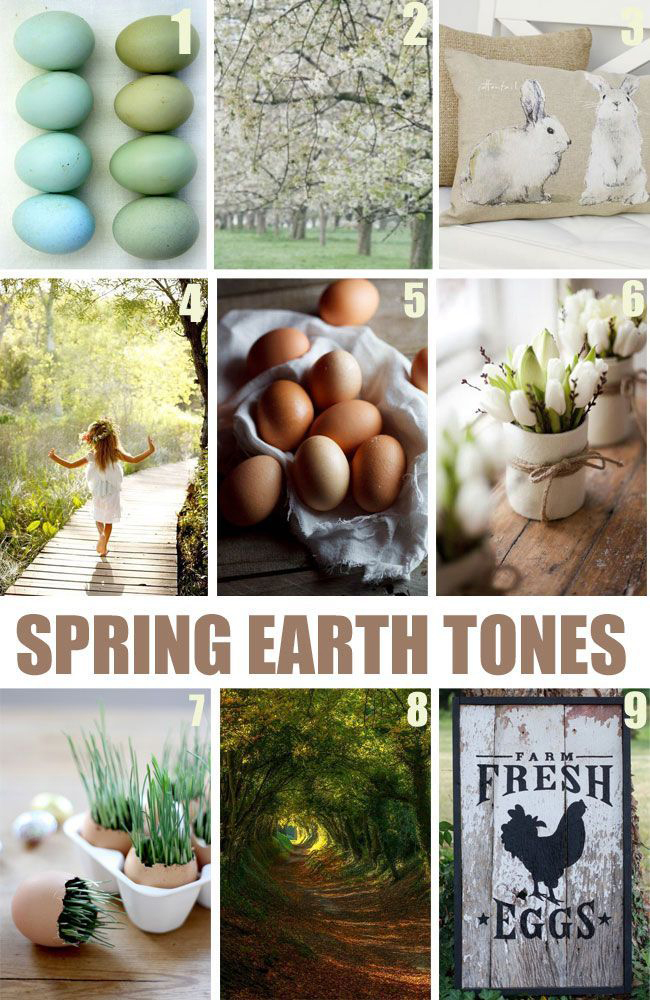
It’s my pleasure to host one of the challenges at the ScrapFest Connect event today! Challenge number 3 revolves around a mood board. Mood boards can be very inspiring and can often spark some creativity when you feel you’re in a rut. With Spring finally here and winter on it’s way out, I chose the following mood board that highlights the beautiful earth tones that come with the onset of Spring.
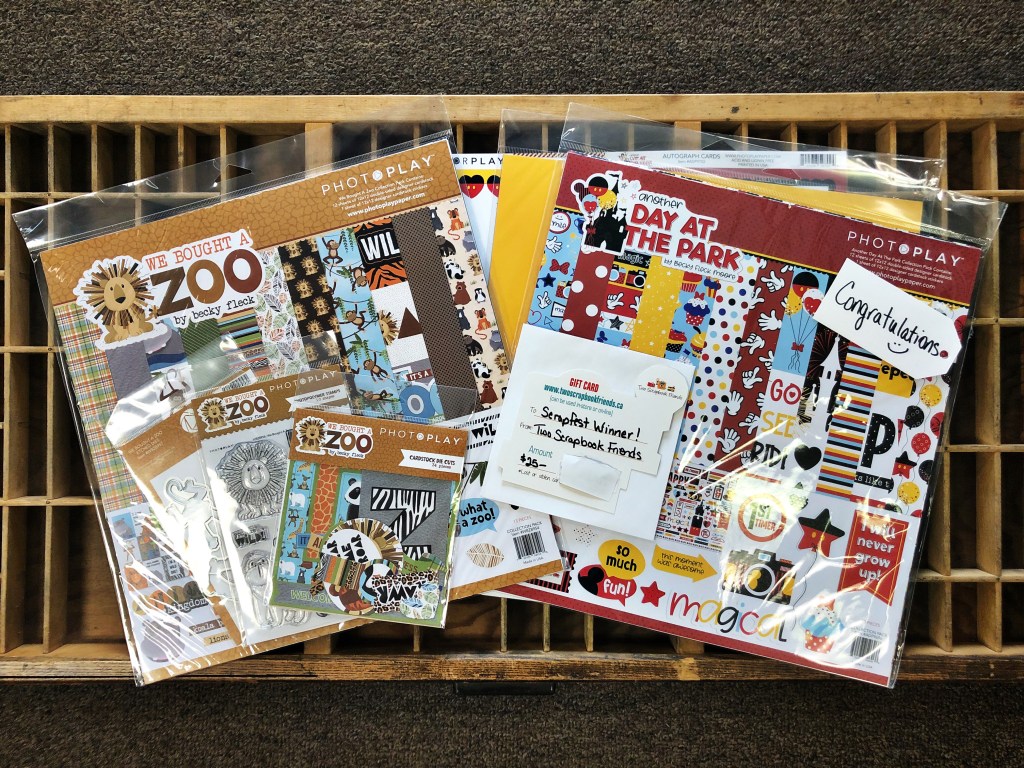
Your challenge is to reflect on the images in this mood board, pull the elements that speak to you, and get creating! You may choose to create a scrapbook layout, a card, an art journal page, mixed media or other creative project. You may enter more than once, but any entry in this challenge may not be entered in any of the other challenges today. Two Scrapbook Friends has kindly sponsored this challenge and just look at the amazing prize pack the winner will receive!
Two Photoplay Paper packs, stamp/die & ephemera + $25 Gift Certificate!!!! Free shipping in Canada! WOW!!!!!
In addition to this amazing prize package, Two Scrapbook Friends is offering all participants of ScrapFest Connect a 20% discount to shop in their online store! To receive this discount, simply enter the coupon code SCRAPFESTROCKS21 at checkout. This offer is available now and runs until March 31st. Orders may be picked up at their new location (550 Parkside Drive, Unit B6, Waterloo, ON) or shipped. PLEASE NOTE: Due to COVID in-store shopping is not available at this time.
My interpretation of the Spring Earth Tones mood board focused on images 1 – 6.
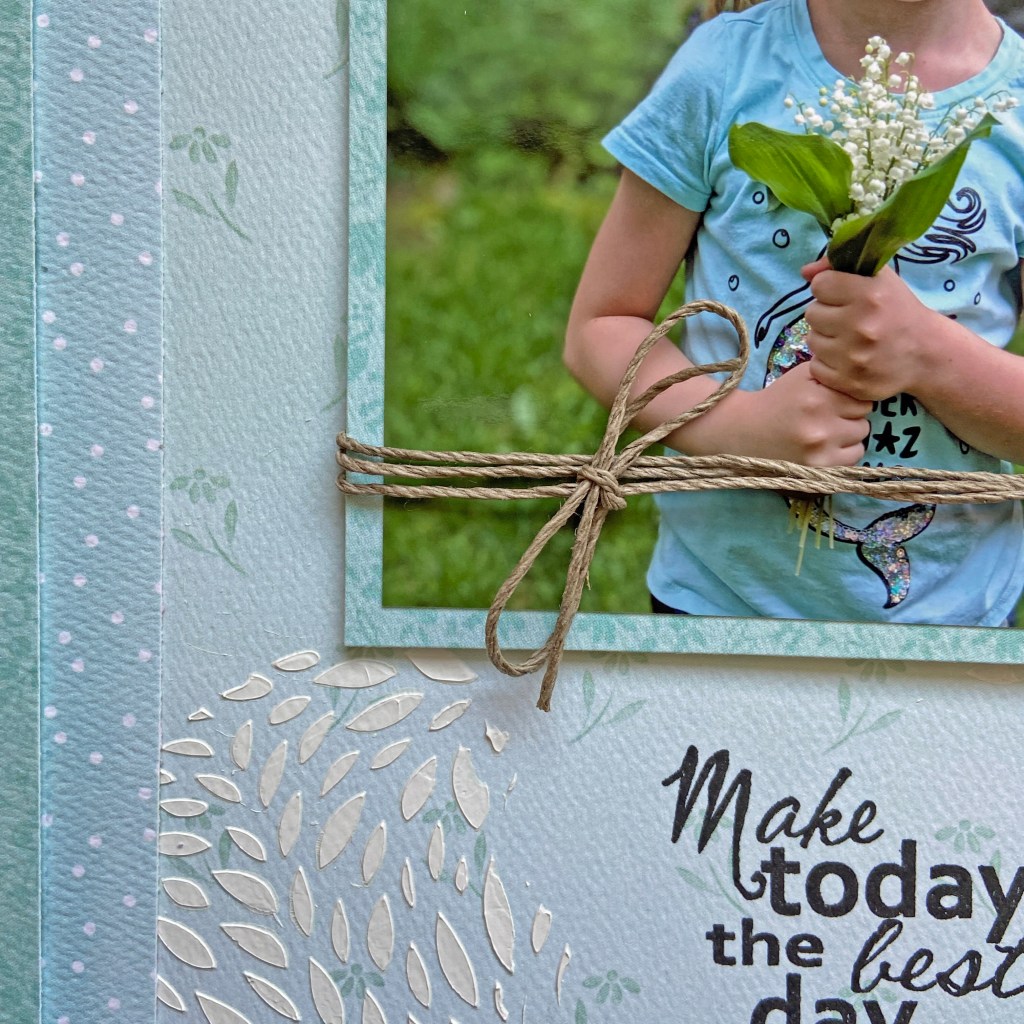
I always start the creative process around a photo and image number 4 (Flower Girl) was the inspiration to use the photo of my granddaughter from a couple of years ago. Not only did she have beautiful white spring flowers in her hands (which fit with images 2 and 6), the colours in the rest of the photo just fit so well with the spring earth tones of the mood board. Lucky for me, even her t-shirt fit the colour scheme.
I loved the soft hues of the naturally dyed eggs in image number 1. This inspired me to pick coordinating papers from Carta Bella’s Flora No 3 collection. Three of the patterned papers from this paper collection formed the background and borders of the layout. To create the top border, I trimmed the patterned paper at 1/2″ inside all four sides. The border below followed the same process by trimming the paper at 1″ from the edge of the paper on each side. These borders were set aside until the rest of the page was put in place.
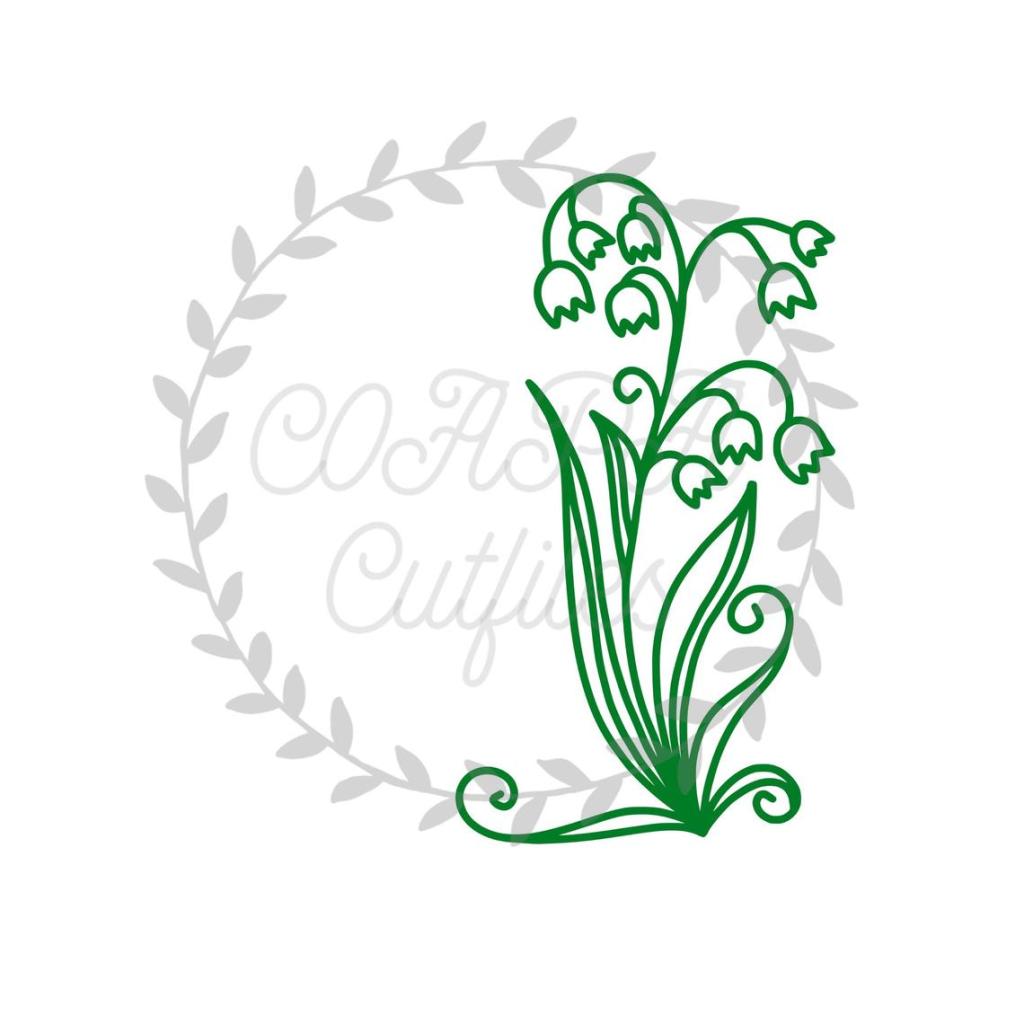
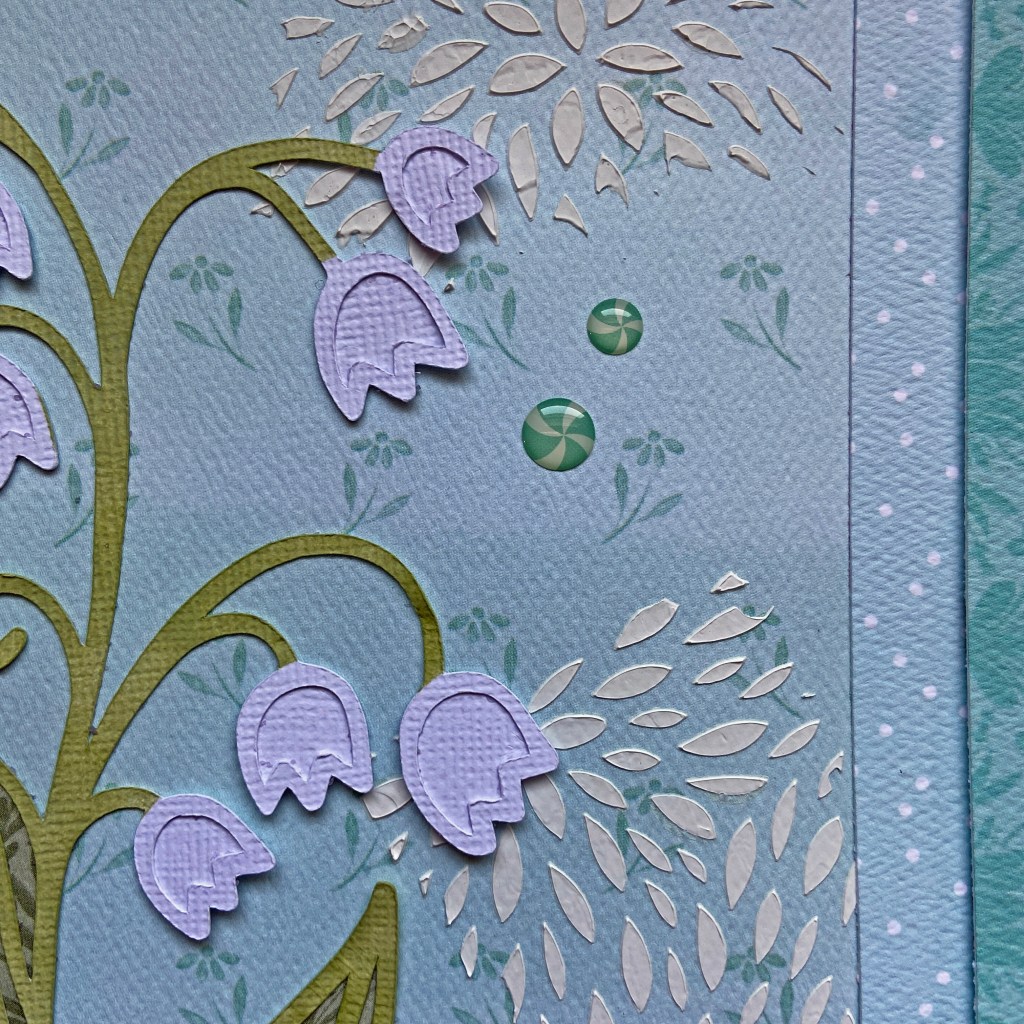
I cut this beautiful cut file from American Crafts Precision White Cardstock. The lilies were back filled with white cardstock and the leaves were back filled with coordinating green leafy patterned paper from the Carta Bella Flora No 3 paper pack. I didn’t want the outline of the leaves and flower stems to remain white, so I inked them with Tim Holtz Shabby Shutters Distress Ink before adding the back fill pieces.
The bunny was inspired by image number 3. I used the “Cottontail” Whispers die from Die-Versions. (I’m not sure if it’s still available, as I’ve owned it for quite some time.) I cut the bunny from white cardstock and layered it on fun foam that was also cut with the die. Once the bunny was completed and adhered to the layout, I added a small white pom-pom to create a fun tail and to add some dimension.
As I started to put the elements of the page together, I was unhappy with the background and felt it was a bit too much of the same colour. To lighten the look and feel of the overall layout, I used a Taylored Expressions stencil (Pretty Petals) and applied Vicki Boutin Molding Paste to different sections of the background. This added in more texture and the white brightened the layout considerably.
The earth tones found in images 5 and 6 were the inspiration to add the natural hemp cord to the lower portion of the photo. I adhered fun foam to the back of the photo to raise it slightly and to provide a nice smooth foundation. To achieve a smooth uniform finish for the photo, I cut out a small channel of fun foam that allowed the hemp to fill this space without adding further bulkiness.
Before adhering anything to my base page, I placed all of the completed elements on the page to determine where I would stamp the title phrase. Once this decision was made, I removed everything but the stamp from the page and placed it in my 12″ x 12″ Misti to complete the stamping. The”Make today the best day ever” stamp has been in my collection for well over a decade and is from Daisy Bucket. Once the stamping was completed, all the elements were secured to the layout. The final touch was to add a few coordinating shape sprinkles from Doodlebug Designs from the Peppermint Twist line. These aqua elements were a perfect match for this layout.
I hope my layout inspires you to create a project or two for this challenge. Post your creations in the associated challenge on the Scrapbook Connect Facebook page to enter the competition. Include a few quick comments or points that tell others what part(s) of the mood board inspired you. The deadline for submissions is Sunday, March 28th at 9:00 pm. I can’t wait to see what you come up with!
Thanks for playing along with me today. Stay safe, stay well and Happy Scrapping!
Isn’t it funny, that as adults we are always hoping we might just squeeze in a nap or two when the weekend comes, yet children are the exact opposite? They like to keep going, and going until they drop! Our youngest grandson Ben is at that tender age when he’s almost ready to completely give up the afternoon nap. He’ll go for days without one, and then his body gets the best of him and he’s down whether he likes it or not!
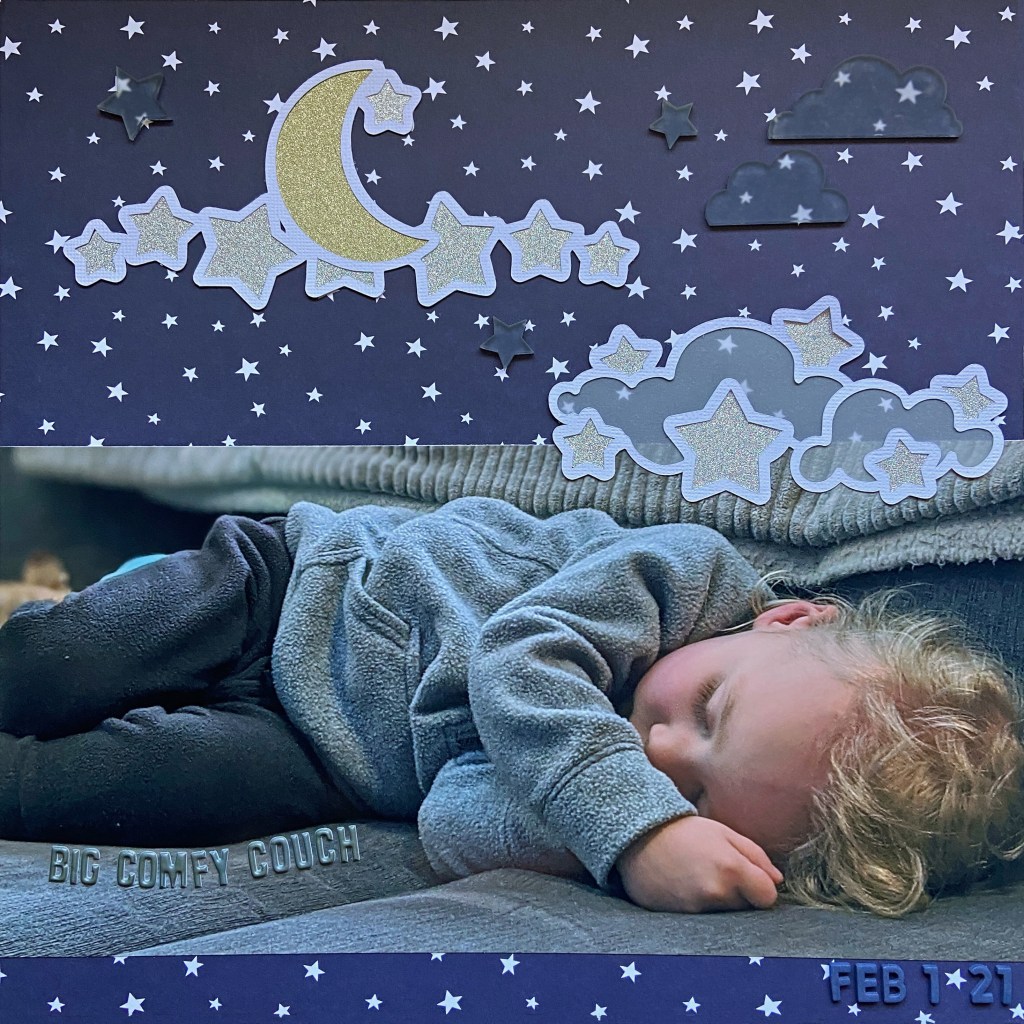
My daughter captured this beautiful photo of Ben in early February. He was playing in the den after lunch on a cold winter day. The fireplace was warming the room and the big comfy couch beckoned Ben to take a rest. He looks so relaxed and comfortable in this photo, it certainly looks ideal for a wonderful afternoon nap.
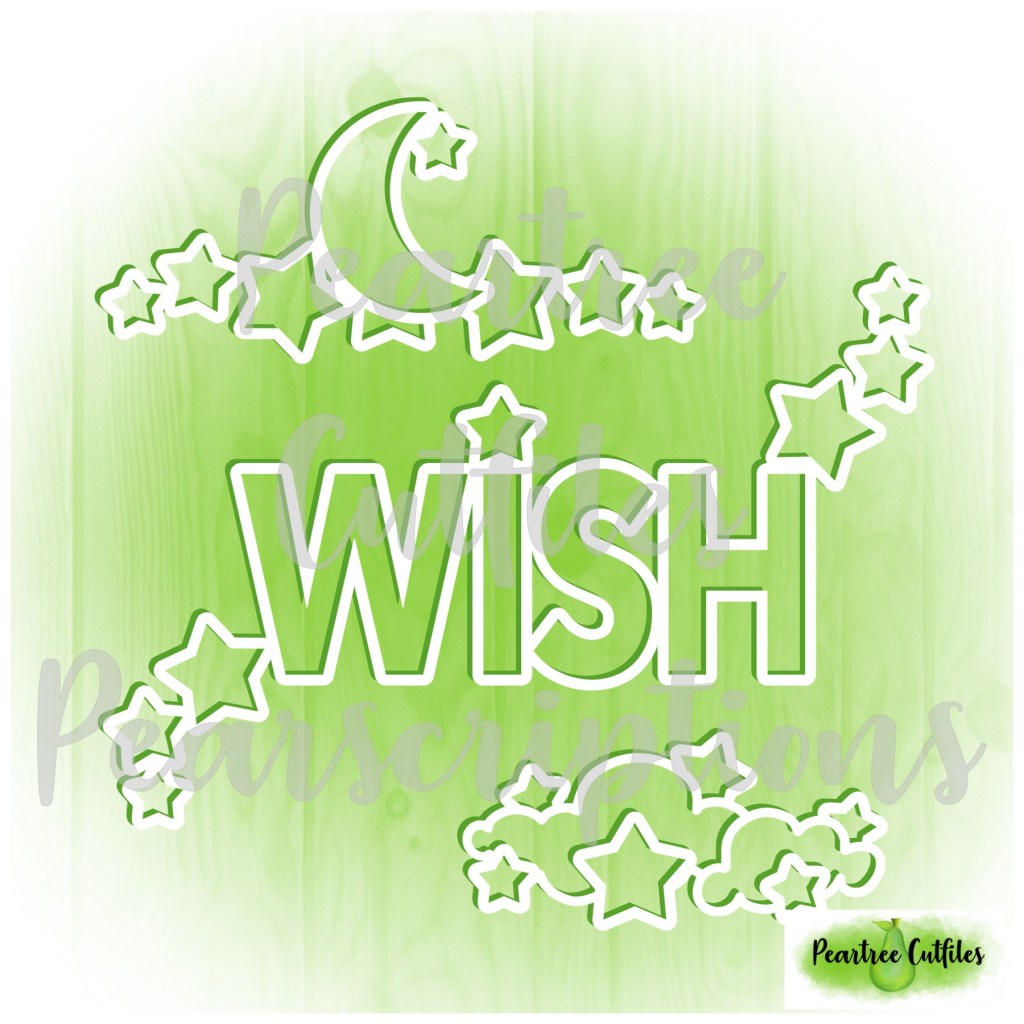
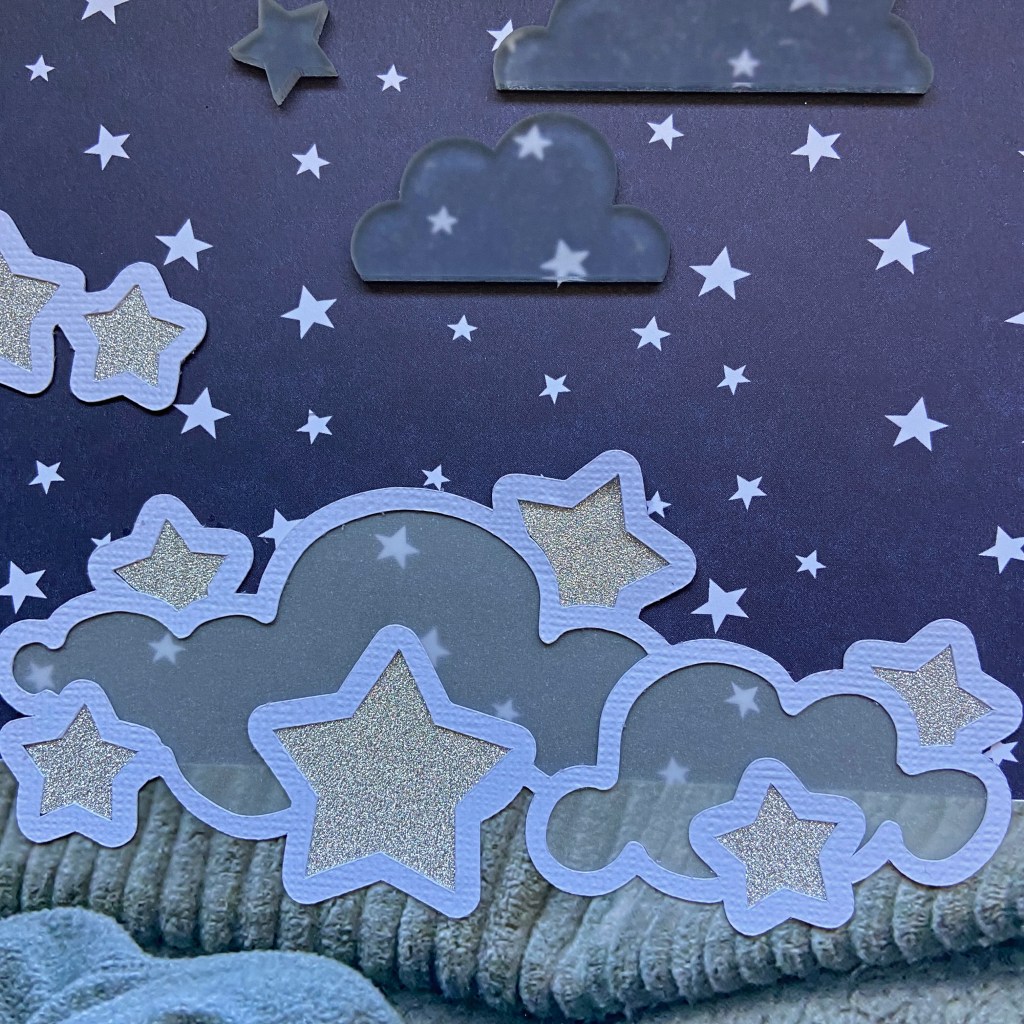
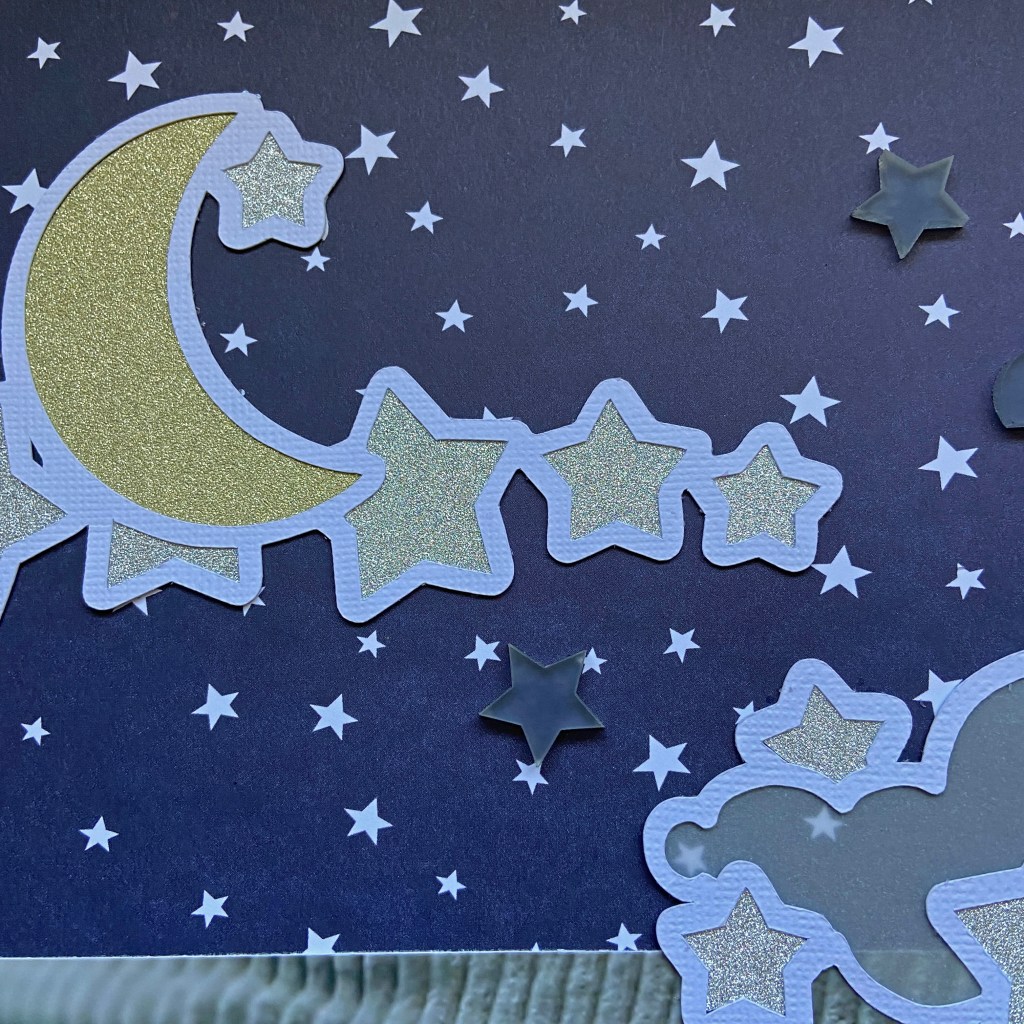
The star background paper for this layout came from Echo Park Paper Company’s Little Dreamer Boy paper collection pack. The specific paper was the back side of the Planes Palooza paper. When I saw this photo I knew right away I wanted to crop and enlarge it. I think the big photo helps draw you into the mood of the photo and layout. My March 2021 Pearscription with Peartree Cutfiles provided the perfect cut files to complement this photo and document this moment. I choose 2 of the 3 cut files that came with the Wish cut file. You can find Peartree Cutfiles here https://www.peartreecutfiles.co.uk/, but know that the file used is an exclusive file that came with the March Pearscription. I highly recommend the Pearscription, the files are just wonderful!
The stars on the cut files were backed with silver and gold glitter cardstock and the clouds were backed with vellum for a light and airy feel. I also found some acrylic shapes in my scrapbooking stash from Shimelle. They fit in perfectly and also complemented the light and airy feel I was looking for. I usually look for ways of adding a title in an unusual way to a layout. The large 12′ x 6″ photo provided the perfect opportunity to place a title. With the photo occupying centre stage on the layout, I wanted something subdued for the title. Pinkfresh Studio’s Mimi Puffy Alpha Stickers in grey were exactly what I needed to achieve this effect. Here are a few closeups of this project.
Thanks for stopping by today, and if I’ve enticed you to take a quick Sunday afternoon nap, don’t worry, it will be our little secret! Until next time, stay safe, well and Happy Scrapping!
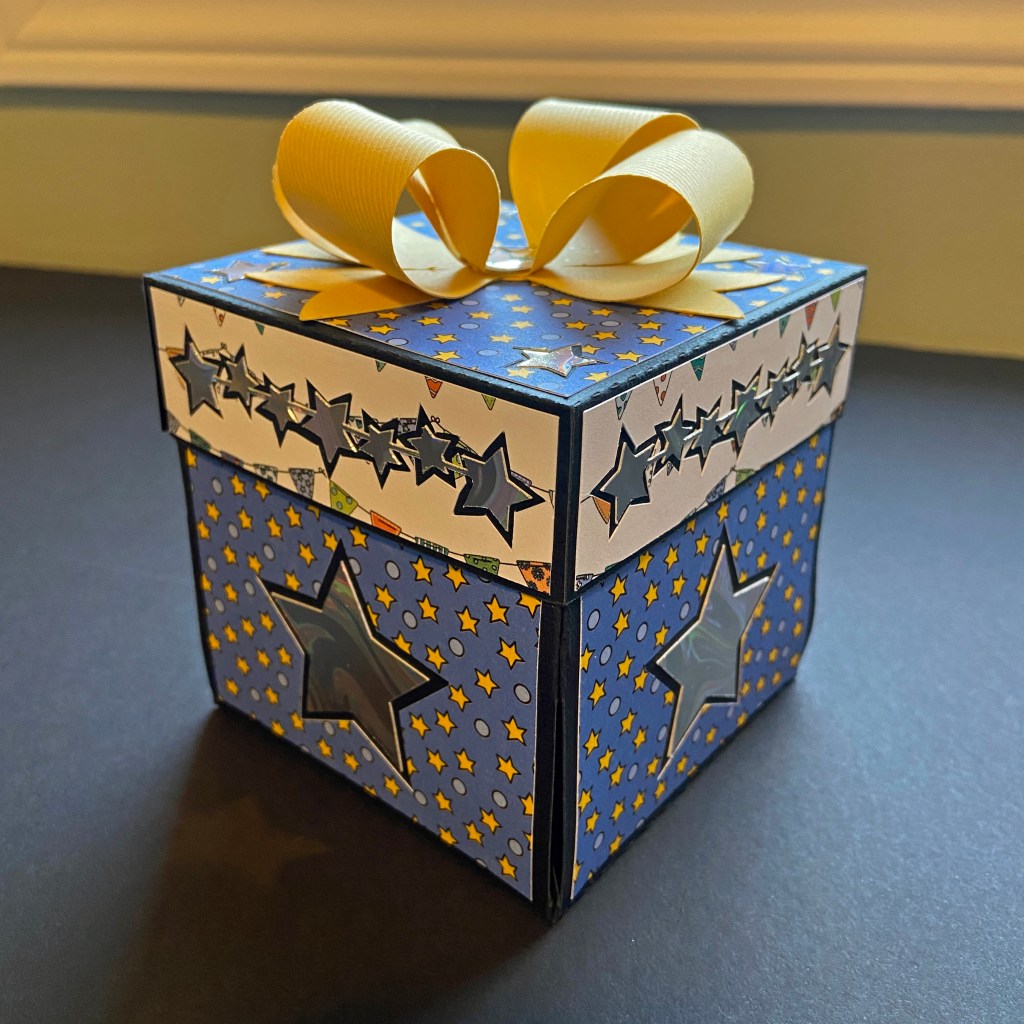
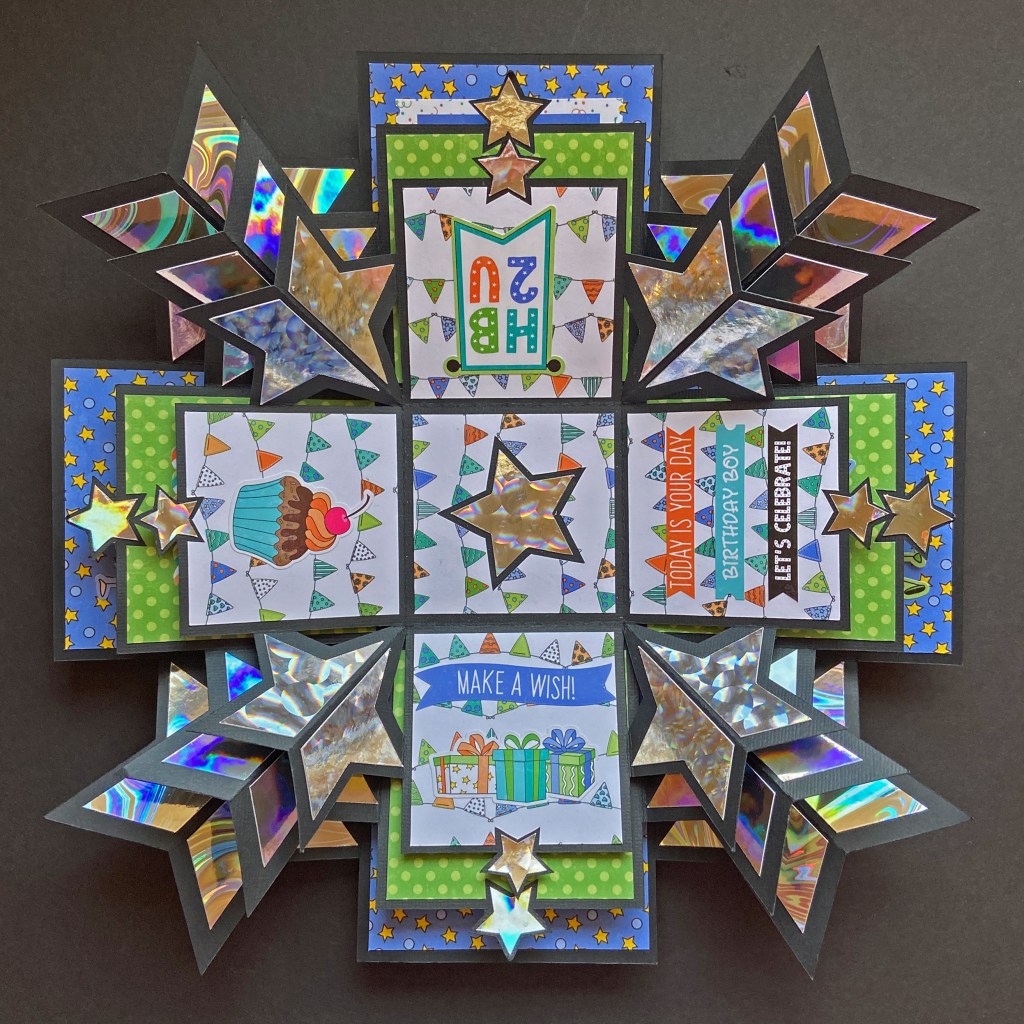
I’m back with another wonderful project from Les Pensées en Papier called the Star Explosion Box. This project was made for my grandson Owen, who turned 8 yesterday! We did our best to make this a special birthday for Owen – his second year in a row without a “kids” party. I’m glad to say, he had a lovely birthday, and I was touched when he asked me if I made him a special box for his birthday.
As with all of Giuly’s amazing projects, the purchase of this project will provide you will a full supply list and all the necessary cut files for both Cricut and Silhouette users. It is also supported by a clear, easy to follow YouTube video https://www.youtube.com/watch?v=Bm59Kwl_iH8. If you feel the previous Tower Explosion Box might be a bit intimidating to start with, I highly recommend the Star Explosion Box as a first project. It will introduce you to concepts you will utilize in other projects by LPPSVP.
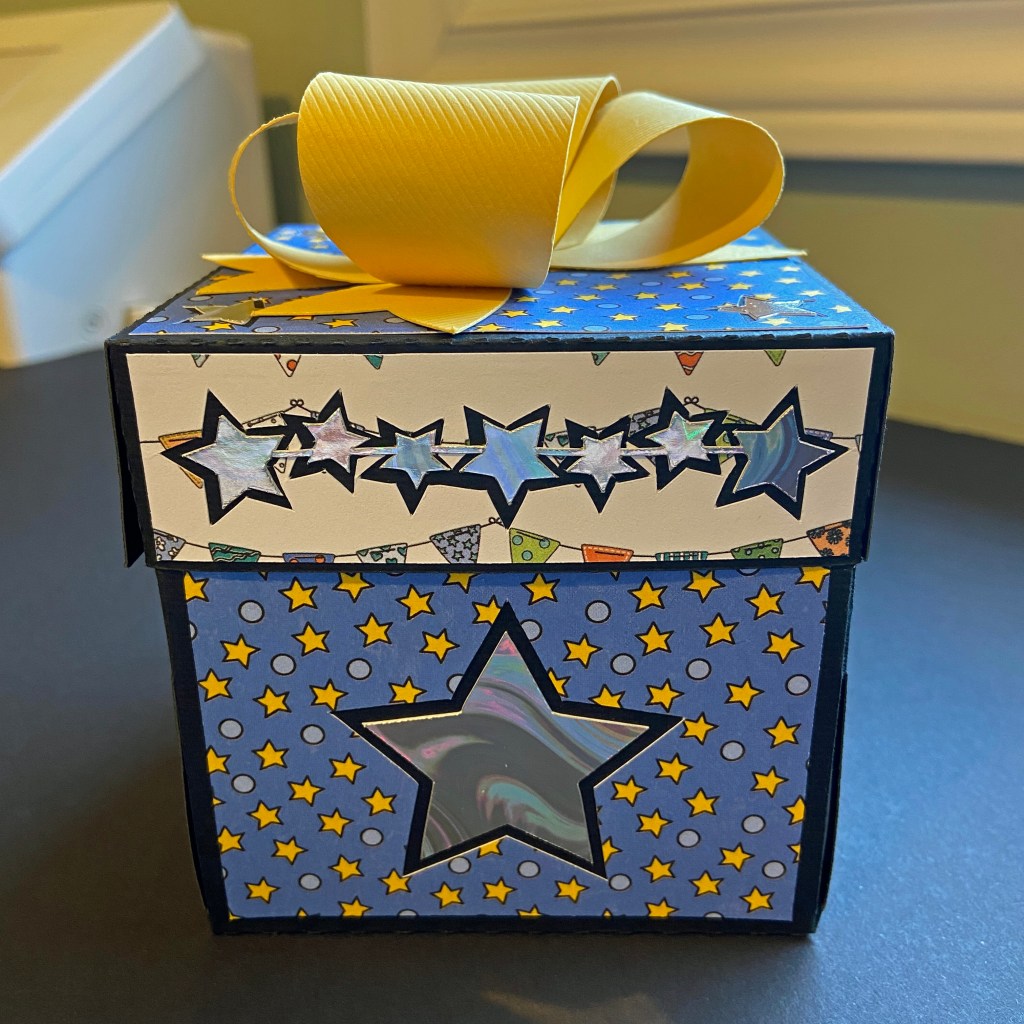
To complete this project I used 4 sheets of 12″ x 12″ black Precision Cardstock from American Crafts, the Birthday Boy Wishes paper collection pack by Becky Fleck from Photoplay Paper, and 1 sheet of 12″ x 12″ coordinating cardstock to create the bows on the top of the boxes. The paper pack includes twelve double-sided papers and a full coordinating element sticker sheet. I used three of the patterned papers and approximately 1/2 of the sticker sheet to decorate the project. To create the fun stars found in the corner of each explosion level, I used Lawn Fundamentals Metallic Cardstock in “Holographic 2.0” by lawn fawn. Glossy Accents by Ranger Ink was used to construct and attach the bows seen in this project. I have always found it a reliable, strong bond for projects like this.
The bottom layer of this project creates a large box that conceals all the other hidden layers, or explosions. The following pictures provide examples of the detail found in the large box.
Once the lid is removed three explosion levels and a small independent box is revealed.
The small box in the centre is concealing a little surprise for Owen. I’ve been reading Harry Potter to both Owen and Maddie for years now. I found a small Lego figure that fit perfectly inside this small box. When the small box was opened it revealed “Ron Weasley”. Owen was thrilled to add this little surprise to his Lego collection!
I hope I’ve encouraged you to try an Explosion Box. Les Pensées en Papier has so many options to choose from https://www.etsy.com/shop/LesPenseesenPapier. They are as much fun to make, as they are to give! Until next time, stay safe, well and Happy Scrapping!