Christmas Market Vienna

Who’s ready to go on a ride with me?! On a recent visit to see family in Austria, we had the wonderful opportunity to visit the Christmas Market in front of Vienna’s City Hall (Rauthausplatz Christkindlmarkt). To say it was magical, would simply be an understatement. The sights, the sounds, the smells, the tastes – every turn was a new and exciting discovery. The roots of this market date back to the late 18th century and over 3 million visitors are expected to attend this year. I am so fortunate to count myself among them! A highlight for me was taking my grandchildren on this gigantic, two-tier carousel.

I am thrilled to share with you my second layout as a Guest Designer for Paige Evan’s 25 Christmas Cut Files! Paige’s Carousel cut file was perfect to help me document this wonderful moment. This cut file is part of the 25 Christmas Cut Files released this year. It can also be purchased separately in Paige’s shop at https://bit.ly/digitalcutfiles. To start this layout I cut the file from white card stock and backed it with several patterned papers from the Sugarplum Wishes collection.

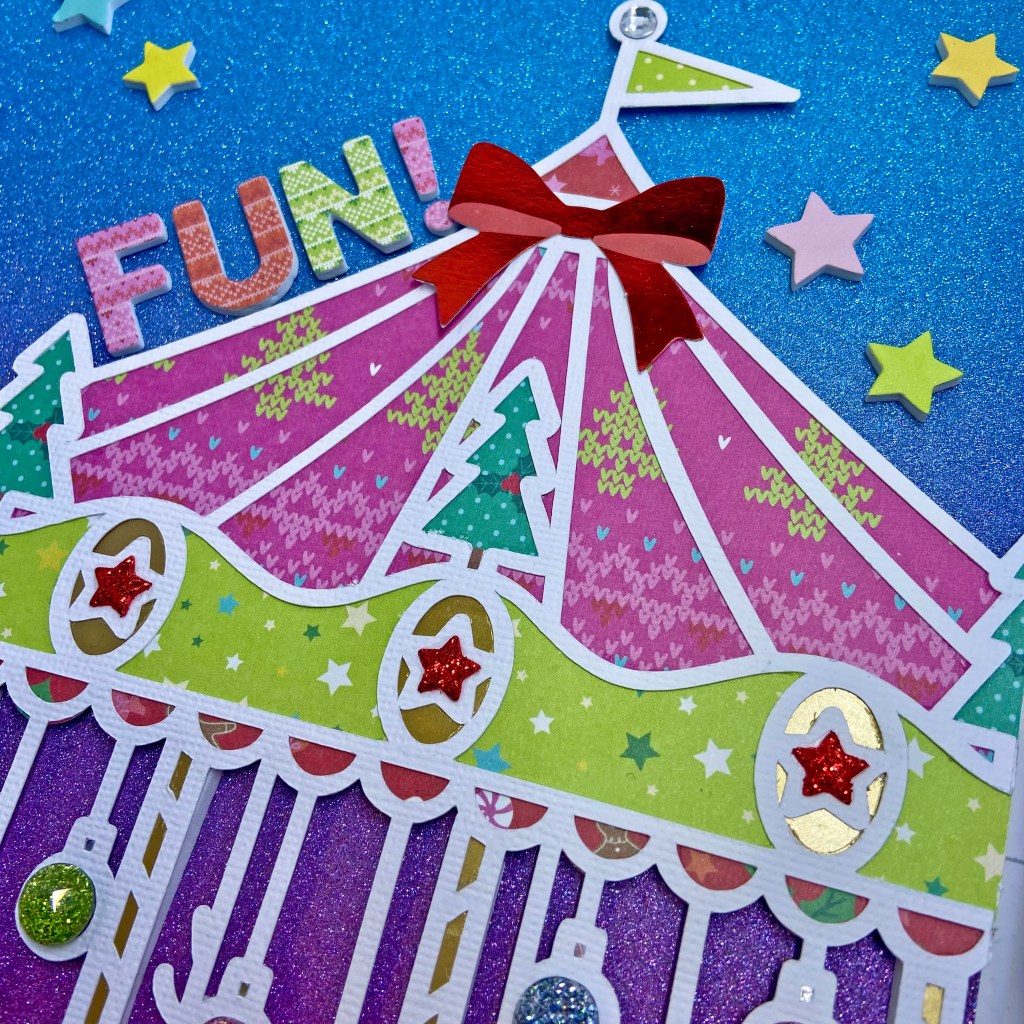
The trees at the top of the carousel were fussy-cut from paper #11. They fit perfectly in the canopy. I included a bit of gold foil cardstock for the star medallions, pony poles and at the base of the carousel. Once I completed this step, I placed the cut file on my background paper and offset it slightly to the right. After trimming the cut file on the right, I adhered fun foam to the entire back to help lift it off the page. This technique aided in the illusion of being able to jump on the carousel. The stars adorning the canopy and at the base of the carousel were cut from red glitter fun foam.

The green enamel dots at the base of the carousel and the pink enamel dots on the noses of the ponies both come from the Sugarplum Wishes collection. Clear rhinestone dots were also used at the base of the carousel and at the top of the flag pole. The large glitter dots that fill in the hanging ornaments were purchased at a stationary store in Austria.

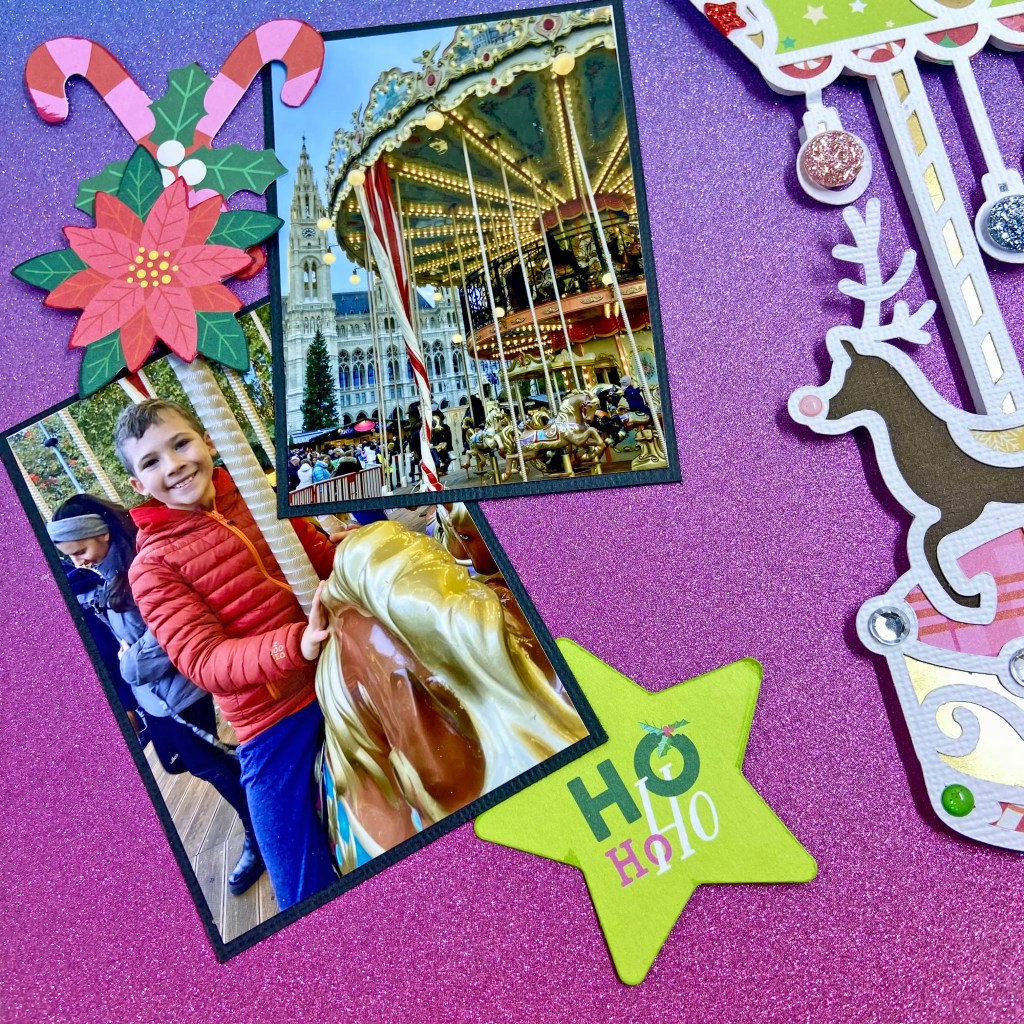
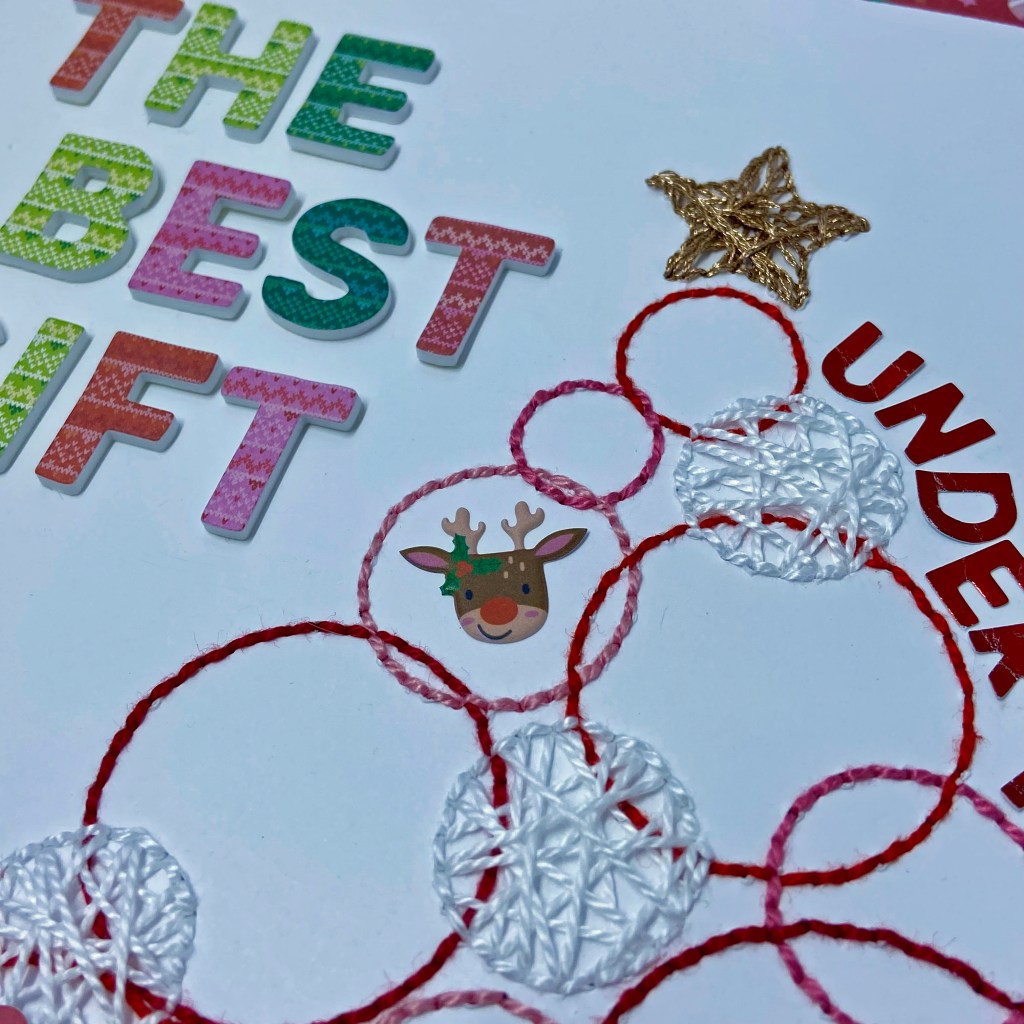
All of the embellishments on this page came from the Sugarplum Wishes Ephemera Die Cuts and the Floral & Snowflake Die Cuts packages. The word FUN! and the stars at the top of the page belong to the Foam Stickers sheet. The title, Christmas Market Vienna, was added using the multi-coloured alphabet stickers from the large Stickers package.

And there you have it! A special memory with my grandchildren that we will reflect on for years ahead! Thanks for stopping in today. I wish each one of you the Happiest of Holidays! To quote my Mom: “Go and make wonderful memories!”

Until next time, stay safe, stay well, and Happy Scrapping!

The Best Gift

I am extremely excited to share my first project as a Guest Designer for Paige Evans Christmas Cut & Stitching Files for 2023! Here’s where you can purchase each bundle: 25 Christmas Stitching Cut Files https://bit.ly/25christmasstitchingcutfiles, 25 Christmas Cut Files https://bit.ly/25christmascutfiles. Any of these cut files can also be purchased separately in Paige’s shop: https://bit.ly/digitalcutfiles. With the release of these beautiful bundles, Paige is releasing a free cut or stitching file every day from December 1 – 25th, so don’t miss out on all these beautiful designs. This stitching file is one of Paige’s freebies, and you can grab it from her Happy Scrappy Place Facebook Group.

Embroidery and cross-stitching have been part of my crafting adventure for decades. I jump at any chance to incorporate these skills into a scrapbook layout! This cut file is called Christmas Tree Circles for Stitching. And it’s yours free at https://www.facebook.com/groups/happyscrappyplace! To begin this project, I cut the plain white cardstock to 11 & 1/2″ x 11 & 1/2″, and cut the stitch cut file using my Silhouette Cameo. I chose non-traditional colours for the tree and selected coordinating hues of pink, red and white DMC pearl cotton floss to stitch the tree.

I used a simple back stitch technique, alternating the reds and pinks as I worked through the circles in this cut file. I used the white pearl cotton floss on the smaller circles and filled in the circles using a string art technique. To create a string art effect, randomly stitch your thread from one point to another, working in opposite directions and inserting in another point anywhere to create the effect. Make sure you pass the floss through each point in the pattern. I like the completed result. It made these circles look like 3D ornaments on the tree and integrated more texture into the overall layout. I used this same string art technique on the gold start at the top of the tree. I used a chain stitch in brown floss around the tree trunk. This stitch helped provide a sturdy look to the large tree.

I turned to Paige’s magical Sugarplum Wishes Collection to create this whimsical layout. Sugarplum Wishes transport me to a world of wonder and enchantment. How fitting for the Christmas Season! Once I completed the stitching I centred and adhered the page to the bright red candy cane paper (paper 7) from the collection. My photo was also matted on this bright, fun paper. To build the title for the design, I used coordinating Christmas Sweater Thickers and the red foil letters found in the generous sticker pack.

I used a combination of embellishments from the Sugarplum Wishes collection to complete this layout. In addition to placing several poinsettias from the Floral & Snow Flake Die Cuts package to frame the design, I used the Santa and sweater from the collection of Ephemera Die Cuts to add to the page. I love adding texture and dimension to my layouts, and one of the poinsettias and Santa were backed with fun foam to achieve this effect. I randomly filled the centres of the poinsettias with enamel dots from the Sugarplum Wishes collection and added a small white pompom to Santa’s hat to further enhance this effect.

The presents below the tree belong to the Sugarplum Wishes Foam Stickers sheet. I punched the number 25 found on coordinating patterned paper in the collection (paper 8) and adhered it to the layout using more fun foam. I “hung” the remaining ornaments (penguin, candy canes, gingerbread men & reindeer) on the tree using matching puffy stickers.

Be sure to visit Paige’s Happy Scrappy Place Facebook Group to collect the free Christmas Cut File each day (December 1 – 25)! Thanks for joining me today and I hope I’ve inspired you to try some stitching and playing with Paige’s fabulous products! Stay tuned for another one of my layouts from these incredible cut files next week. Until then, stay safe, stay well, and Happy Scrapping!

All of Me Loves All of You

Happy Valentine’s Day, friends! Today’s post comes to you in celebration of all things love and my three beautiful grandchildren who fill my heart to the top every single day! These three are so happy and full of joy it’s a pleasure to spend every moment with them. How lucky I am that all I have to do is walk across the street to see them!

The starting point for this layout was selecting two cut files from Peartree Cutfiles. The Snowflake Heart was an obvious choice for fitting with Valentines Day and the picture I chose. The title All of Me Loves All of You was the perfect fit for how I feel about my grandkids. It simply says it all! The foundation of the page is white textured Precision Cardstock from American Crafts. I opened both cut files in Silhouette software and sized them on the page to ensure I would have enough space to fit both. I slid the title off the cutting area to focus on the snowflake heart. Next, I traced the design and used the Release Compound Path function to allow direct access to all the design components. Finally, I removed the outside cutting line of the large heart before sending the file to cut. I did not want the cut file as a separate element but wanted it cut directly into the white cardstock.

I pulled beautiful Ali Edwards stamps from my stash to stamp around the base of the heart. I pulled from two of her collections for Technique Tuesday, Sweet Baby and Loving Words. My 12″ x 12″ Misti came in handy for this task. This wonderful tool allowed me to bend and wrap my stamps around the cut out design. Once the stamping was complete, I set about inking the blue hearts on the remaining background of the white cardstock. For this task, I used the Lots of Heart stencil from My Favorite Things (MFT). I liked the random whimsical look of this stencil, as it helped mimic falling snowflakes. I chose Tim Holtz’s Chipped Sapphire Distress Ink for the stenciled hearts. I liked the way this shade coordinated with the papers from Carta Bella’s Welcome Winter collection, which were chosen to complement my grandchildren’s snowsuits.

I then moved on to cutting and backing my title for the layout. I chose the Light Blue coordinating solid paper from the Welcome Winter line for the outline. I backfilled the word Loves with a finely dotted vellum from an old collection by Papertrey Ink called Sheer Basics. The completed cut file was then secured to the page before moving to the final stages.

I placed my photo on the upper right-hand side of the Snowflake Heart, behind the white cardstock. I then back-filled the entire background of the cut file with the Winter Wonderland patterned paper from the Welcome Winter collection pack. The remaining elements for this layout were a few chipboard accents from the same collection and a slew of die-cut snowflakes in various sizes and papers from coordinating vellum and solid patterned papers. The beautiful Snowfall Thinlits Dies belong to a set created by Sizzix for Stampin-Up! The final step was adding some enamel dots from the Welcome Winter collection to the large snowflake in the cut file.

This layout did take some time to complete, but I am so happy with the end result. Don’t be afraid to experiment and play while you create your scrapbook pages. It’s a fun way to complete a page, and to strengthen your paper crafting skills!

May your Valentine Day be filled with love and joy! Thanks for stopping by, and until next time, stay safe, stay well, and Happy Scrapping!

Gingerbread Fun

HO HO HO! It’s just two more nights until the big day! Where did December go? Today I’m sharing a layout that documents Maddie building her gingerbread house last December. She had a blast putting it together, but I think she enjoyed eating the candy best of all!

I chose the Gingerbread House Two cut file from Confessions of a Paper Addict (COAPA) as the main focal point for this layout. The whimsical lines in this cut file reminded me of the fun I had with Maddie as she decorated her gingerbread house. The cut file comes in SVG format, so I used the trace function in Silhouette Studio to trace it before ungrouping it to backfill the sections. I also find that using the Fill section to colour in each piece facilitates a quicker process when preparing to cut.

The main paper line for this layout is Hot Cocoa from American Crafts. It came in a paper pad of 48 papers. I used this paper collection in November 2019 to make a Christmas Album for a class at ScrapFest. It also has a whimsical feel and was an excellent fit for this cut file. I chose the kraft paper with the snowmen and falling snow for the base page of the layout. The red paper with snow falling, black paper with snowflakes and black paper with peppermint candies were all used to construct the gingerbread house cut file. I fussy cut the peppermint candies to fit the scalloped border of the roof and the pinwheel candy to the left of the front door. I chose an embossed white paper for each section laden with snow. I turned to glitter papers from My Favorite Things paper collections to back the windows and fill the wreath. For added dimension, I used pop dots to add the wreath to the front of the house. A red acrylic dot from doodlebug design worked perfectly for the doorknob.

The Christmas Tree to the right of the gingerbread house comes from Memory Box Inc. It is called the Flowering Christmas Tree. I slid it partially behind the gingerbread house and wrapped some of its limbs in front. I added rhinestones to the centre of each flower to complete the Christmas tree.

All of the snowflakes in this layout came from a collection by Sizzix called Snowfall Thinlits Dies. This set was made exclusively for Stampin’ Up! a couple of years ago. It is an extensive set of snowflake dies in multiple sizes. I’ve used this set multiple times and have never regretted the investment. I purchased them through a good friend and Stampin’ Up! demonstrator, Margie Stares. Check out Margie’s Stampin Up! blog for lots of inspiration. To enhance the magical feel of this layout, I added rhinestones to each snowflake. The final touch was adding the title using doodlebug designs teensy type letters in white. I chose the round letter stickers to mimic the falling snow and snowmen on the patterned paper. 

I appreciate you stopping by today and hope you’ve found some inspiration for your Christmas layouts. May your holiday season be full of magic, incredible moments and lots of love!

Until next time, stay safe, stay well, and Happy Scrapping!

Summer

Cottage season is over, and crafting season is back on! While I love summer and the cottage, I am always happy to get back into my craft room. It seemed fitting to share a summer layout with you as I get back into my crafting groove.

This summer, my son Sean, and his fiancé Tanis traveled from out west to our cottage in Muskoka. It was Sean’s first trip back in six years and his first trip to bring Tanis. We had a wonderful week with them and loved introducing Tanis to everything we love to do in the summer at the cottage. Tanis had a go at tubing and enjoyed a fun-filled, action-packed ride with Maddie and Owen! This picture represents the fun they all had!

To document this moment I used the FREE SUMMER SVG cut file from Marcy Milly SVG.

I selected a photo of our dock to backfill the cut file. You can accomplish this effect in two different ways. You can trace the outline of the cut file onto your photo and then fussy cut, or you can open the photo in Silhouette software and then open the SVG cut file over the top. This positioning allows you to move the cut file exactly where you want it cut. To achieve this, release the compound path of the cut file and remove the outline of the cut file and any extra inside pieces. This isolates the six letters that spell SUMMER. Then create a slight offset of the individual letters (0.05 works well) and delete the original (internal letters) before you cut. The result gives you a slightly larger backing to securely adhere the letters to the back of the cut file. The following pictures provide some close-ups of the title.

This layout was designed using Cocoa Vanilla Studio’s Boys Rule collection. The specific paper was called Entitled, and I used stickers, word phrases and chipboard embellishments from the collection to complete the layout.

Thickers Happy Life foam letter stickers were used to add the subtitle Tubing with Auntie Tanis and the date.

We had such a lovely summer this year and made exceptional memories that I look forward to documenting this winter. I hope you all have wonderful summer memories to get you through the long cold winter ahead. Thanks for visiting, and until next time, stay safe, stay well and Happy Scrapping!

The Girls!

With summer just around the corner, it’s time to share a highlight from summer 2020. We’ve just come out of a very long lockdown and I can’t wait to make some fun memories this summer with my family and friends! This photo is one of my favourites from last summer as it captures 3 generations. We get so busy having fun together that we often forget to pause for a minute to take some pictures. This picture includes me, my daughter and granddaughter on a beautiful summer day at the cottage – our favourite place to be in the warm weather! I’m so thrilled that Marcy Milly SVG designed thegirls! cut file. It was exactly what I was looking for! This title lends itself to so many possibilities – sisters, reunions, weddings, sororities, girls night out, and many more – so many options!

I decided to use the Vicki Boutin Color Study paper, ephemera, and stickers for this layout. The bright bold colours remind me of beautiful summer days. I cut the title in Fushia cardstock and then offset the title 2 separate times to layer it in coordinating (orange and teal) cardstock. This also helps draw more attention to the title cut file. Once my picture was printed and matted I added fun foam to the back of the cut file to pop it up further and to create some dimension on the layout.

The rest of the layout came together quite quickly. Several embellishments came from the Vicki Boutin Color Study Journal Ephemera and Icon Ephemera packages. I also utilized a sticker (This is the Stuff That Matters) and the gold foil dots came from the 6 x 12 Sticker sheets that belong to the same collection. The date was added using teal glitter foam letter stickers from Thickers called Sunny.

As we start to see daylight in this pandemic, I hope the summer of 2021 is one of love and laughter for you. I can’t wait to hug so many important people in my life!! And don’t forget to grab pictures of your reunions and events that bring us back together. This is going to be a summer to celebrate!

Until next time, stay safe, stay well, and Happy Scrapping!

Everyday Moments

Even though we’ve been living through a pandemic for well over fifteen months now, it’s still easy to find joy in everyday moments. My daughter is so good at sending me random pictures of our grandchildren, and she knows every picture brings a huge smile to my face. Back in May 2019, she sent me this picture of herself and her youngest, Ben. I was overjoyed to see her beautiful face in this photo. Her two oldest children were in online school at the time, and nothing special was going on. It was just a perfect moment to capture Mom and baby in a photo for prosperity. This picture just fills me with love and joy!

I used Carta Bella’s Flora No 3 collection pack for all of the patterned papers in this layout. I love the soft feel of this paper line and it coordinated beautifully with the shirts Ben and Lindsay were wearing. The background paper is the reverse side of Elegant Stems patterned paper. The layout frame and matching cutouts for the title and floral cluster came from the Elegant Large Floral patterned paper. The photo was matted using the backside of two coordinating patterned papers from the collection called Elegant Small Floral and Elegant Journaling Cards.

I chose two cut files from Peartree Cutfiles for this layout. The title cut file Everyday Moments was cut from white cardstock first. It’s such a versatile cut file and was one of the free weekly cut files from the Peartree Cutfiles Facebook Group. Usually, I offset the cutout letters and back fill the title, but for this layout, I decided to keep them the same size as the original title. First, they were cut from coordinating patterned paper and then they were backed with Taylored Expressions Foam Sticky Strips to provide the texture and dimension.

I altered the second cut file called Floral Bunny Ears to suit my needs for this layout. By using the knife tool in Silhouette Studio Design Software, I was able to separate the bunny ears from the gorgeous floral cluster. This technique is also a great way to stretch some of your cut files. Once the floral cluster was sized properly, it was also cut from white cardstock. I used the Silhouette Studio software and the Fill Pattern function to plan out which coordinating patterned papers would be cut to back the cut file. I use this function often when backing an intricate cut file.

The final touches on the floral cluster were adding a few acrylic dots from various collections. The date was added to the left of the photo using rose-coloured thickers from American Crafts, called Happy Life.

I’m so pleased with the delicate feel of this layout. It helped me preserve a very precious moment in time between Mother and Son. If you’ve hesitated scrapbooking day to day moments, jump in! Our scrapbooks should be filled with memories of everyday moments, good and bad, in addition to the highlights like birthdays and vacations. What will you work on next? Until next time, stay safe, stay well, and Happy Scrapping!