ScrapFest Connect – Challenge #3!

It’s my pleasure to host one of the challenges at the ScrapFest Connect event today! Challenge number 3 revolves around a mood board. Mood boards can be very inspiring and can often spark some creativity when you feel you’re in a rut. With Spring finally here and winter on it’s way out, I chose the following mood board that highlights the beautiful earth tones that come with the onset of Spring.

Image courtesy of Taryn Whiteaker Designs @ tidbits-cami.com
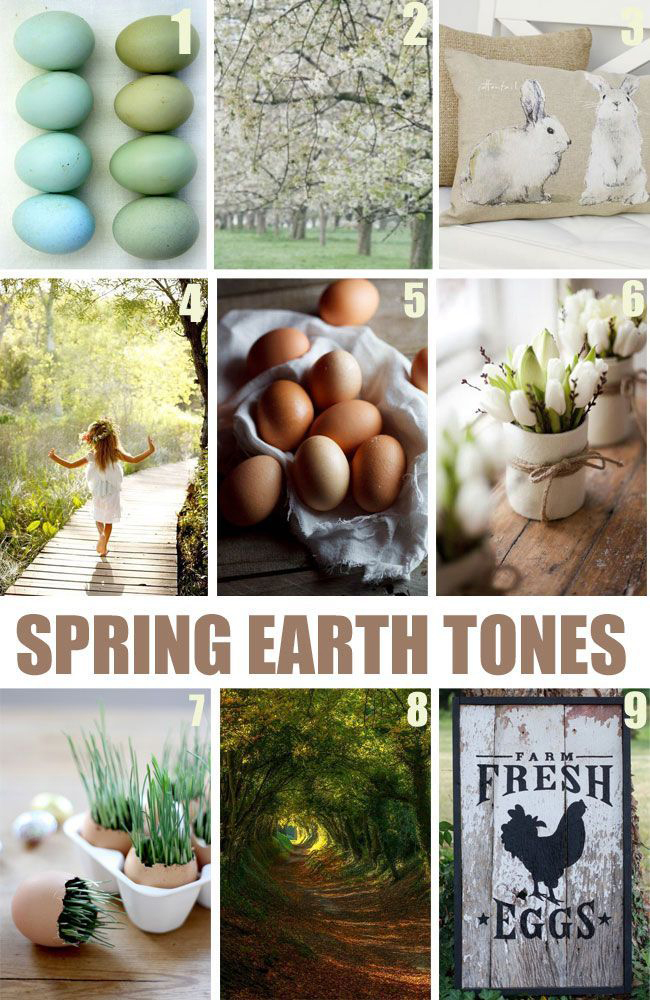
1. Natural Dyed Eggs 2. Orchard 3. Bunny Pillows 4. Flower Girl 5. Eggs 6. White Tulips 7. Wheat Grass in Egg Shells 8. Path 9. Farm Fresh Eggs

Your challenge is to reflect on the images in this mood board, pull the elements that speak to you, and get creating! You may choose to create a scrapbook layout, a card, an art journal page, mixed media or other creative project. You may enter more than once, but any entry in this challenge may not be entered in any of the other challenges today. Two Scrapbook Friends has kindly sponsored this challenge and just look at the amazing prize pack the winner will receive!

Two Photoplay Paper packs, stamp/die & ephemera + $25 Gift Certificate!!!! Free shipping in Canada! WOW!!!!!

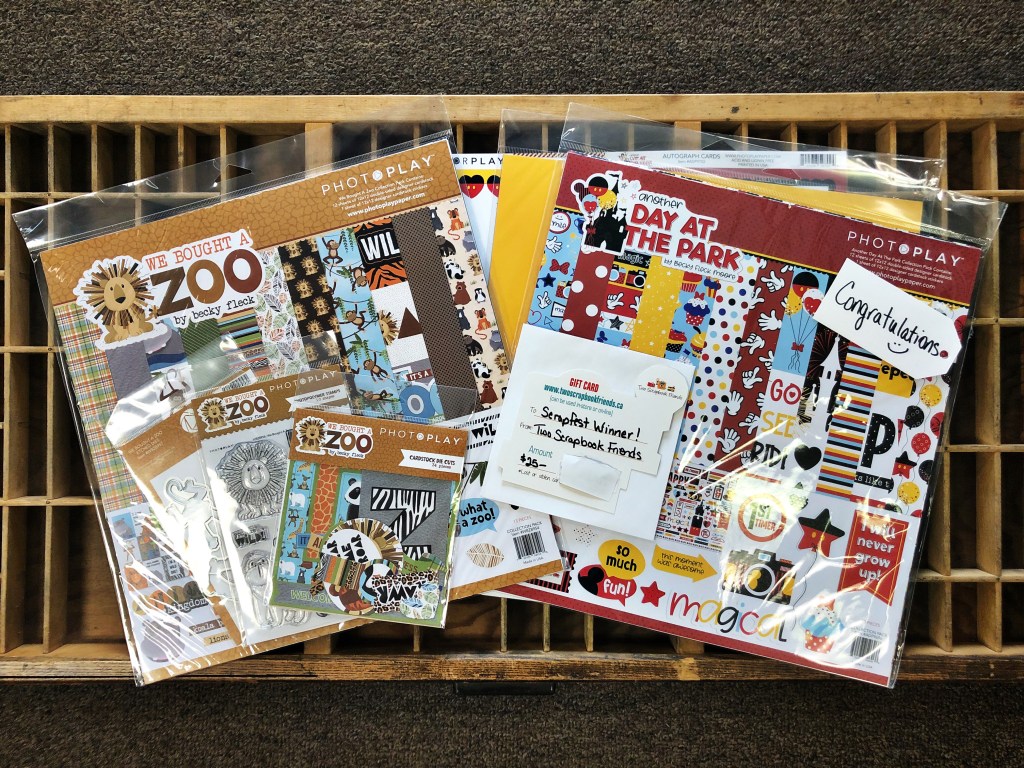
In addition to this amazing prize package, Two Scrapbook Friends is offering all participants of ScrapFest Connect a 20% discount to shop in their online store! To receive this discount, simply enter the coupon code SCRAPFESTROCKS21 at checkout. This offer is available now and runs until March 31st. Orders may be picked up at their new location (550 Parkside Drive, Unit B6, Waterloo, ON) or shipped. PLEASE NOTE: Due to COVID in-store shopping is not available at this time.

My interpretation of the Spring Earth Tones mood board focused on images 1 – 6.

I always start the creative process around a photo and image number 4 (Flower Girl) was the inspiration to use the photo of my granddaughter from a couple of years ago. Not only did she have beautiful white spring flowers in her hands (which fit with images 2 and 6), the colours in the rest of the photo just fit so well with the spring earth tones of the mood board. Lucky for me, even her t-shirt fit the colour scheme.

I loved the soft hues of the naturally dyed eggs in image number 1. This inspired me to pick coordinating papers from Carta Bella’s Flora No 3 collection. Three of the patterned papers from this paper collection formed the background and borders of the layout. To create the top border, I trimmed the patterned paper at 1/2″ inside all four sides. The border below followed the same process by trimming the paper at 1″ from the edge of the paper on each side. These borders were set aside until the rest of the page was put in place.

The cut file for this project is called Lilly of the Valley and it comes from COAPA (Confessions of a Paper Addict). You can find this cut file here https://www.etsy.com/ca/listing/736576883/lilly-of-the-valley-cut-file-svg-png-pdf?ref=hp_opfy-1&pro=1.

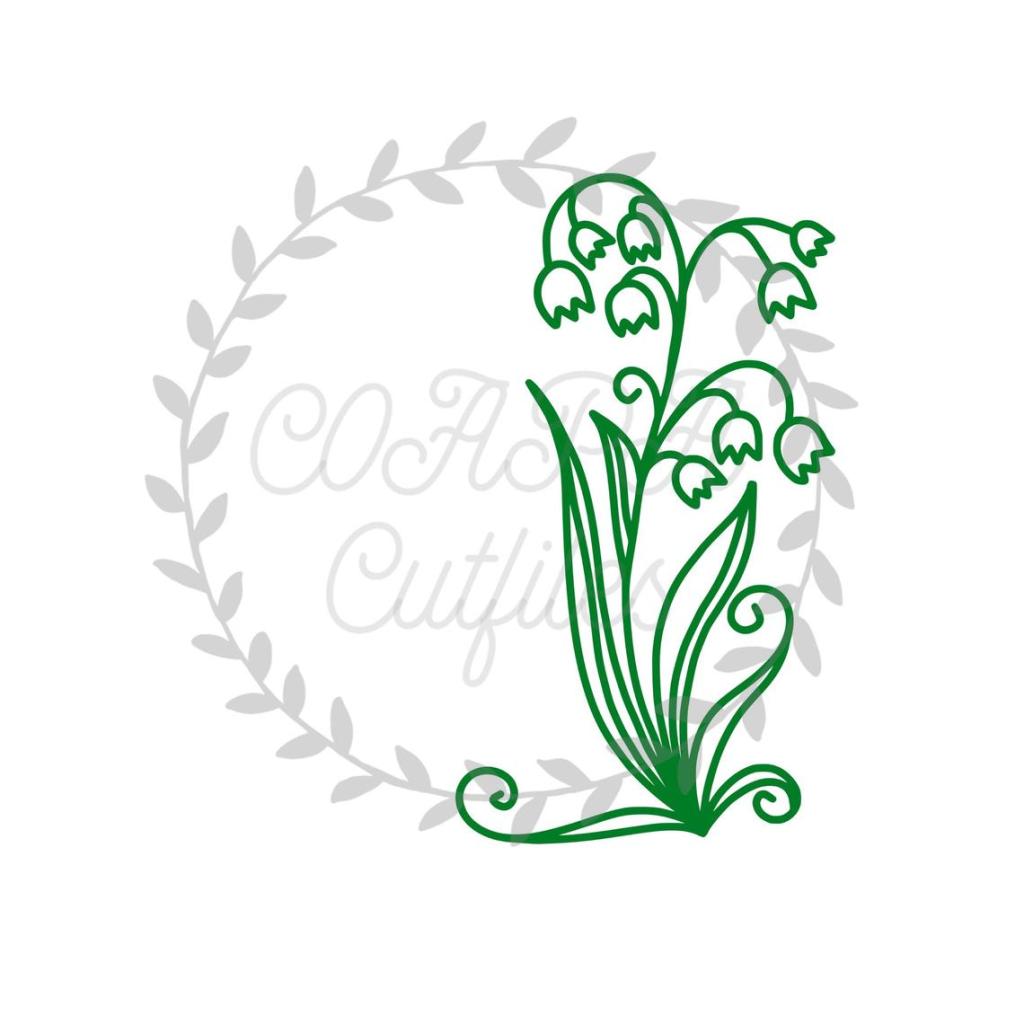
I cut this beautiful cut file from American Crafts Precision White Cardstock. The lilies were back filled with white cardstock and the leaves were back filled with coordinating green leafy patterned paper from the Carta Bella Flora No 3 paper pack. I didn’t want the outline of the leaves and flower stems to remain white, so I inked them with Tim Holtz Shabby Shutters Distress Ink before adding the back fill pieces.

The bunny was inspired by image number 3. I used the “Cottontail” Whispers die from Die-Versions. (I’m not sure if it’s still available, as I’ve owned it for quite some time.) I cut the bunny from white cardstock and layered it on fun foam that was also cut with the die. Once the bunny was completed and adhered to the layout, I added a small white pom-pom to create a fun tail and to add some dimension.

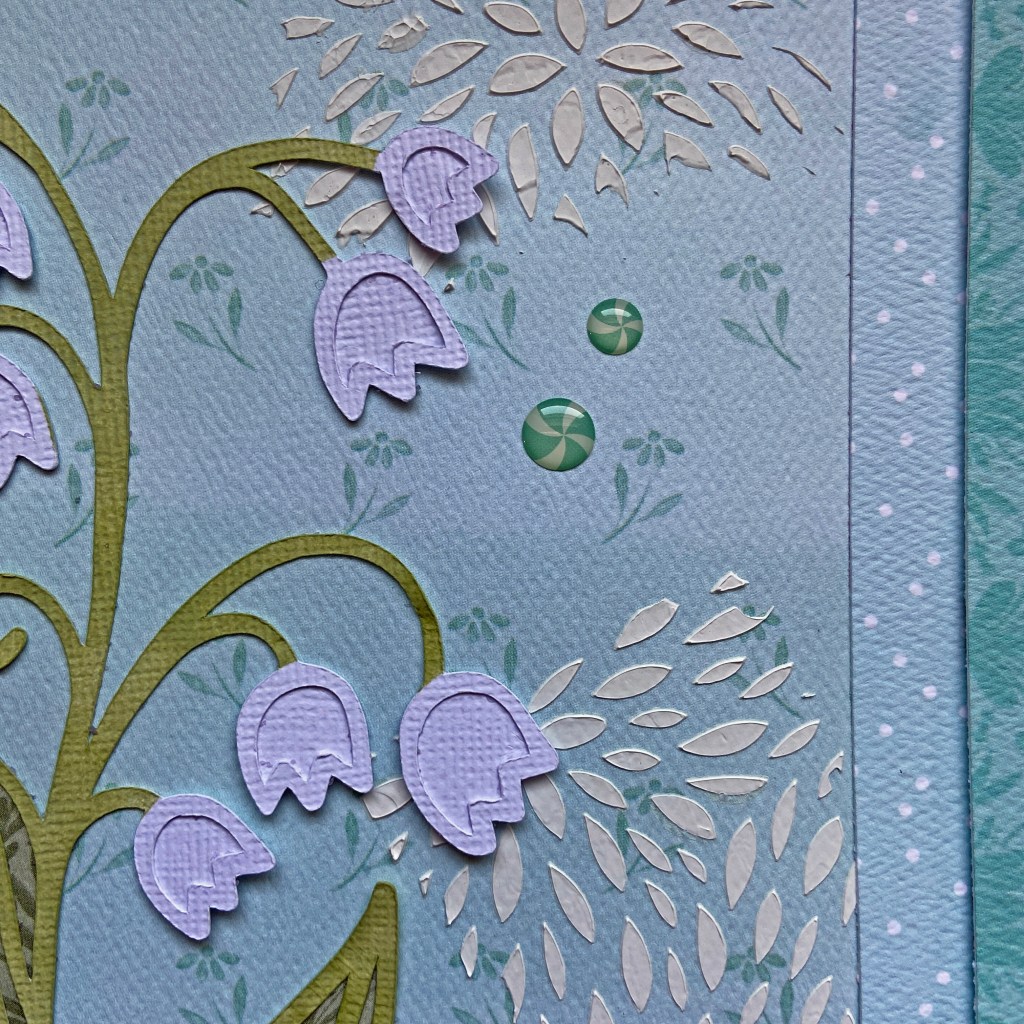
As I started to put the elements of the page together, I was unhappy with the background and felt it was a bit too much of the same colour. To lighten the look and feel of the overall layout, I used a Taylored Expressions stencil (Pretty Petals) and applied Vicki Boutin Molding Paste to different sections of the background. This added in more texture and the white brightened the layout considerably.

The earth tones found in images 5 and 6 were the inspiration to add the natural hemp cord to the lower portion of the photo. I adhered fun foam to the back of the photo to raise it slightly and to provide a nice smooth foundation. To achieve a smooth uniform finish for the photo, I cut out a small channel of fun foam that allowed the hemp to fill this space without adding further bulkiness.

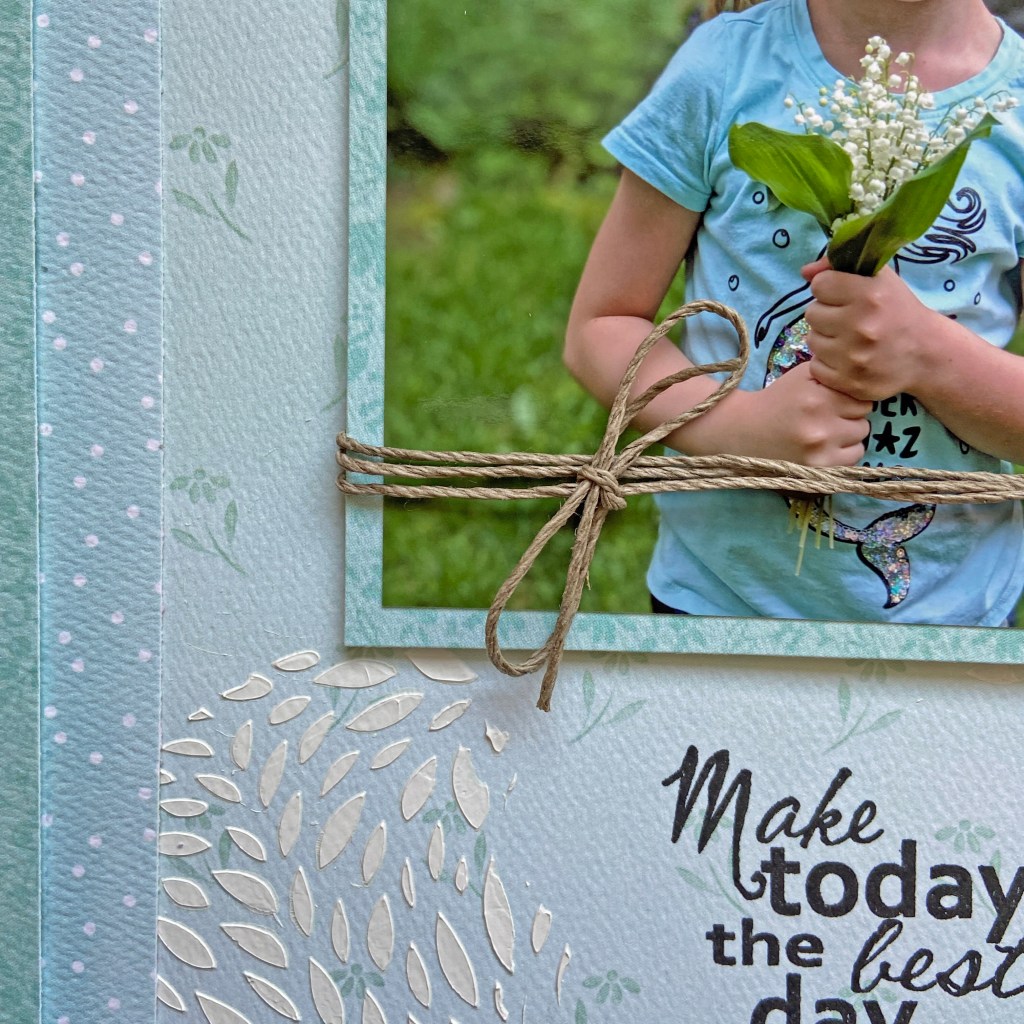
Before adhering anything to my base page, I placed all of the completed elements on the page to determine where I would stamp the title phrase. Once this decision was made, I removed everything but the stamp from the page and placed it in my 12″ x 12″ Misti to complete the stamping. The”Make today the best day ever” stamp has been in my collection for well over a decade and is from Daisy Bucket. Once the stamping was completed, all the elements were secured to the layout. The final touch was to add a few coordinating shape sprinkles from Doodlebug Designs from the Peppermint Twist line. These aqua elements were a perfect match for this layout.

I hope my layout inspires you to create a project or two for this challenge. Post your creations in the associated challenge on the Scrapbook Connect Facebook page to enter the competition. Include a few quick comments or points that tell others what part(s) of the mood board inspired you. The deadline for submissions is Sunday, March 28th at 9:00 pm. I can’t wait to see what you come up with!

Thanks for playing along with me today. Stay safe, stay well and Happy Scrapping!

Fall

I had fun creating this Fall layout for Owen. The picture was taken at the cottage on Thanksgiving weekend 2020, and the weather was perfect for lots of playtime outside! Fun Fact: I have many, many pictures of Owen’s Mom and Uncle around this very tree, as they grew up, so this shot was extra special to me.

The foundation of the page came from the Leaf Pile patterned paper from the Glorious Autumn Kit paper pack by Reminisce. It was a perfect match for the wonderful colour we have on display each Fall in Muskoka. The title for the page is a cut file from Peartree Cutfiles called Fall Tags. You can find it here: https://www.peartreecutfiles.co.uk/product/fall-tags/.

I have some wonderful Fall shaker elements that matched the patterned paper perfectly, and this inspired me to make the tags into individual shaker boxes. The first step was to cut the Fall Tags cut file out twice – one for the top and one as a base for the bottom. I then very carefully punched small holes in one of the cut files to prepare it for hand stitching. I carefully stitched the full cut file using 5 separate colours of DMC floss to match the colours in the patterned paper (DMC 221, 921, 742, 3021, 347). Because the cut file had delicate borders, I only used 3 strands of each colour to stitch around the edges. Once the stitching was completed, I backed the leaves, mushrooms, and pumpkin, that can be seen around each letter. The following picture will help you see the detail of the completed top level.

To create the shaker pockets, I utilized the negative cutouts from the letters of the cut file as a guide and traced each onto a piece of acetate twice (one for the top and one for the bottom of each shaker pocket). I wanted the patterned base paper to show through the completed shaker tags, so the second piece of acetate was necessary to achieve this. The acetate letters were cut slightly larger than the tracing marks to ensure they completed covered each letter and securely held the shaker contents. Once the acetate was in place on the stitched title, I used Foam Sticky Strips from taylored expressions and carefully placed the strips around all edges of each tag and the banner at the top. Before removing the backing of the foam strips, I placed the Fall Shaker Elements in each letter. After the Shaker Elements were added, I removed the backing from the Foam Sticky Strips. I won’t lie, this was a very tricky and tedious step, and it required lots of patience, as the shaker elements kept moving around and liked to stick to the foam – but I feel the effort was worth the result! Once the backing was removed, I placed the second layer of letter acetate cutouts over the letters to secure everything nice and firm and to allow me to lift the cut file without losing any shaker elements. I chose to then adhere everything to the additional cardstock cutout of the cut file. This provided more stability to the overall completed cutout. I also adhered the small stitched centre to the letter A to complete the overall title. Here’s a couple more closeups to show you the completed shaker title.

Once the title was completed, the layout came together quite quickly. I adhered the photo and title first and then added several falling leaves to complement the patterned paper. These included No. 6 Forever Flowers from Prima Marketing Inc., which have been in my stash for years, and a few wooden diecut leaves. Finally, the two wooden slices were added to the bottom left of the picture.

I hope I’ve encouraged you to try a shaker pocket title on a future layout! Thanks for visiting, stay safe and Happy Scrapping!

Brrr

Here we are in a new year, with new possibilities and hopes for a brighter future for all of us! In my neck of the woods, we are still in lockdown – we’re to call it a “Stay Home” directive. Call it what you will, we are in for a long winter for sure. So what’s a girl to do to relieve the monotony and distract herself from the long, cold days ahead? You got it – SCRAPBOOK! I’ve always found this hobby extremely therapeutic, so I plan on scrapping a lot in the coming months.

I’ve been having fun this year playing with Peartree Cut Files (https://www.peartreecutfiles.co.uk/all-products/shop/). This is the first of several layouts I plan on sharing. For this layout I utilized two of their files – the Brrr title cut file and the Snowflake Corner cut file.

When I was designing this page, I really wanted the snowflake corners to mimic a snowbank. To achieve this look, I cut the file twice from AC white cardstock. Using Foam Sticky Strips from Taylored Expressions, I carefully backed one of the files to create the dimension I was looking for. The photo below illustrates this. These strips worked wonderfully, and they were easy to use. I’ll be stocking up on more in the future!

Here’s an additional shot to help demonstrate the layered Snowflake Corner border once completed.

I cut additional snowflakes from the Brrr title cut file to allow for more dimension in the upper portion of the layout and to help provide more overall balance. Again, I put the Foam Sticky Strips to good use on the backs of these snowflakes.

The patterned papers and tag used in this page come from Carta Bella’s Winter Market collection and their coordinating Frames & Tags embellishment kit. The background patterned paper is the “I Love Winter” page, and the main Brrr title was backed with the backside of the 3 x 4 Journaling Cards paper.

I’m delighted with how this page turned out. Sometimes, the simple things in life can be the most rewarding.

Thanks for checking out my blog – I wish you all good health and Happy Scrapping!