You Are Adored

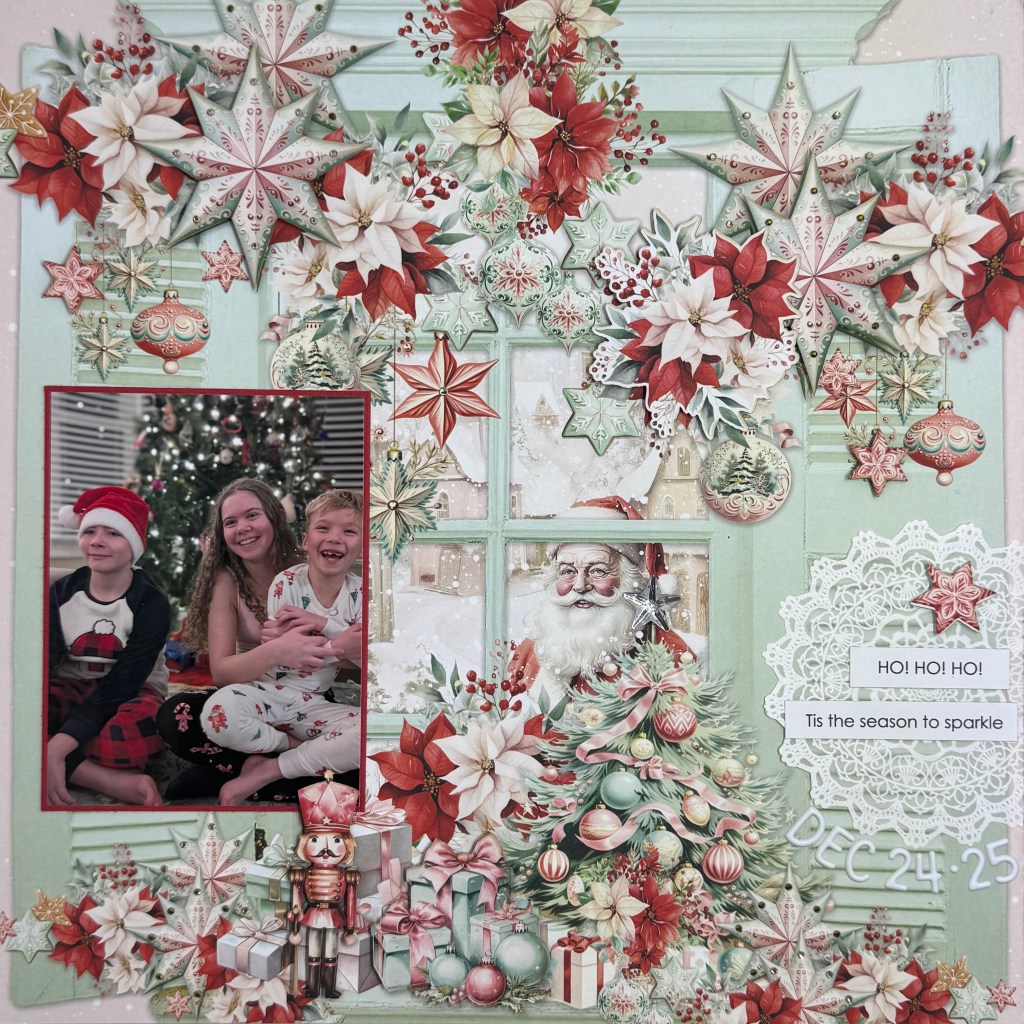
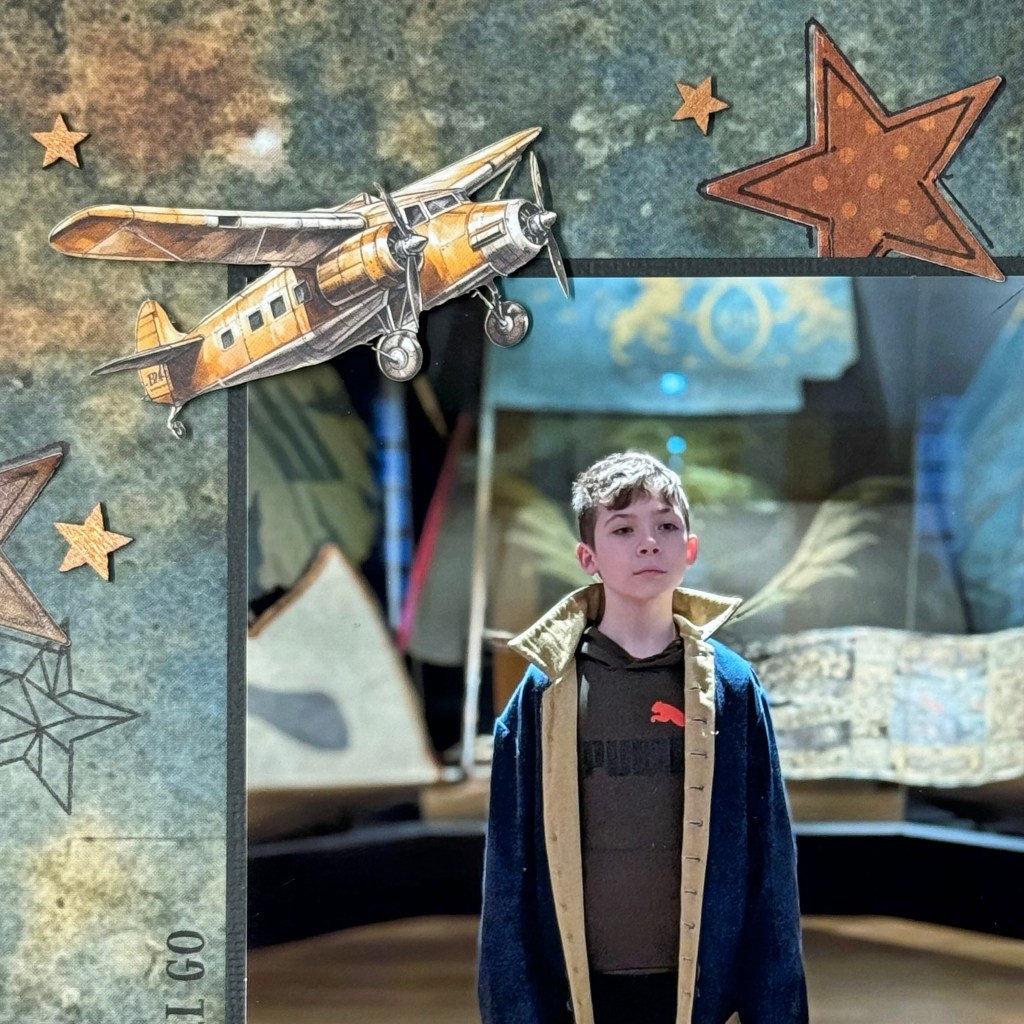
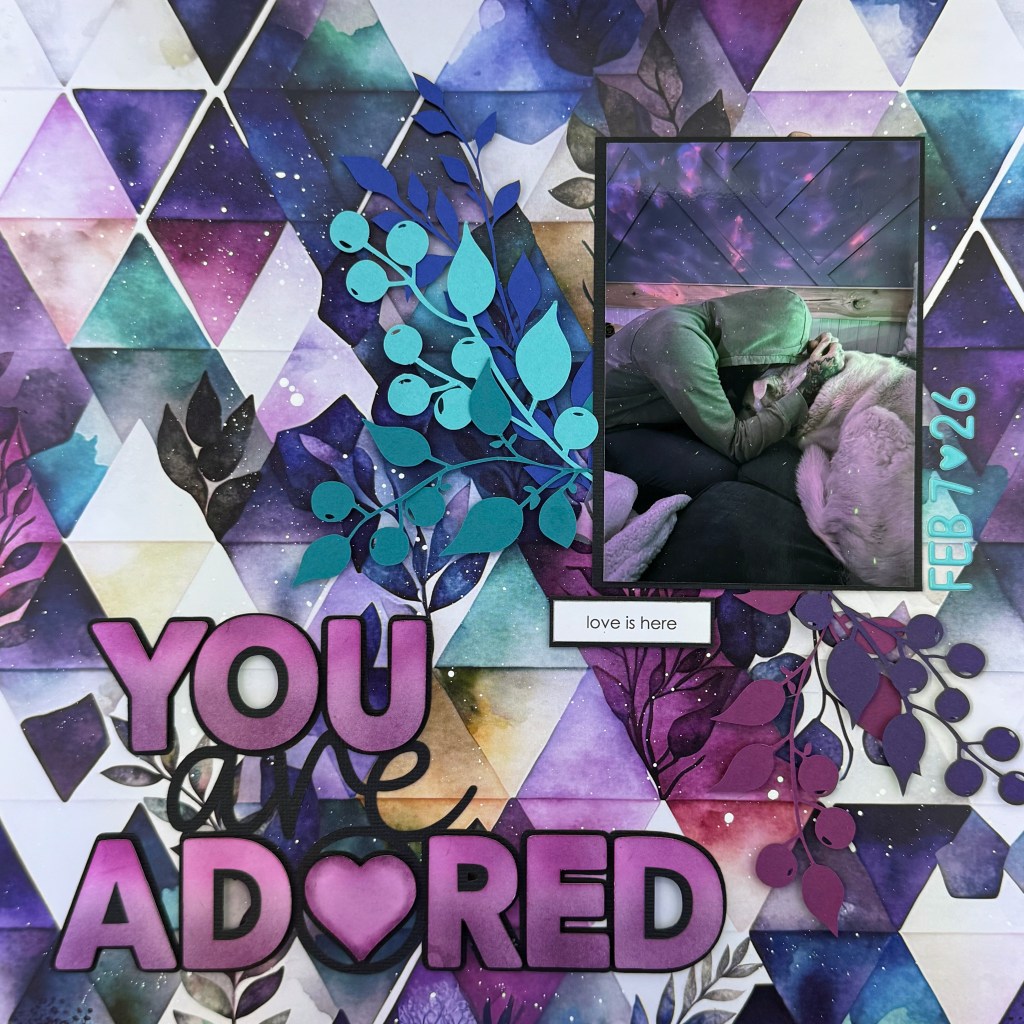
To quote M. K. Clinton, “The world would be a nicer place if everyone had the ability to love as unconditionally as a dog.” This picture gives me all the feels. To me, it fully represents the unconditional love between a man and his dog. There’s an unspoken language in this picture, and it is the language of love. It is powerful, reassuring and comforting. It is everything we need, when we need it most. This beautiful picture, taken by my daughter-in-law, captures my son and their dog Lillie. It is a moment of everyday life that I wanted to remember and document.

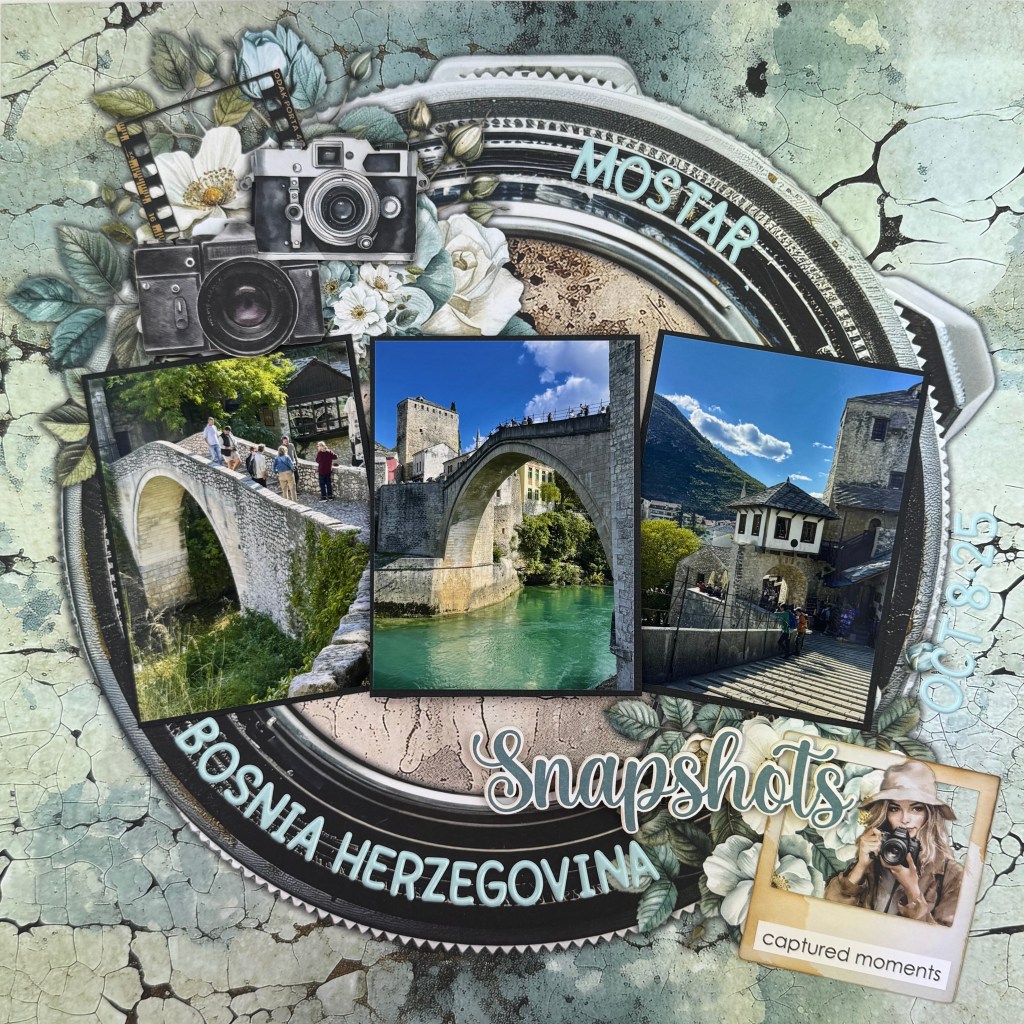
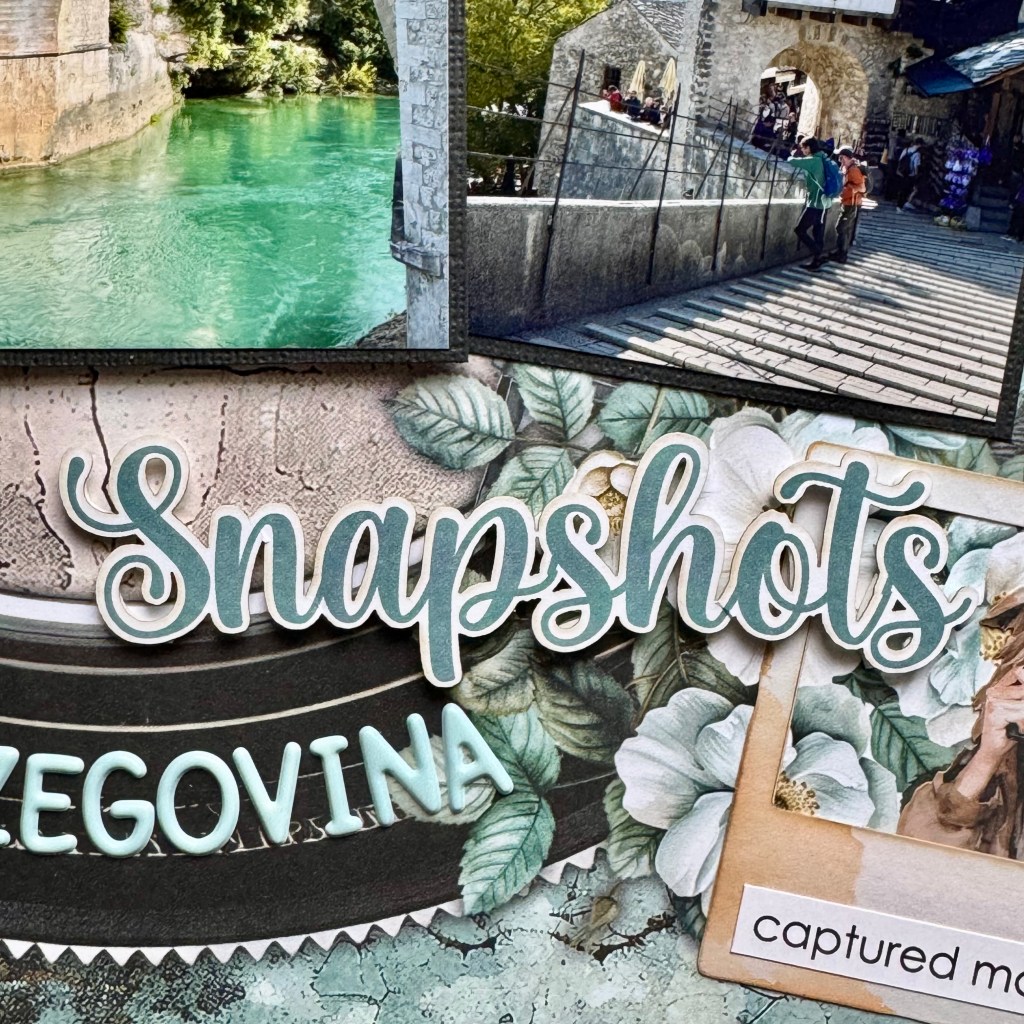
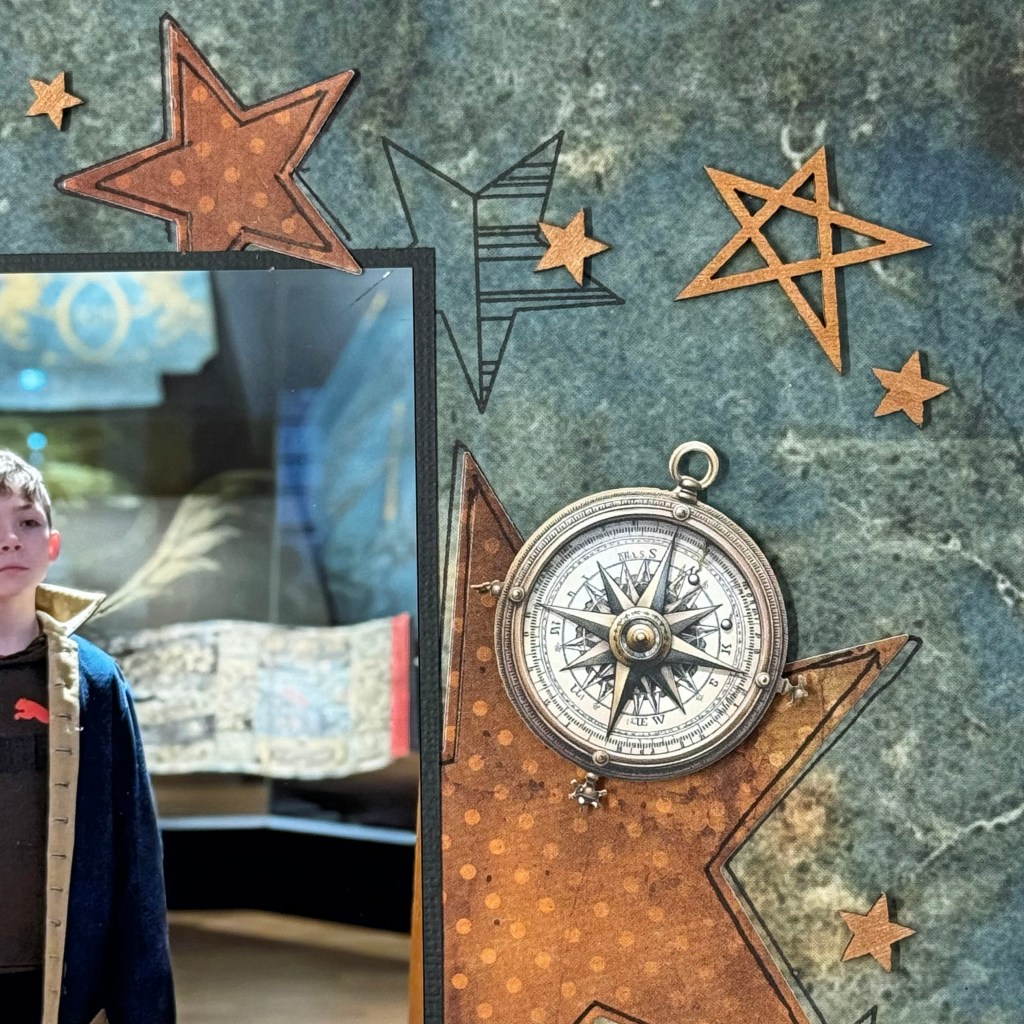
This picture was the driver for creating this layout. I deliberately used patterned paper that matched the photo’s colours and mood. Additionally, the triangular shapes in the paper were a perfect match for the background wall found in the picture. This stunning and colourful paper comes from Paper Rose Studio’s Artsy collection. Specifically, it is Print – B. To further mimic the photo, I splashed Hero Arts White Acrylic Speckle across the page to replicate the light sparkles in the photo.

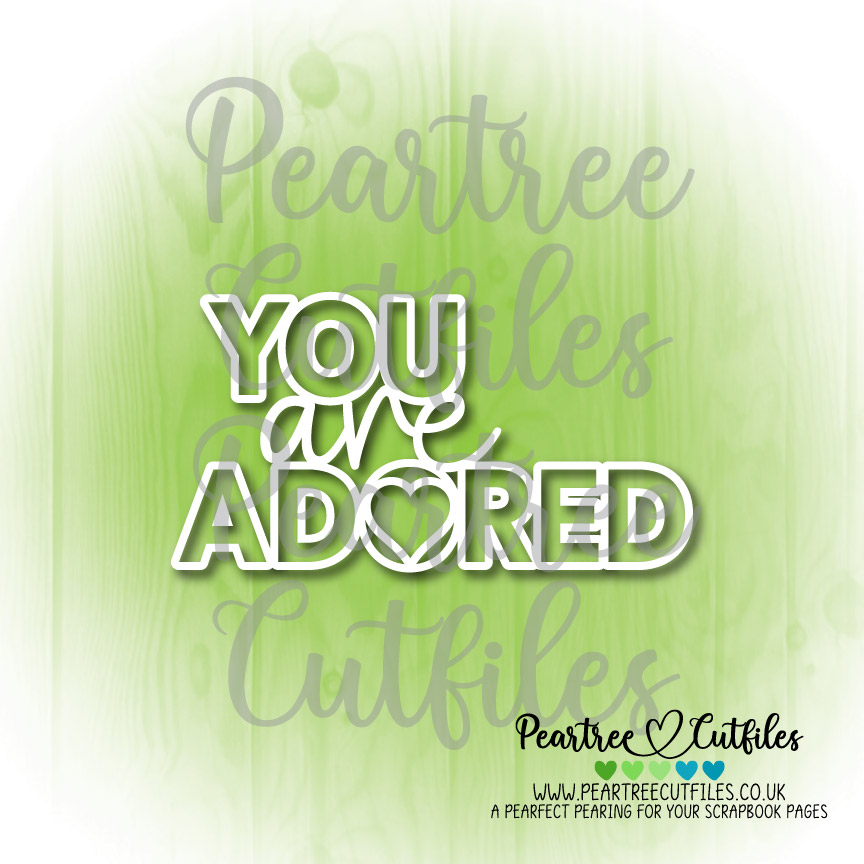
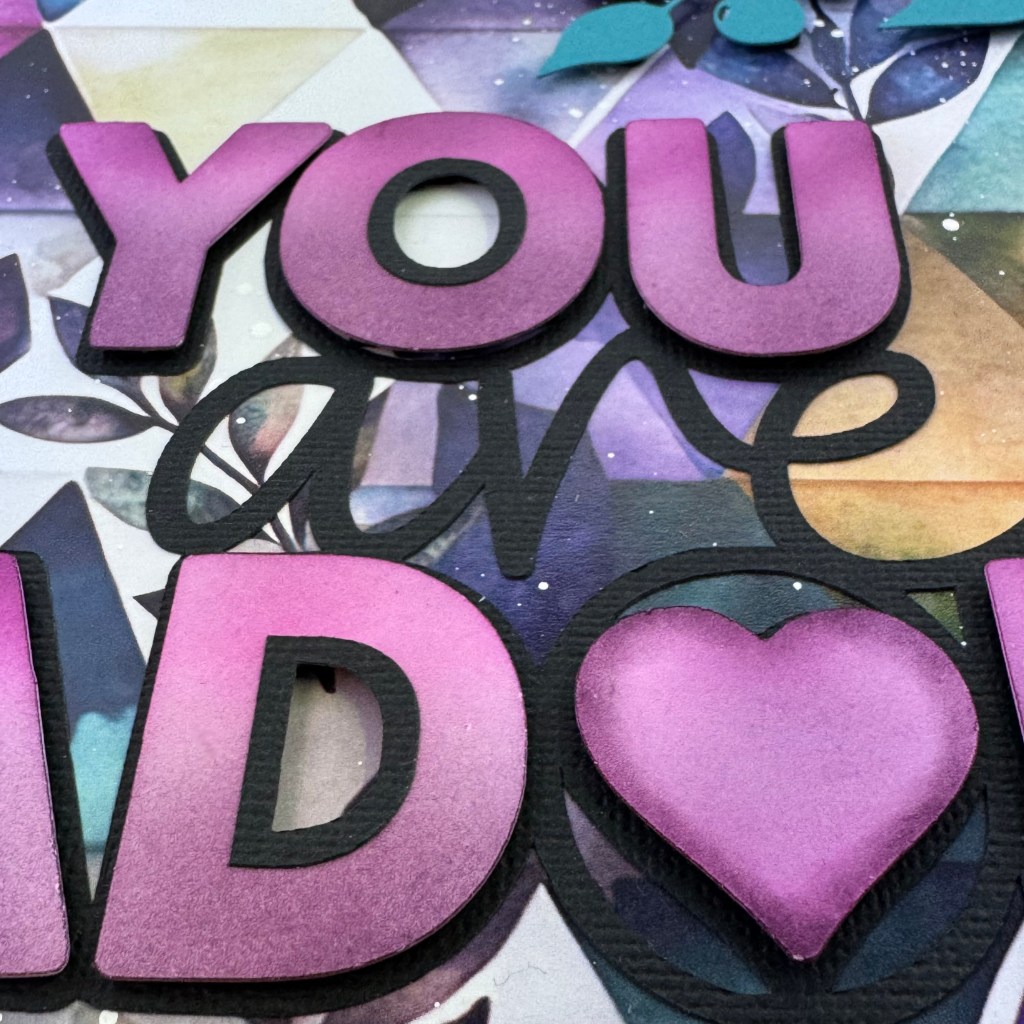
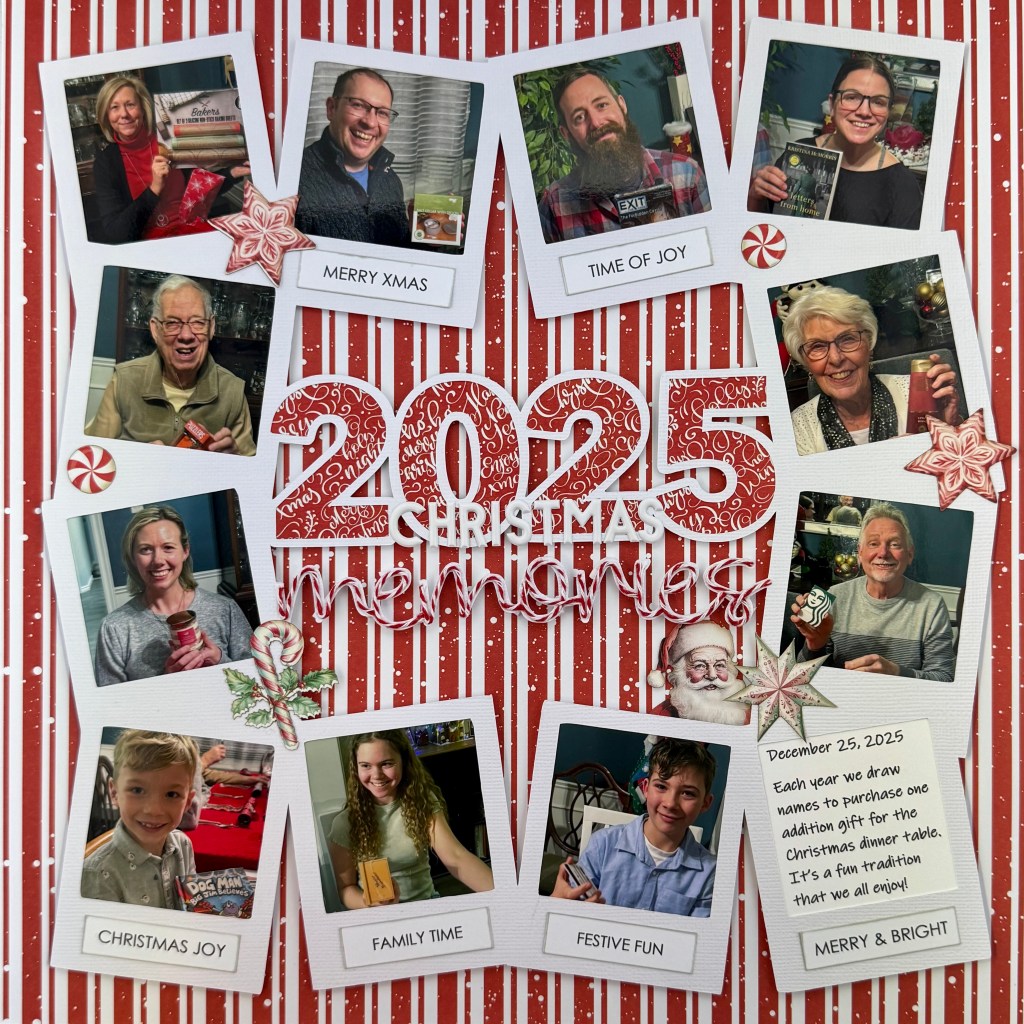
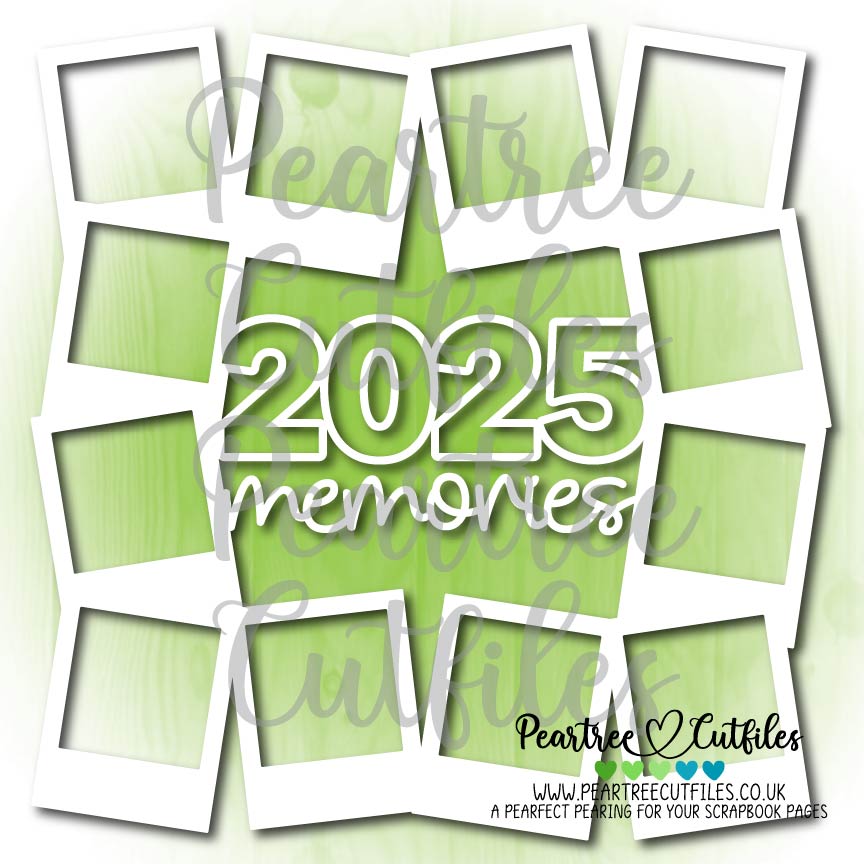
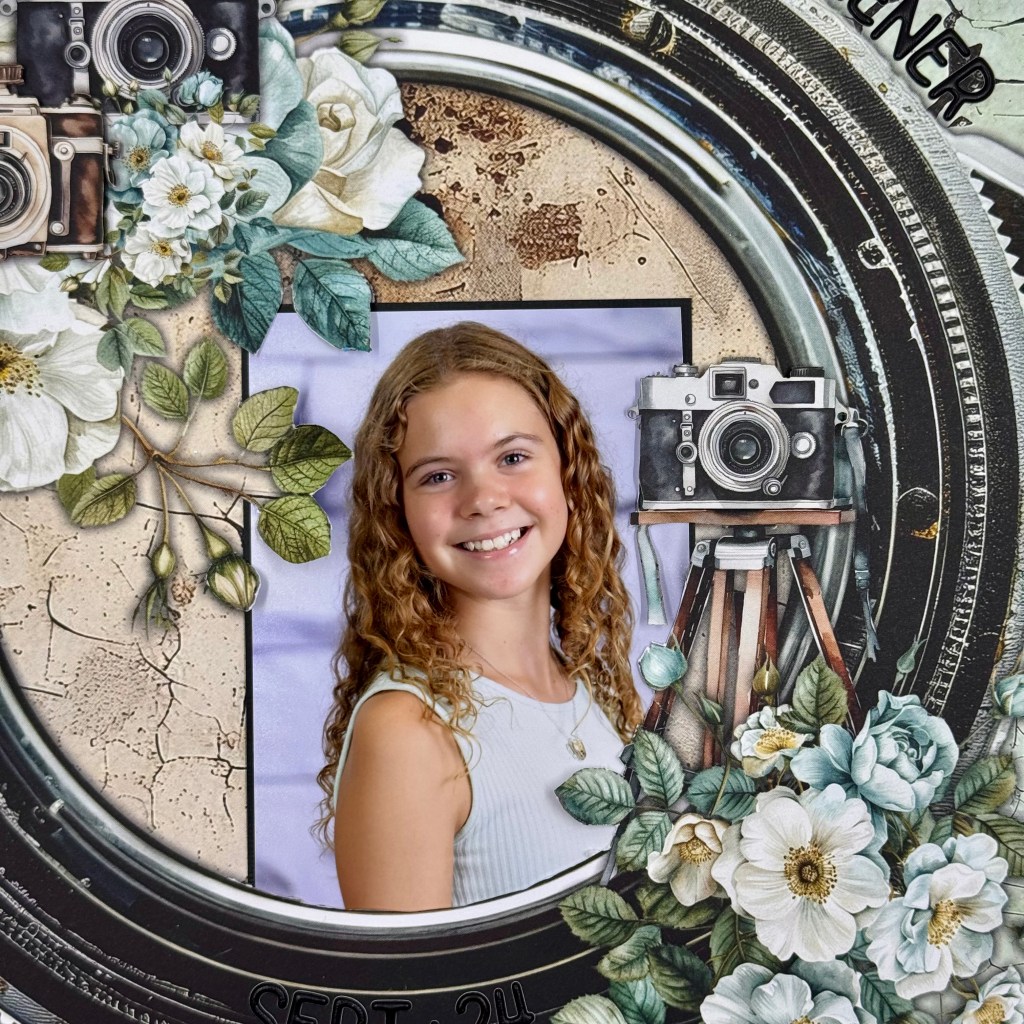
The “You are Adored” title for this page is a cut file from Peartree Cutfiles. It is available for purchase on their website. It was the freebie included in my February 2026 Pearscription. The Pearscription bundle is a unique set of cut files each month that are not available on the main website, but are available only by subscription. I have been a subscriber for over 4 years, and they are always a delight to receive and use. To create the title for this layout, I cut the file from black Precision Cardstock and glued the background to the layout, leaving the letters off. I used my Silhouette software to “ungroup” the file and create offset images of the letters. Once the letters were offset to make them slightly larger, they were cut from plain white cardstock. The letters were inked and blended with a combination of two Ranger/49 and Market inks – Doll Face and Sangria. This colour combination helped me achieve a close likeness to the purples in the picture and patterned paper. Once the ink blending was complete, I adhered the letters using Scrapbook Adhesives 3D Foam Strips to add additional dimension and texture to the layout.

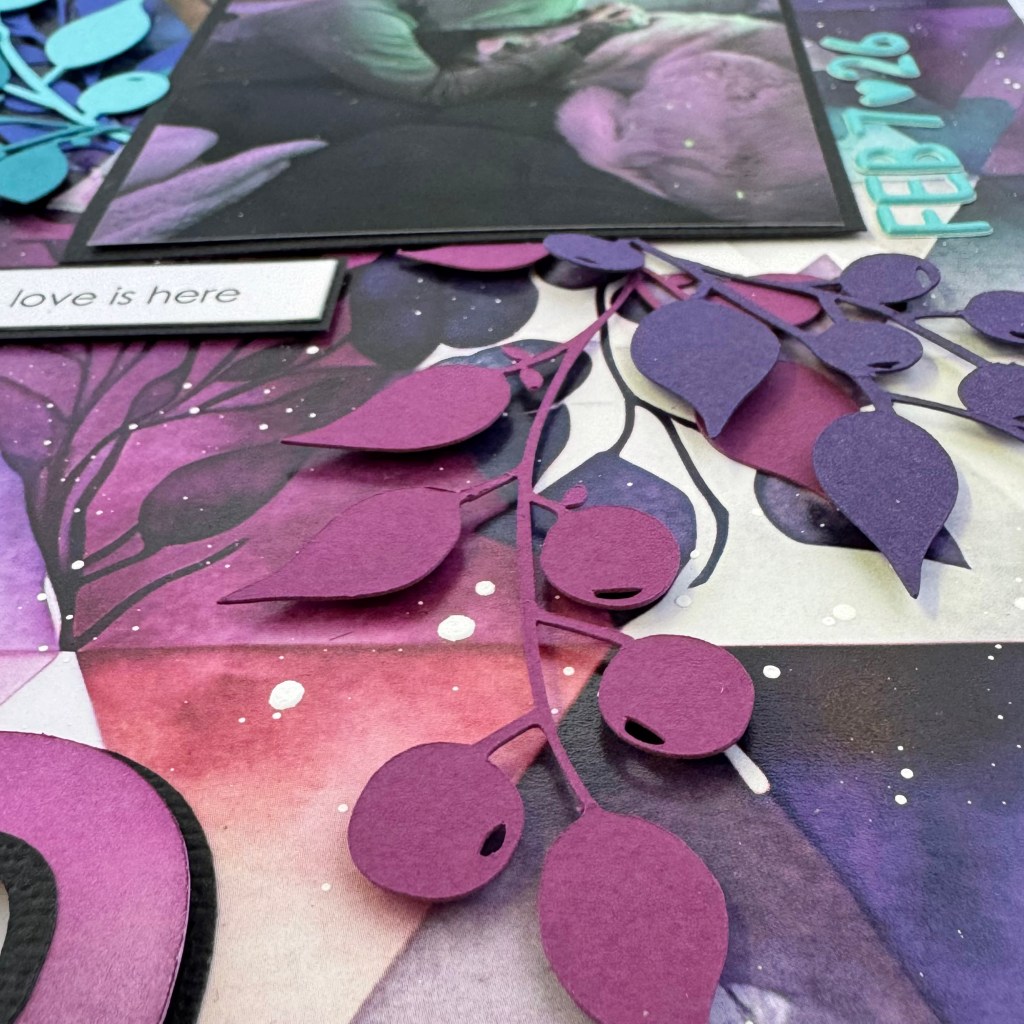
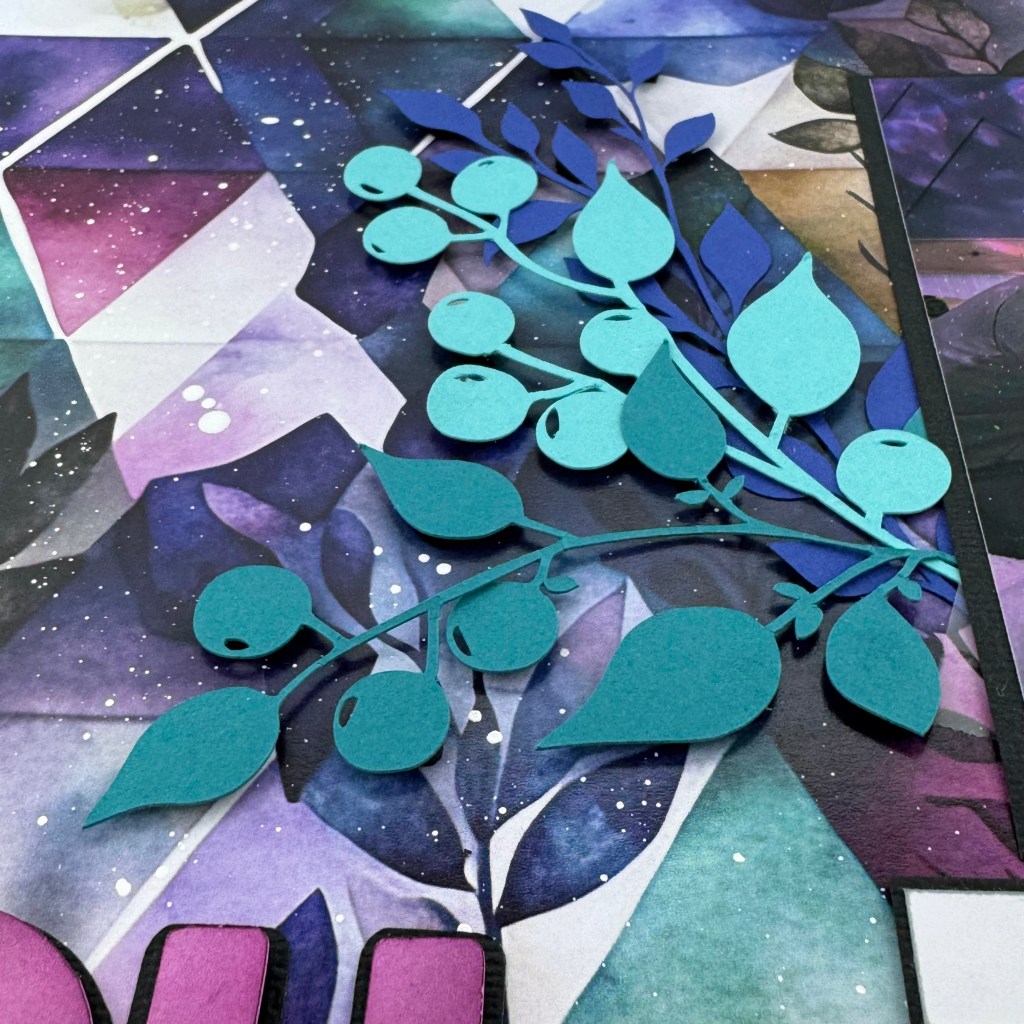
I went in search of digital cut files that could replicate the style of the branches in the background of the patterned paper. I found 2 cut files in the Silhouette Design Store that fit my needs. These 2 files are Long Winter Branches Set, Design ID D-1312913, and Berry Branches Set, Design ID D-1286474. I cut all the branches from coordinating Gina K Designs cardstock. I tucked the stems of each branch under the picture and popped the leaves up with Scrapbook Adhesives 3D Foam Dots in small and micro sizes.  

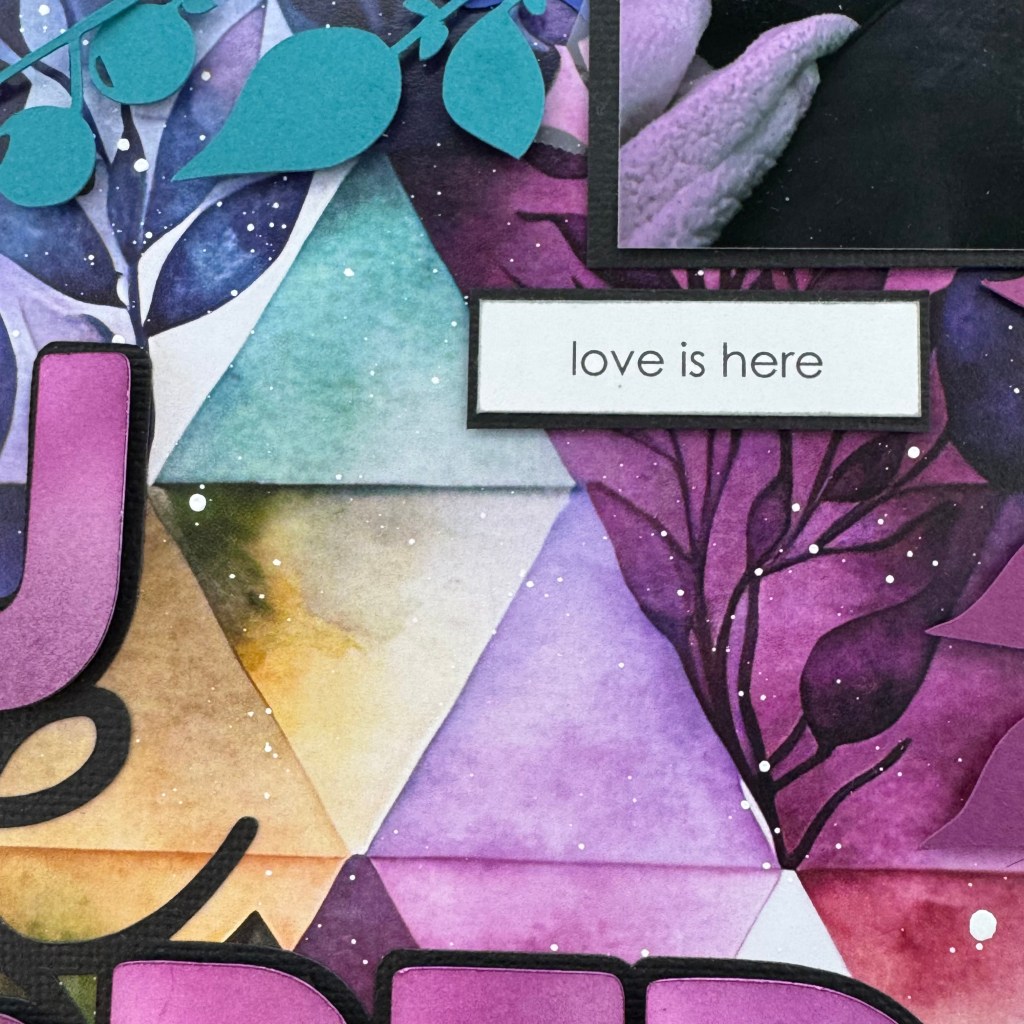
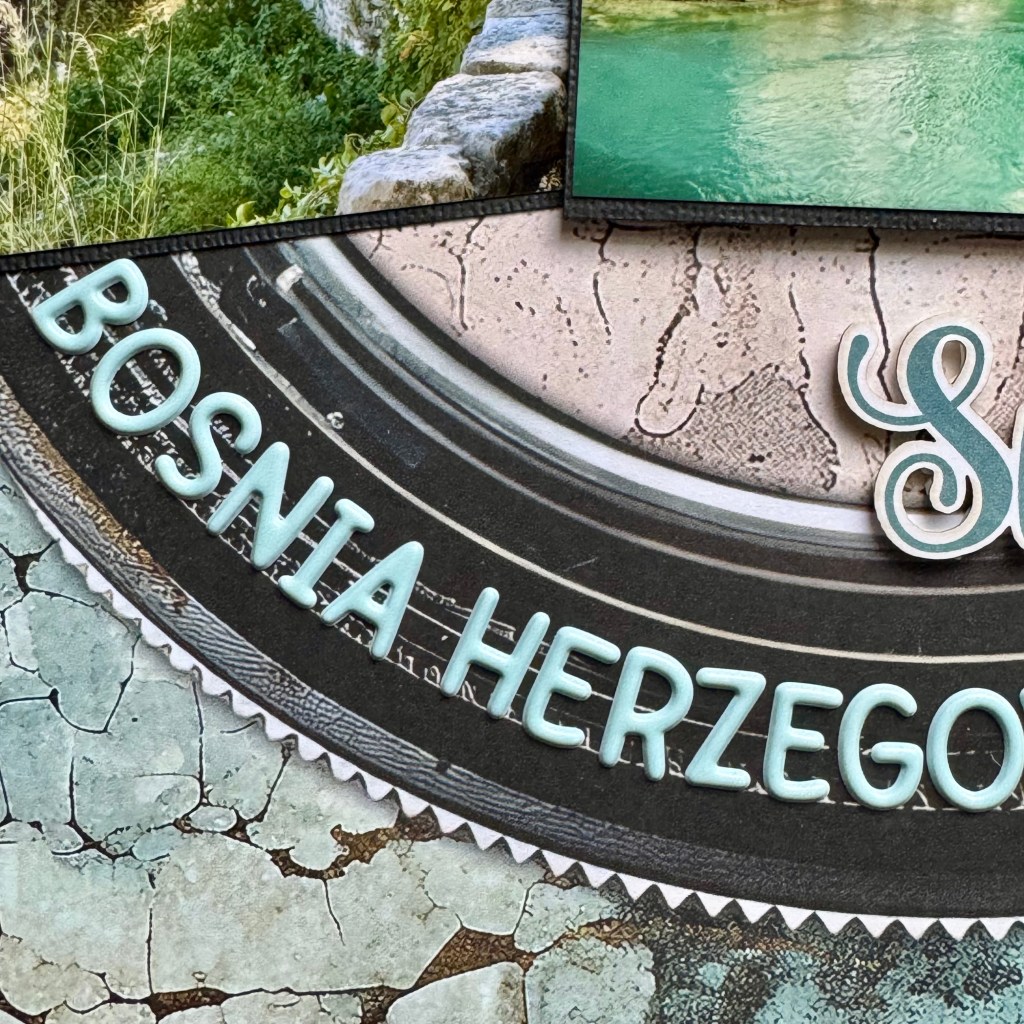
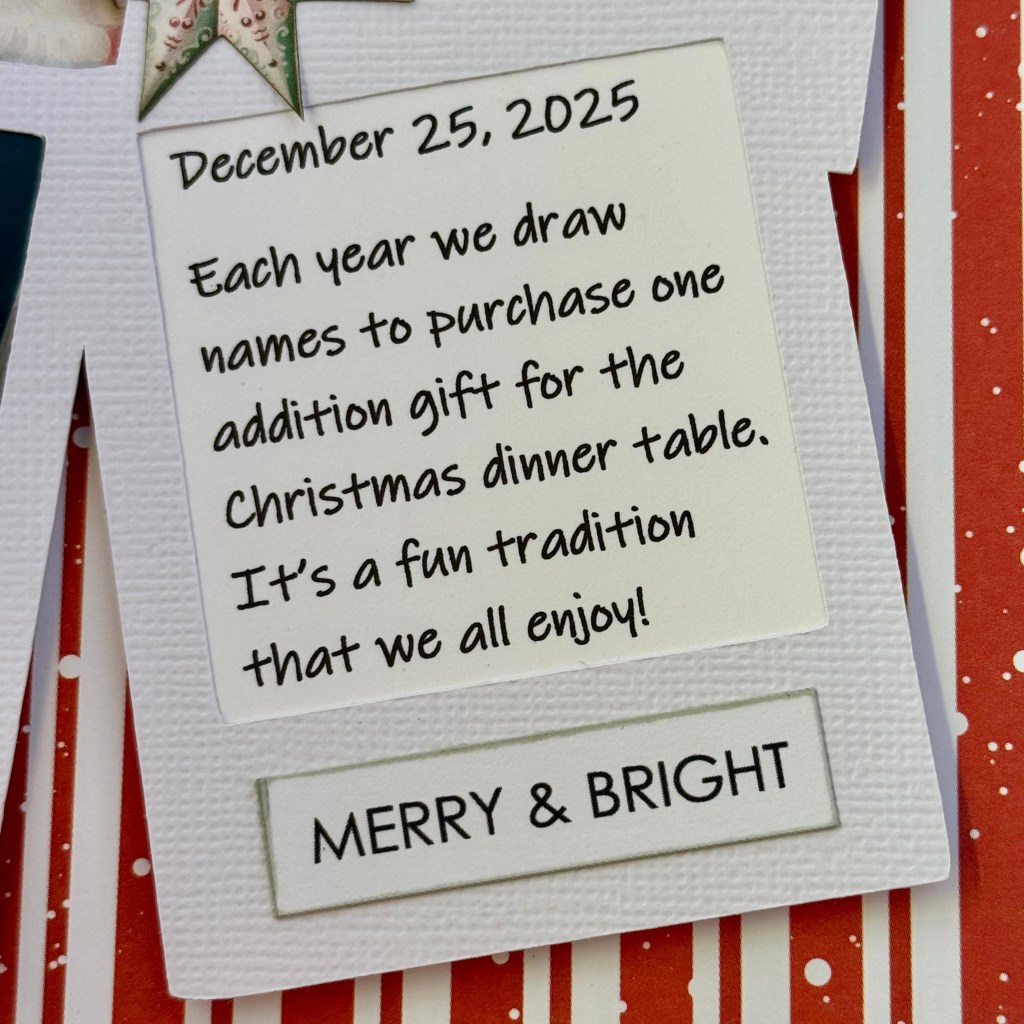
The subtitle “love is here” is a Mintay Papers product. It comes from the Mintay Basics collection, specifically, the Words – Love & Marriage. I mounted the phrase on coordinating black cardstock and adhered it with the 3D Adhesive Strips. The final element was adding the date. I always add a date to my layouts for several reasons. When they finally make it into a book, I can sort them chronologically, and if you’re like me, after a couple of years, I draw a blank on the photo’s date if this marker isn’t included. I used Doodlebug Designs Puffy Alpha Stickers in Swimming Pool to add the date to this layout.  

And that’s a wrap on my design method and creation for this lovely layout. I hope this layout enhances the love I see and feel in this beautiful photo. To all my pet lovers out there, I hope I’ve encouraged you to scrapbook a moment like this for your scrapbook. I can assure you that as you go back and look at your layouts, a moment like this will warm your heart!

Thanks for stopping by today. Until next time, stay safe, stay well, and Happy Scrapping!

Snapshots

Do you ever use a sketch for inspiration? They are a wonderful tool, especially if you feel you’ve hit a crafting rut. Last month, I participated in the final crop for the VIP group of Creative Scrapbooking Magazine. It was bittersweet to say goodbye to such a fabulous group of creatives. But it was a fabulous crop, hosted by Simply Stated Design, a wonderful Canadian company! One challenge was to create a layout for the crop using the provided sketch.

I immediately recognized that I owned patterned paper from Mintay Papers that would work perfectly with this sketch. This gorgeous camera lens paper is paper number 2 in the Photographer collection. It became the large circle found in the sketch. This paper really provided the heavy lifting for this layout. From there, I added three photos from our trip to Mostar last fall. Mostar, a UNESCO World Heritage site in Bosnia and Herzegovina, and its bridge, Stari Most, are popular tourist destinations. It is a rebuilt 16th-century Ottoman-era bridge. The photo of the bridge deserved to take a central place in my layout. It was added to the layout with a piece of fun foam to add dimension and focus.

I used ephemera from the Photographer collection to complement the design. The female photographer and the slide frame were both inked around the edges using Altenew Ink for added dimension. Next, I slid the photographer behind the slide, making sure to keep her hat outside of the frame. I added the ‘captured moments’ phase to the bottom of the slide and sourced it from the paper stickers in the Photographer collection. Next, I added this grouping to the bottom-right portion of the lens.

The cameras and slide cluster of ephemera are a mix of 2 Mintay Papers collections: Photographer and Mamarazzi. The cameras were placed on fun foam to add further dimension.This cluster of elements was placed in the top-left corner of the lens.


The title for the layout, Snapshots, came from the Mamarazzi Die-cuts collection. It was also adhered with small pop dots.

The final elements included adding the location and date to the layout. All of these elements were completed using Doodlebug Designs Puffy Alphabet Stickers in Mint. I adhered all of them in the layout using the curve of the camera lens as a guide.

This layout came together so quickly, thanks to the sketch as my guide. The camera lens really draws your attention to the beautiful pictures from our trip. I’m very pleased with the final result. Thanks for stopping by today. Until next time, stay safe, stay well, and Happy Scrapping!

2025 Christmas Memories

I love the family time we get during the Christmas season when everyone has a chance to slow down and have fun together. This year was an exceptionally fun Christmas, as our entire family was together for the first time in 3.5 years. We made the most of every moment together. Game playing was the main activity, followed very closely by eating! Every day was full of laughter and love, and I am still smiling from the great memories we had together. It was important to me to document these fun days and the traditions that we carry on.

One tradition everyone loves is our small gift exchange just before we eat our Christmas dinner. We draw names for these gifts ahead of time and purchase gifts no higher than $20 for this exchange. The recipient has no idea who purchased their gift, and to complicate it further, we wound ribbons from the packages to each designated seat at the Christmas table. This way, you can’t easily identify your gift when you sit down. We take turns, one by one, pulling our ribbons to find out which gift is ours. It is fun to watch everyone open their small gifts individually. This year, I documented this fun tradition. I think my grandchildren will get a kick looking back at this page as the years go by!

Peartree Cutfiles had an excellent cut file to help me document this tradition. It is called the 2025 Memories Frame. The photo frames around the title were precisely what I needed to capture a picture of everyone around the table, leaving one frame for my journaling. After choosing the pictures to include, I cropped each to fit the photo frames. These frames remind me of the years my parents took pictures at Christmas with the older Polaroid cameras!

I chose coordinating paper from Mintay Papers Merry & Joy collection for the background and to back the title numbers. To enhance the red-and-white theme, I added Recollections red-and-white twine to the word ‘memories‘. The process to add the twine is easier than it looks. I used liquid glue and worked in sections, moving across the word until it was complete. The twine sticks very well to the cardstock using this method. After completing these steps, I decided I wasn’t happy with the cut file lying directly on the background paper. So I took the time to add dimensional fun foam to the back of the cut file. I used Foam Sticky Strips from Taylored Expressions to add the dimension to the back of the scripted word memories. This process did take some time, as I cut each strip in half lengthwise to keep it hidden from the viewer. Once the entire cut file was adhered to the background paper, I applied the word Christmas to the bottom of the 2025 numbers using PinkFresh Studios white Simple & Sweet puffy alpha stickers.

The final touches to this layout included adding bits and pieces of ephemera from the Merry & Joy Die Cuts package, and adhering phrases cut from Mintay’s Christmas phrase sheet. My favourite ephemera is Santa peaking out of the inside corner of the cut file, just above the journaling!

Thanks for stopping in once again. I hope you’ve found some inspiration in my design today. Until next time, stay safe, stay well, and Happy Scrapping!

HO! HO! HO! Tis The Season To Sparkle

I love the magic of this season, and have fun scrapbooking our memories of this special time. I started the tradition of buying Christmas pajamas for my children several decades ago. After dinner, they would excitedly open their presents and immediately go upstairs to put them on. I’ve carried this Christmas Eve tradition over to my grandchildren, who look forward to it with excitement. They always humour me by letting me take their photo before the tree. I think you can see from their faces that they enjoy this annual ritual as much as I do!

I was fortunate last Fall to purchase a Creative Kit from Mintay Papers that included a slew of products from the Merry & Joy collection. It was priced at $50 and included products that were worth at least $200. This kit is going to give me a lot of options to scrapbook our latest Christmas memories. If you get the opportunity to purchase a Creative Kit from Mintay in the future, I strongly recommend it. I promise you, you will not be disappointed!

As soon as I saw the patterned paper with Santa peeking through the window, I knew it would be the perfect background paper for this layout. After adhering my picture to the design, I chose coordinating Die Cuts from the ephemera pack included in the kit. I’m a lover of dimension to my projects, so I used several 3D Foam Squares from Scrapbook Adhesives to layer the ephemera on the page. Most of the ephemera was adhered to the top of the layout, but I also layered the nutcracker and presents at the bottom of the page.

I fussy-cut a doily from the Decorative Vellum sheet included in the kit and adhered it with vellum tape to the right-hand side of the page, over the green window shutter. Next, I cut the phrases from the sheet of Christmas phrases, also included in the kit. To complete this section, I added the date using Lily White Alphabet Soup puffy stickers from Doodlebug Designs.

To reinforce the page title with a sparkle reference, I adorned the star ornaments at the top and bottom of the page with miniature gold gems from Spellbinders. These gems came in two tones, and I utilized both on the ornaments. The Christmas tree at the bottom of the page also had a star on its top, so I added a bright silver star from my stash to complete the sparkle elements. These gems and sparkles help enhance the Christmas tree lights in the picture.  

I’m very pleased with the final results on this page. It helps convey the anticipation of Santa’s impending visit and captures the joy my grandchildren felt on Christmas Eve! Thanks for stopping by to share in this magical moment. Until next time, stay safe, stay well, and Happy Scrapping!

Happy Halloween!

It’s time to get spooky, my friends! This Fall, I participated in an ATC (Artist Trading Card) swap with my VIP friends through Creative Scrapbooking Magazine. ATCs are out of my comfort zone, and this is only my second swap. But I was really inspired by the Halloween swap and had a blast designing these cute little cards. For those who haven’t made an ATC before, each miniature card measures 2 & 1/2″ by 3 & 1/2 inches. Such a small canvas to create on!

Here’s how they came together. I started by fussy-cutting four Halloween images from the Mintay Papers Halloween Book. It is full of whimsical images for creating cards, scrapbook pages, and many other creative projects. Each image was inked around the edges to add a distressed look. I wanted something different for the cards’ backgrounds and searched the Silhouette Design Store for an alternative. I decided that tombstones would be the perfect backdrop. I chose four separate designs for this purpose. Three of the backdrops came from Jillibean Soup – Halloween Tombstone (1 Design ID #384738, 2 Design ID #384737 & 3 Design ID #384739), and the last came from Lilium Pixel SVG – Days Til Halloween Tombstone (Design ID #386333). I resized each cut file to fit the ATC size requirements and cut them twice from BoBunny’s Fright Delight collection (12″ Fright Delight Spiders), and Doubledot Designs (12″ Licorice Journal). I trimmed the black tombstones away from the base of the cut file to mimic a stone foundation for each tombstone. Each stone base was adhered to the bottom of its respective tombstone.

Before assembling my cards, I splattered some black paint on the tombstones to further the distressed look. Once these backgrounds were dry, each image was adhered to a tombstone using Scrapbook Adhesives 3D Foam Squares.

I placed a Halloween phrase at the bottom of each tombstone using Simple Stories Ephemera Bits and Pieces from their Simple Vintage October 31st set. For additional texture and Halloween fun, I added a bat from this same collection of ephemera, and glossy spiders from Doodlebug Designs Shape Sprinkles (Spooky Spiders). To complete the cards I added Glossy Accents to the eyes of each fussy cut image.

And there you have it, friends, my sweet and spooky Halloween post. To all those Trick-or-Treaters, may your baskets be full of your favourite treats and no tricks tonight. Wishing you all a safe and fun Halloween! Until next time, stay safe, stay well, and Happy Scrapping!

Intrepid Explorer

My oldest grandson, Owen, has a keen interest in history. During the Christmas holidays, his family traveled to Stockholm, Sweden, and visited the exhibits at the Armémuseum (Swedish Army Museum). Owen enjoys getting immersed in the events he’s learning about. I love this picture of him wearing an old army coat from the exhibit. This picture inspired me to create a layout to celebrate his love of history and discovery.

I enjoyed creating this layout and drew on ten brands for the final product. Unfortunately, some of the products used have been in my scrapbook stash for years and are no longer available for purchase. The Intrepid Explorer cut file for this layout came from Peartree Cutfiles. I cut it from black Bazzill cardstock and partnered it with rusty patterned paper from 49 and Market’s Rust and Revs collection. The beautiful rusty patterned paper helped highlight the rust in the base paper. This background paper belongs to Mintay Paper’s Traveller collection. When I buy a collection, I often purchase the smaller add-on paper packs, which are handy for backing cut files or cutting additional items without wasting the large 12″ x 12″ designs. In this case, the rusty, dotted patterned paper had a slightly smaller and more variegated pattern. I loved the effect it brought to the layout. I also used a nested star die set from Sizzix to cut several star shapes from this patterned paper. The stars had slightly beveled edges, which I highlighted with a thin black Sharpie marker.

I stamped several different star images from the My Favorite Things, Stars Above stamp set to give the layout more depth and texture. This stamp set is an older release and is no longer available. The script stamp came from a 7 Gypsies stamp set called Avignon and is also no longer available. The wood veneer stars are also vintage and came from Studio Calico. I sprayed them with Tim Holtz’s Rusty Hinge Distress SPRITZ to highlight the background paper’s rusty tones. As seen behind the globe, the ticket came from 49 and Market’s Ticket Essentials pack (Color Swatch Toast).

The phrases on the layout, “Never Stop Exploring” and “Oh, The Places You Will Go,” are rub-ons from the 49 and Market Wherever Ride Rub-on Transfer set. The detailed travel theme ephemera belongs to the coordinating Traveller paper die-cut package by Mintay Papers. I placed fun foam and pop dots behind some of the ephemera pieces to give the layout additional dimension. I added the location and date below the title to complete the design using Doodlebug Designs Alphabet Soup Puffy Stickers in beetle black.

I am happy with the final layout and its overall look and feel. I hope my grandson’s interest in history grows and he continues to learn and discover more about those who paved the way for us today. Thanks for stopping in today, and until next time, stay safe, stay well, and Happy Scrapping!

Bilingual Junior High School

Happy Birthday to our oldest grandchild! Maddie turns 14 today! Where has the time gone? This young beauty is in her last year of German/English Junior High School in Wiener Neustadt, Austria, and I created this layout to document her school picture. The last two and a half years have been a lot of work for her. Not only was her family uprooted from Canada and their family and friends, but she was also required to learn German to be successful at school. They say a picture is worth a thousand words. You’d agree that this picture speaks volumes to her happiness and success. We couldn’t be happier or prouder of all her accomplishments in such a short time. Well done, Maddie!

I chose the gorgeous Photographer collection of patterned papers from Mintay Papers to document this milestone. The sizeable floral lens paper is paper number two in the collection pack.

Mintay has an Instagram presence (@mintaypapers). I enjoy learning from their talented design team. I followed one of their tutorials, which demonstrated cutting into the patterned paper to insert a photo. While initially nervous that I might ruin the paper, it was relatively easy to accomplish. I am delighted with the results and appreciate the tutorials they share.

Additionally, I used ephemera from the coordinating paper die-cut package and a phrase from the 6 x 12 paper stickers of words. I layered the ephemera cameras on the page using double-sided foam tape. I secured the “keep your focus” phrase using fun foam. I used Doodlebug Design’s Alphabet Soup Puffy Stickers in black to complete the wording around the outside of the lens.

I kept this design reasonably simple. I did not want to distract from the gorgeous patterned paper and oversized lens, which I feel draws your eyes directly to my granddaughter’s beautiful photo.

Thanks for joining me today as I celebrate Maddie’s special day! Until next time, stay safe, stay well, and Happy Scrapping!

Just The Ticket

This trip to the iconic Prater Amusement Park was on my husband’s bucket list. A long-time fan of Orson Welles’ film The Third Man, this was a must-see item on his wish list. Fortunately for us, this gigantic Ferris Wheel resides in Vienna, Austria, and is only a quick trip from our daughter’s home. While we have visited the Prater more than once, these pages document Bill’s first trip to the incredible Riesenrad.

I chose two cut files from Peartree Cutfiles to document these memories: Just the Ticket and Heathers Ferris Wheel.

I resized and slightly manipulated the Just the Ticket cut file to fit our tickets from our ride on the Riesenrad, and I backed the Ferris Wheel cut file to mimic the ride’s look. The Ferris Wheel was positioned slightly off the page to accommodate the picture, and I carefully trimmed the excess away. Once I completed both cut files, I adhered them to the background paper using double-sided fun foam.

The beautiful papers in this double-page layout belong to Mintay Paper’s Traveller Collection. Specifically, the background paper is the back side of sheet 02. I purchased two collection packs to accomplish this. I backed the title, Just the Ticket, using the back side of sheet 04. I typically buy a coordinating pack of 6″ x 6″ or 6″ x 8″ patterned paper in a collection to use for backing cut files. I then use these papers to back my cut files, saving my 12′ x 12″ patterned papers for additional layouts.

Before I adhered my picture and cut file on the left-hand page, I wrote the journalling for this layout in Word. I wanted to print the story directly onto the patterned paper. I did a test run on a piece of vellum to ensure my positioning was correct before sending it to print. This test allowed me to overlay the vellum onto the patterned paper and make any adjustments necessary before printing directly on the layout.

For the final touches on this layout, I added some ephemera from the coordinating Traveller’s collection. This die-cut package contains sixty elements and will provide plenty of finishing touches to several future layouts.

That’s a wrap on my design process for this double-page layout. It is a special memory for me, as this experience meant so much to my husband. Thanks for stopping by today, and until next time, stay safe and well. Happy Scrapping!

This Life

With Spring finally arriving it seemed an appropriate time to share this double-page layout. We have had cool and rainy days in our neck of the woods for weeks. The grass is finally growing again, and so are the dandelions! Every time I look out the window, and see the dandelions growing, I am reminded of this very special day in my life. My sweet grandson Ben, just 2 at the time, rang my doorbell holding a bouquet of dandelions. Imagine my delight, a special bouquet picked just for me! But as life would have it, that isn’t quite how the story ended.

Here’s the story I journaled on this layout: “Ben – today you showed up with some beautiful flowers you had picked in the park. Nana, these are for you!!! But as you began to hand them over, you quickly snatched them back. No, Nana – I’m going to take these home!!!” Well, either way, you made my day! I knew this precious memory needed to be documented for prosperity.

I chose the gorgeous Mamarazzi paper, cardboard stickers and paper die-cuts from Mintay Papers to document this memory. The specific papers used in this collection were numbers 02 and 04. The combination of the yellow florals and cameras made it an instant hit with me. I was attracted to the frames used in these papers and utilized them to highlight my pictures. Several elements from the paper die-cut package were added, some with a layer of fun foam to add dimension and texture.

I kept all the embellishments to a minimum. I did not want to distract from this beautiful background paper. A couple of floral clusters were added to enhance the right-hand page. Phrases from the cardboard stickers were included on both pages of the layout. And the title “This Life” and all remaining embellishments were added using Vicki Boutin’s Stories of US” Thickers from her Fernwood collection. The date was added using Paige Evan’s “Happy Life” Thickers.

The Mamarazzi paper collection is highly versatile. I have used other papers in the collection to document some of our travel pictures and will share them with you at a future date.

Thanks for stopping in today, I hope my precious memory has provided you with a little laugh and made you smile. Until next time, stay safe, stay well, and Happy Scrapping!