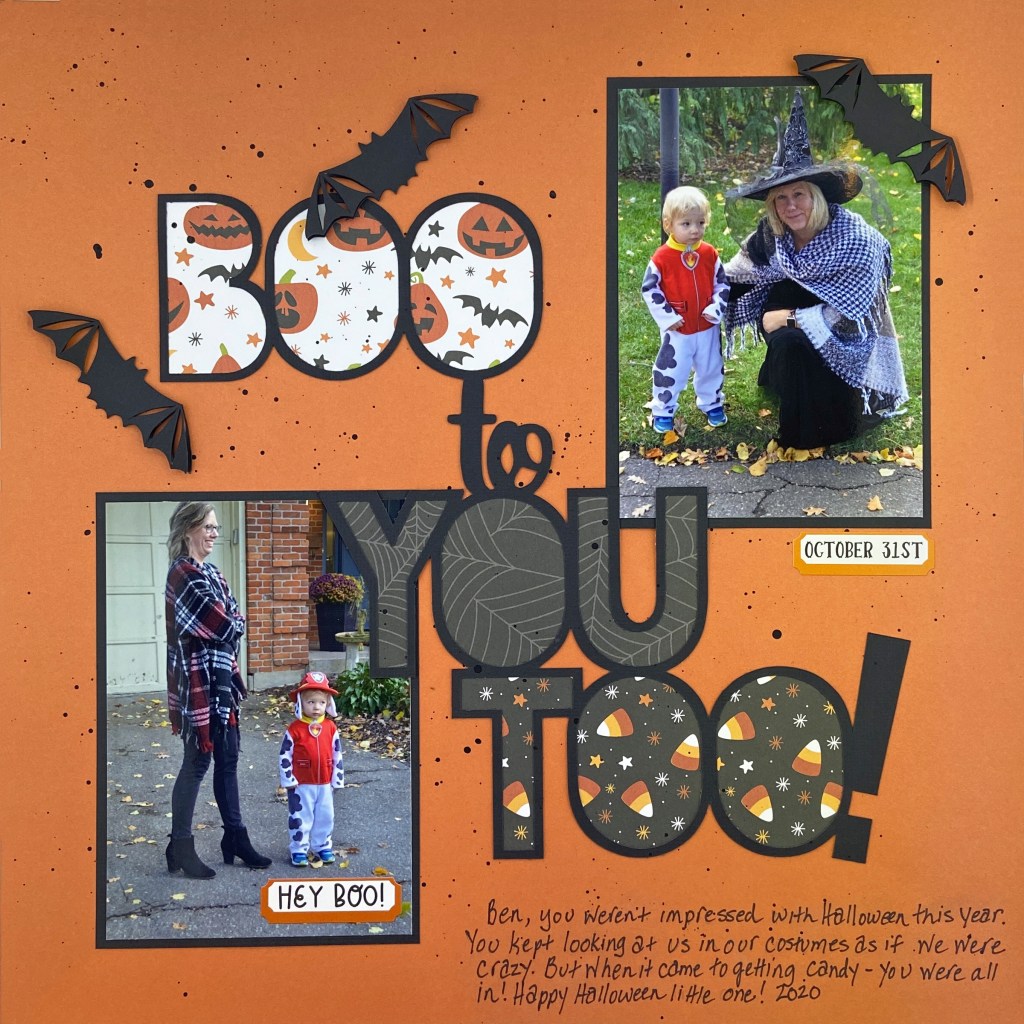
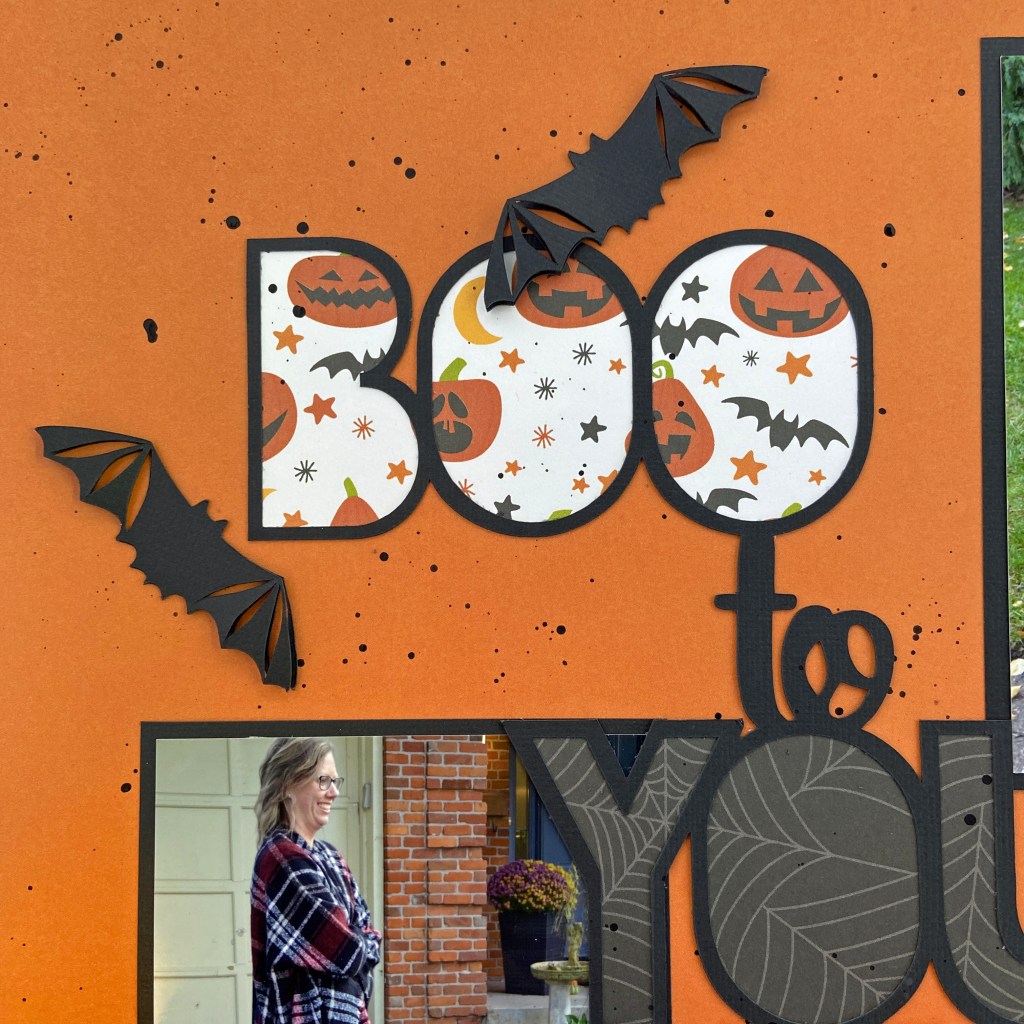
I hope you all had a wonderful, safe and fun Halloween yesterday. I love dressing up as a witch and handing out candy to all the excited children. Today’s post focuses on another picture from last year’s celebrations. With Covid restrictions and a ban on trick-or-treating, we celebrated in our driveway. Thank goodness for good weather!
I utilized Echo Park’s Halloween Party collection kit once again. The background for this layout is the backside of patterned paper HP250004 entitled Something Wicked. It is such a fun collection of papers and stickers. I’m sure I’ll be using it for many layouts.
The title for the layout, EEK, is a Silhouette Design Store cut file by Jillibean Soup (Design ID #386850). I resized the file to make it a bit bigger and cut it out of black cardstock. I love creating layers, textures, and stitching on my layouts. The spider webs in the cut file provided the perfect backdrop for adding in some soft stitching. The first step was to pierce holes in the spider webs found in the letters E and K. The spider webs were stitched using three strands of light silver DMC floss (#762). To enhance the spooky feel of the layout, the title was backfilled using Lawn Fawn’s Metallic Cardstock in Holographic 2.0. Ranger’s Glossy Accents was used to adhere the stitched cut file to the holographic background.


The large cut file at the top of the layout is entitled Halloween Corner by StudioIlustrado. It is also in the Silhouette Design Store (Design ID #65854). It was cut from black cardstock and the pumpkin eyes, noses, and mouths were kept to create a shadow effect. I choose to highlight the pumpkins and the ghost, leaving the bats flat on the page. This created continuity in the layout as the bats in both cut files appear to merge into one big cut file, encircling the photo. I used the knife tool in the Silhouette Studio software to isolate the ghost and pumpkins. This allowed me to cut the specific part of the cut file I desired, rather than having to waste paper by cutting out the entire cut file in another medium. The ghost was cut from vellum and adhered slightly offset with vellum tape. The pumpkins were cut from heavy orange textured cardstock and adhered with 3D foam squares by Scrapbook Adhesives.

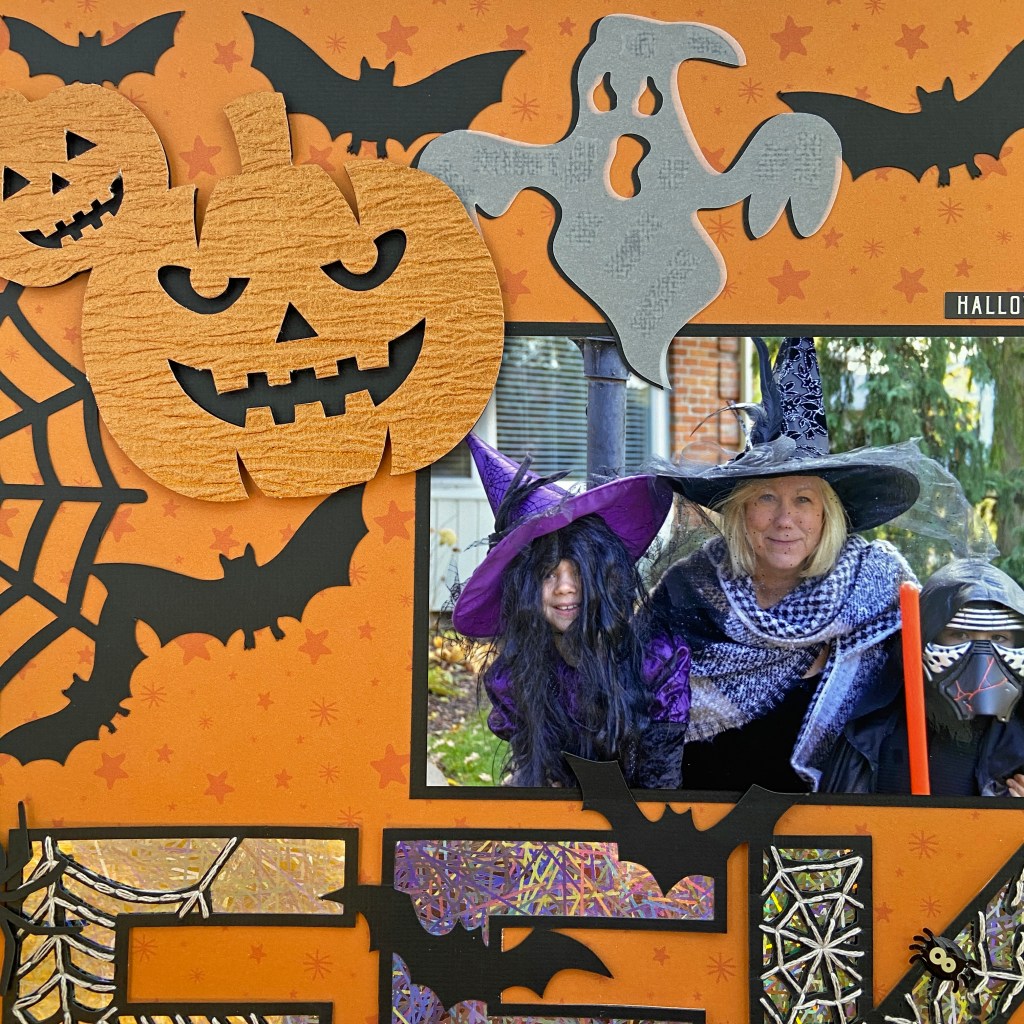
A few simple elements were added to complete the layout. Two spooky spiders from Doodlebug Designs shape sprinkles were placed in the upper left and lower right spider webs. The small black and white sticker entitled Halloween Fun was placed above the picture on the right-hand side. The sticker was included in the Halloween Party collection pack.
Thanks for stopping in and until next time, stay safe, stay well, and Happy Scrapping!