Rollercoaster

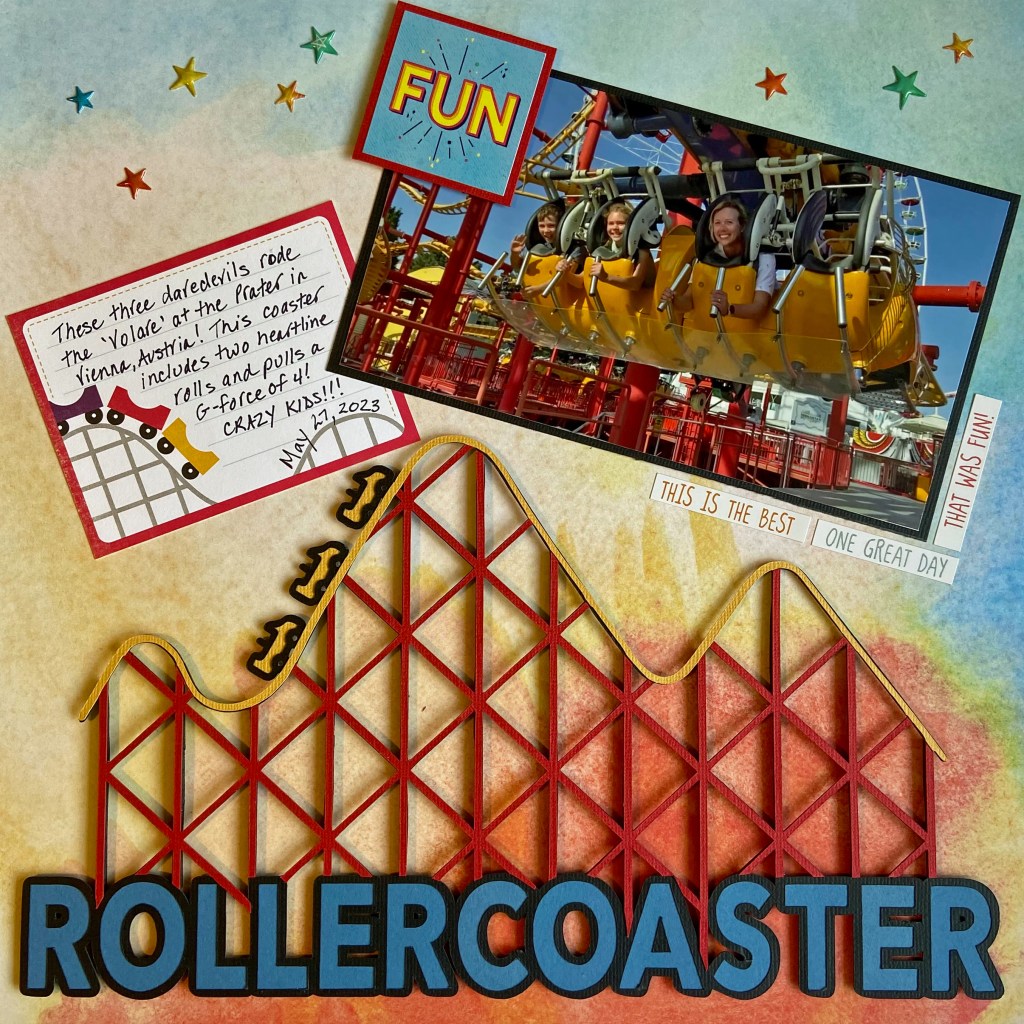
Who’s in for a good roller coaster ride this summer? While visiting our family in Austria, we took another trip to the Prater, Vienna’s renowned amusement park. Emperor Joseph II opened the park to the public in 1766. It has been serving up smiles ever since! Our 10-year-old grandson somehow convinced his Mom to ride this wicked (lying down) roller coaster. I’m the one safely on the ground, filming for prosperity! This picture captures them as they pause before being loaded into a corkscrew lift to start their ride.

The paper selected for this layout is from Webster’s Pages and it is called Dream in Color – Drifting. It fits beautifully with my design when I rotate it upside down. I chose Peartree Cutfiles Rollercoaster cut file to document this fun event. I wanted my layout to provide the illusion of a roller coaster. To achieve this effect, I took several steps. 

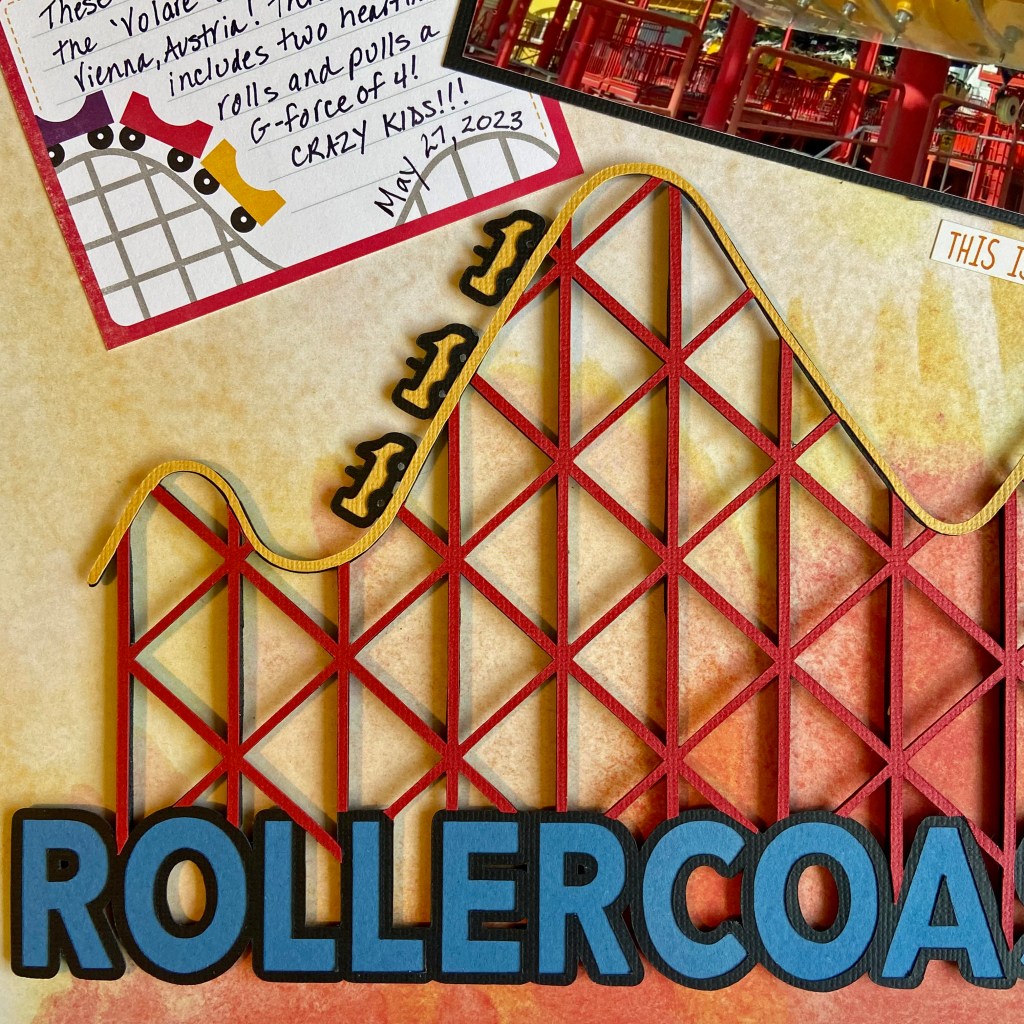
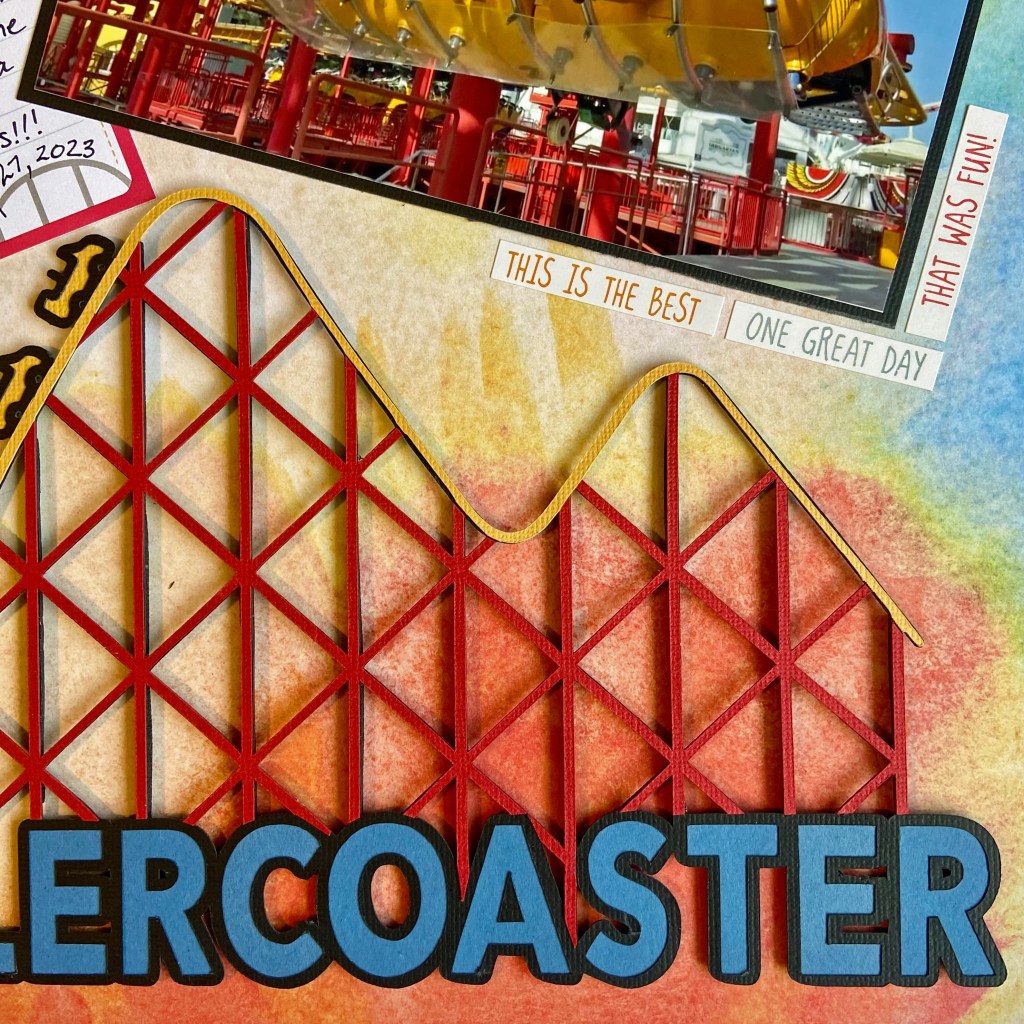
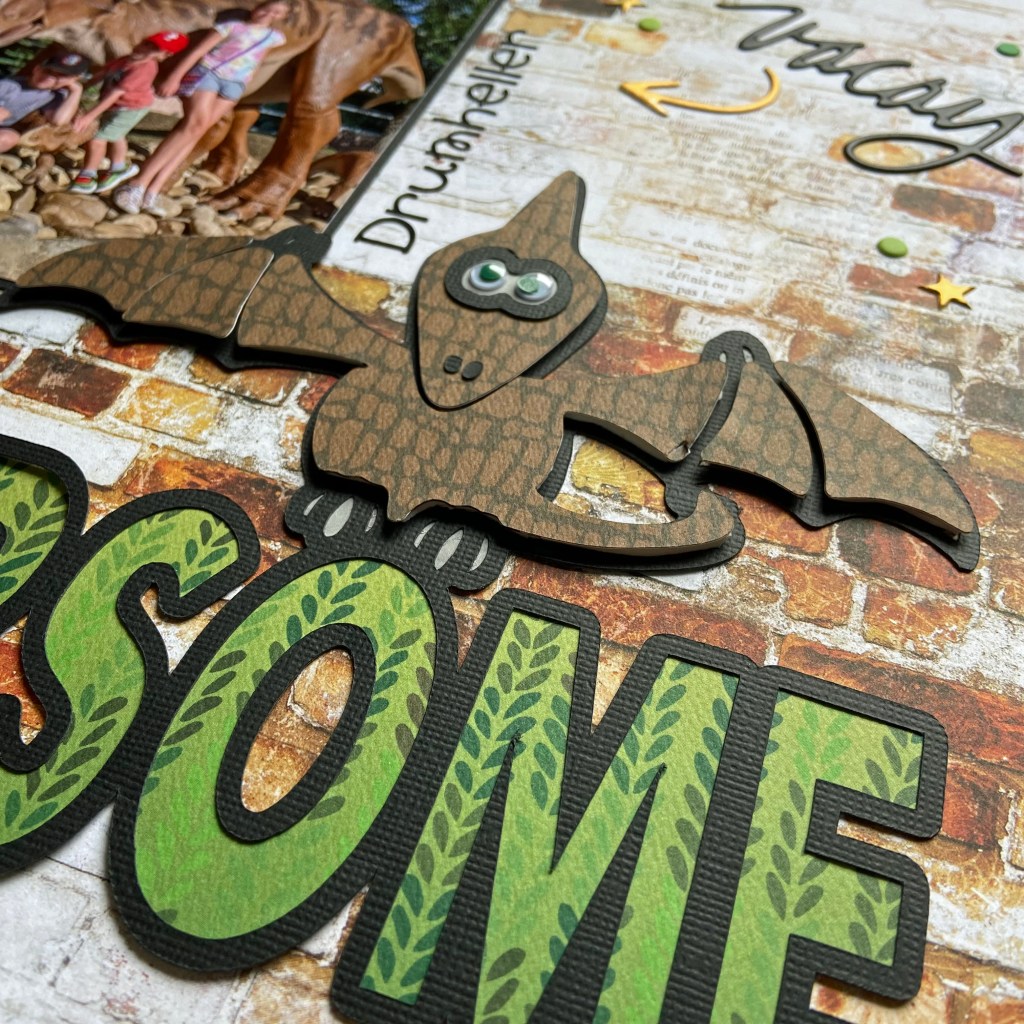
First, the cut file was cut out in black to help the title stand out. Next, the letters of the title were cut in blue to match the sky in the photo. The third step included cutting the file once again in red to imitate the red steel girders of the actual roller coaster. The cut file was cut once again in yellow to mimic the yellow rails the roller coaster cars travelled on. Once all 4 colours were cut, I carefully cut the elements away that I didn’t need and glued each section into place to recreate the coaster my family was riding.

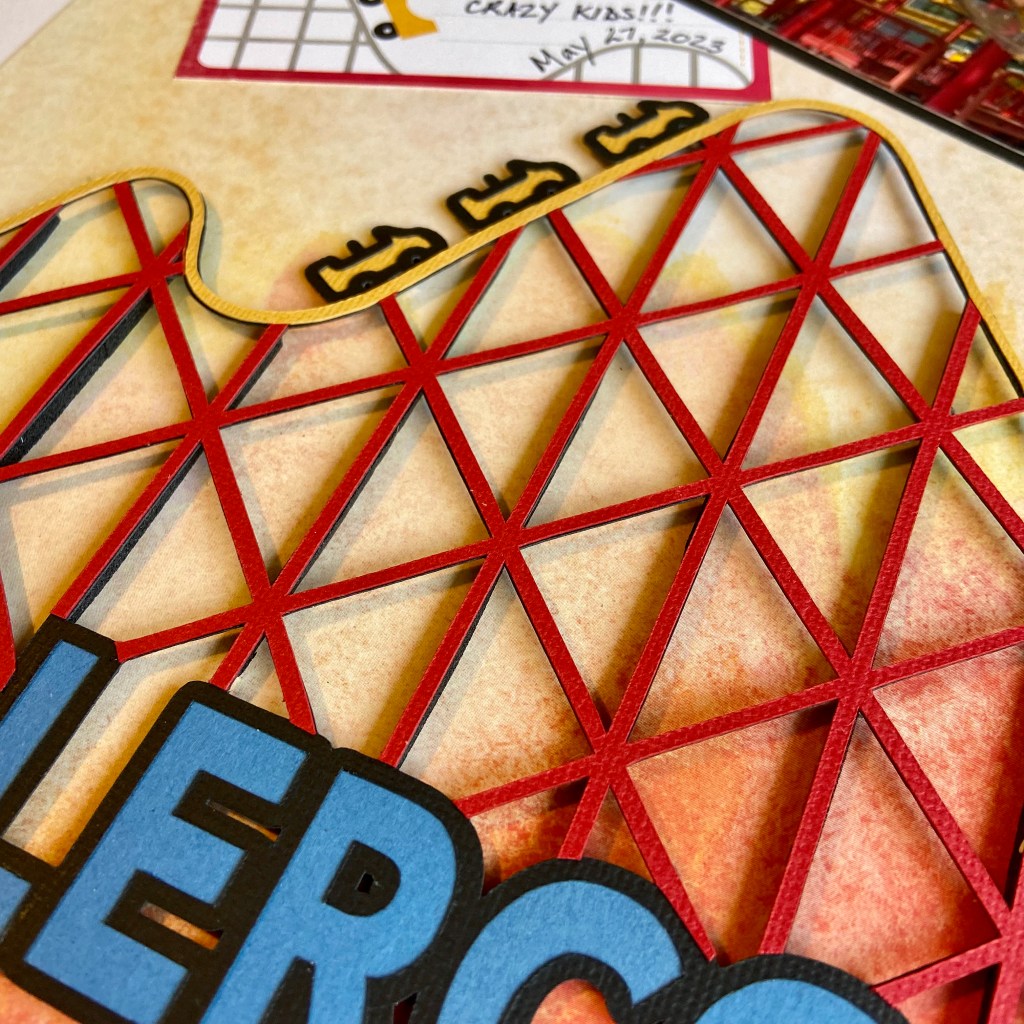
To further the illusion of the actual roller coaster, I used Taylored Expressions Black Foam Sticky Strips to back the cut file and provide dimension. Each sticky strip was cut in half lengthwise and then carefully adhered to the back of the cut file to achieve this look. While somewhat tricky and time-consuming, I am very happy with the result.

The sticker phrases and journalling box came from an older Echo Park paper collection called hello Summer. The large colour-coordinated FUN sticker is from Photoplay’s Those Summer Days paper collection. The final design element was adding brightly coloured stars in the sky. These stars are Puffy Stickers from Cocoa Vanilla Studio’s No Limits collection.

I may not be a roller coaster enthusiast myself, but I certainly had a blast documenting this ride for my family. My grandson is very excited this layout will be included in one of his scrapbooks!

Have I convinced you to get out to the amusement park this summer? Be sure to take every opportunity to enjoy this glorious summer and all the opportunities it offers! Until next time, stay safe, stay well, and Happy Scrapping!

Explore Dublin

Last Fall we had the good luck to travel to Ireland. We spent 4 wonderful days exploring Dublin. The history of this beautiful city is simply outstanding. This double-page layout focuses on Christ Church Cathedral, just one of many treasures in this gem of a town!

Those of you that regularly follow me, know I have an addiction to designing with Peartree Cutfiles! Therefore, this layout is no exception, as I have used two Peartree cut files to complete this design. I love the versatility of these cut files, as you can use them over and over. This is not the first layout that I’ve used the Explore cut file with, and likely not the last time either. This cut file was also an excellent fit with the paper collection used in this layout. I used Echo Park’s Getaway collection and found the backside of the Adventure patterned paper worked perfectly. The black and white compasses tied in nicely with the compass in the cut file. I used the Adventure paper to back the cut file with the exception of the compass itself. I used the backside of the Planes patterned paper for this element. A small black brad was used to complete the compass.

Drawing on the circle theme of the compass, I used one of the Radiate Stencils from Vicki Boutin’s StoryTELLER collection to stencil a random background on the right-hand side of this page. I was looking for a very subtle background for the Walnut Cream cardstock from Bazzill, and I turned to Tim Holtz’s Pumice Stone Distress Ink to achieve this overall look.

The right-hand page of this double-page layout uses the Film Strips Background cut file. It was part of the March 2023 Pearscription package. I highly recommend you investigate the Pearscription packages. You receive 5 exclusive cut files each month, and I can honestly say that I’ve never been disappointed! This cut file was the perfect way to add multiple photos with lots of detail from our visit to the Cathedral.

To balance the film strip, and draw your eye to the multiple pictures, I filled 3 separate frames with embellishments. The compass and word travel were stickers in the Getaway paper collection. The rustic star-shaped element comes from a package of Mechanicals by Finnabair and is called Steampunk Blades. I secured it to the layout with a small bronze brad. The third embellishment, Road Trip, is a glazed chipboard piece that’s been in my supplies for years. To complete the layout, I added the date with small round Doodlebug Stickers.

Thanks for stopping in today, I hope you’ve enjoyed a quick tour of Christ Church Cathedral in Dublin. Until next time, stay safe, stay well, and Happy Scrapping!

Roarsome

In late June, we travelled out west for our son’s wedding. My daughter and her family planned a few side trips while we were there, and Drumheller was their first destination. Drumheller, Alberta, is located northeast of Calgary. It is known as the dinosaur capital of the world, and it was a huge hit with our grandchildren!

I chose the Roarsome title from Peartree Cutfiles to showcase a picture from their trip. I loved the addition of the dinosaur on top and wanted to make it a bit whimsical as I designed the layout. The patterned papers in the title come from an older Carta Bella Paper Co collection aptly entitled Dinosaurs.

While I backed the words in the title, I chose to lift the pieces of the dinosaur by securing a piece of black fun foam underneath each piece to create dimension and the illusion of flight. I added green googly eyes to the dinosaur to enhance the whimsical feel of the layout. Once the title was complete, both the picture and title adhered to the fun background paper 12″ Life in Color Bricks. This background page also belongs to an older BoBunny collection called Life in Color.

The final elements of the layout came together quite quickly. The “vacay” puffy phrase and accent stickers came from a Vicki Boutin collection of Thickers called Loving This. The date and location of the picture were documented with Doodlebug Design Inc.’s teensy-type stickers.

And there you have it, a simple and whimsical page that focuses the attention on the picture and title. Thanks for stopping by today, and until next time, stay safe, stay well and Happy Scrapping!

EEK

I hope you all had a wonderful, safe and fun Halloween yesterday. I love dressing up as a witch and handing out candy to all the excited children. Today’s post focuses on another picture from last year’s celebrations. With Covid restrictions and a ban on trick-or-treating, we celebrated in our driveway. Thank goodness for good weather!

I utilized Echo Park’s Halloween Party collection kit once again. The background for this layout is the backside of patterned paper HP250004 entitled Something Wicked. It is such a fun collection of papers and stickers. I’m sure I’ll be using it for many layouts.

The title for the layout, EEK, is a Silhouette Design Store cut file by Jillibean Soup (Design ID #386850). I resized the file to make it a bit bigger and cut it out of black cardstock. I love creating layers, textures, and stitching on my layouts. The spider webs in the cut file provided the perfect backdrop for adding in some soft stitching. The first step was to pierce holes in the spider webs found in the letters E and K. The spider webs were stitched using three strands of light silver DMC floss (#762). To enhance the spooky feel of the layout, the title was backfilled using Lawn Fawn’s Metallic Cardstock in Holographic 2.0. Ranger’s Glossy Accents was used to adhere the stitched cut file to the holographic background.

The large cut file at the top of the layout is entitled Halloween Corner by StudioIlustrado. It is also in the Silhouette Design Store (Design ID #65854). It was cut from black cardstock and the pumpkin eyes, noses, and mouths were kept to create a shadow effect. I choose to highlight the pumpkins and the ghost, leaving the bats flat on the page. This created continuity in the layout as the bats in both cut files appear to merge into one big cut file, encircling the photo. I used the knife tool in the Silhouette Studio software to isolate the ghost and pumpkins. This allowed me to cut the specific part of the cut file I desired, rather than having to waste paper by cutting out the entire cut file in another medium. The ghost was cut from vellum and adhered slightly offset with vellum tape. The pumpkins were cut from heavy orange textured cardstock and adhered with 3D foam squares by Scrapbook Adhesives.

A few simple elements were added to complete the layout. Two spooky spiders from Doodlebug Designs shape sprinkles were placed in the upper left and lower right spider webs. The small black and white sticker entitled Halloween Fun was placed above the picture on the right-hand side. The sticker was included in the Halloween Party collection pack.

Thanks for stopping in and until next time, stay safe, stay well, and Happy Scrapping!

Boo to You Too!

With Halloween just around the corner, it’s time to get your Boo on! Last Halloween, Benjamin was only two, and he wasn’t much impressed with Halloween – until the candy came out! We did our best to coax a smile out of this sweet boy, but he wasn’t having any of it. He was the saddest Marshall from Paw Patrol you ever did see. Whether happy or sad, it’s still important to document these moments in our lives. I know Ben will find this moment amusing when he’s a bit older.

The Boo to You Too! cut file from Marcy Milly SVG was an excellent fit for documenting this story. 

Echo Park’s Halloween Party patterned paper collection and stickers provided the foundation for this layout. The background page is the orange/black sheet, and three patterned papers – Gleaming Gourds, October 31st, and Candy Corn Craze, were used to back-fill the words in the title cut file. Once the title was complete, it was centred and adhered to the orange background. Some space was left free to slide the pictures underneath. Before securing the pictures, the entire page was sprinkled with black Liquidex Heavy Body Acrylic paint. The small black paint splotches help fill in some of the empty spaces and enhance the Halloween mood.

I love the bat in this cut file and like how there are cut-outs in the wings to give it the effect of flying. To emphasize this on the layout, I cut the bat six times. The next step was to create three bats from the six cut files. To create this look, adhere two of the bats together with a strong, permanent adhesive at the centre of the body only. Be careful to leave the wings free of glue. To produce the illusion of flapping wings, place small black 3D foam squares by Scrapbook Adhesives between the wings of each bat.

To complete the layout, I added a couple of stickers from the coordinating sticker sheet found in the patterned paper collection. The final touch was to add personalized journaling in the bottom right-hand corner.

Ben’s all ready for Halloween this year and looking forward to being a penguin! I’m hopeful I’ll manage some pictures with him smiling in his costume this year. But if not, you can be sure, I’ll be scrapbooking it anyways! I hope you have a safe and fun Halloween with those you love.

Until next time, stay safe, stay well, and Happy Scrapping!

Wish

Do you remember the joy of turning 10 and feeling so special because you now have 2 digits to represent your age, instead of 1?! This February marked Madison’s 10 birthday, and as excited as she was to be turning 10, it also came with some sadness that she wouldn’t get to celebrate with her friends due to Covid. Thankfully, my daughter and her husband went all out in putting up decorations to celebrate this special day. You can see the joy in Maddie’s face as she took in all garlands, streamers and balloons. Take that Covid! We can still find excitement and joy in these quiet celebrations!

I wanted to create a layout for Maddie using the same papers used in creating her Tower Explosion Box. These papers came from Echo Park’s It’s Your Birthday paper collection pack. For the red background, I used Echo Park’s Party Time patterned papers. It’s difficult to see in the pictures, but this red background paper has very subtle red stars throughout each page.

Two digital cut files from Peartree Cutfiles were featured to create this double page layout. The main title, Wish, is part of the larger Wish cut file from March’s Pearscription. I utilized the other portions of this cut file in the Big Comfy Couch layout back in March. The second cut file is entitled Stack of Presents.

Both of these files have stars in them which further coordinated with the background paper. Each file was backed with coordinating patterned papers from the It’s Your Birthday paper collection. The stars were all backed with silver glitter cardstock. I also cut additional stars to add to the background to heighten the overall party effect.

One of the design elements that I wanted to pull into this layout, was the replication of the garland that Maddie is standing under in the larger picture. To accomplish this I cut multiple circles from coordinating patterned paper using the smallest die in Lawn Fawn’s Large Stitched Circle Stackables. Before adhering them to the page, I ran a dark black line with a Sharpie to connect them. The upper portions of each page were filled with various pieces of confetti that came from two Silhouette Design Store cut files. Both cut files were designed by Sophie Gallo. One is called Confetti – Design ID 17667 – and the other is called Cute Confetti – Design ID 42203. A third Silhouette cut file called Elegant Alpha – Numbers were used to create the number 10. Kolette Hall is the designer and you will find it under Design ID 35756. I removed the scrolls found on each number before cutting. The following two pictures provide a closer look at the garland, confetti and the number 10.

The final touches on the layout included adding 3 die cut cardstock pieces from the It’s Your Birthday Ephemera pack, and scattering the additional stars throughout the layout. And that’s a wrap on Birthday #10 for this sweet girl! I hope her next 10 years are as much fun as the first!

I hope you have all found creative ways to celebrate birthdays during this global pandemic. I know we will come through this to better days when we can celebrate in person with family and friends! In the meantime, stay safe, stay well and Happy Scrapping!