Hey Bestie

This layout is very special to me. I designed it as a birthday gift for one of my life-long friends, Gail, who was celebrating a milestone birthday. We’ve been through decades together, and she’s been there for me through thick and thin. While there may be a few years difference in ages, we’ve had fun together as if we were classmates growing up together. It turned out that we both married the man of our dreams the same year. Coincidently, our husbands share the same first name. The picture in this layout comes from our mutually celebrated 25th wedding anniversary trip to Italy. A dream come true for all four of us!

I used the Hey Bestie cut file from Cut to You as the centrepiece for this design. The cut file was cut from white cardstock and then pierced with a paper piercer to allow a stitched border.

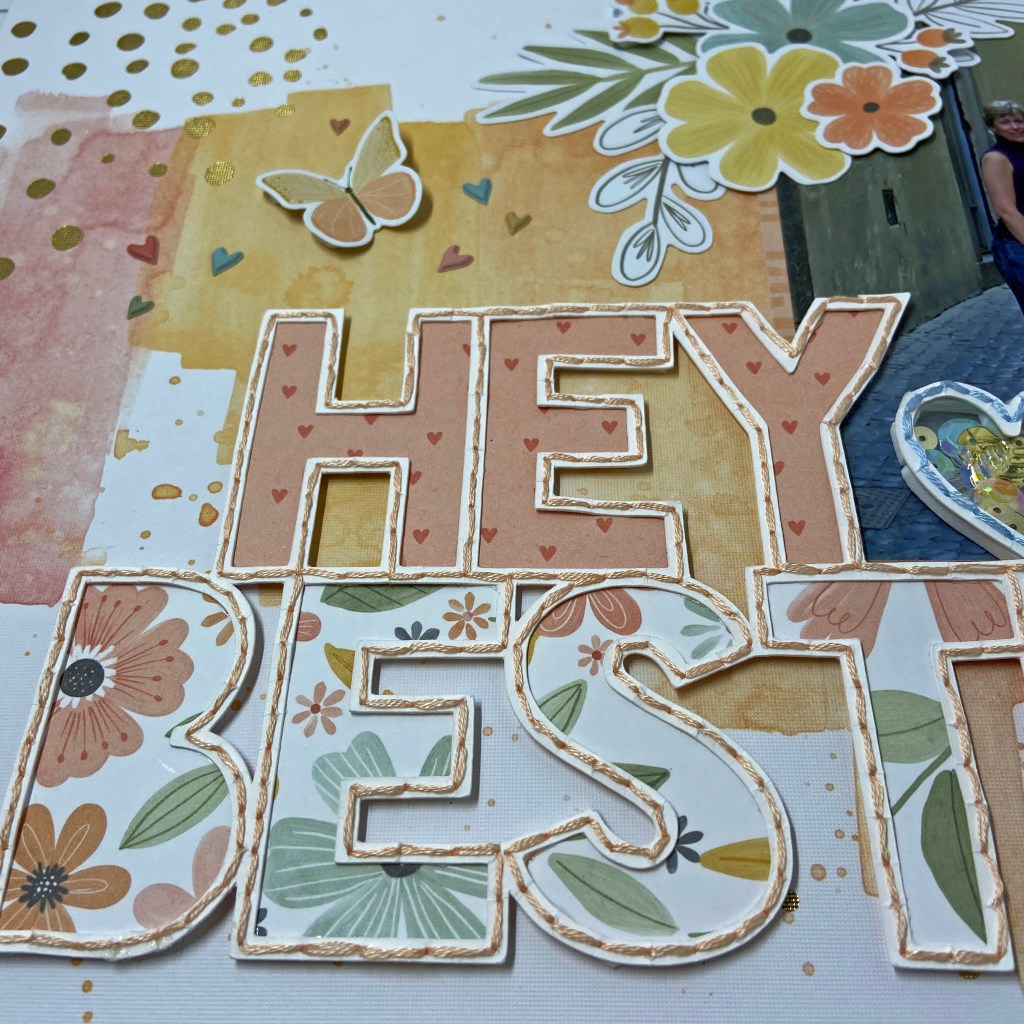
The letters were stitched with pale peach embroidery floss and the heart with pale blue. Cocoa Vanilla Studio’s, These Days, coordinating patterned paper, was used to backfill the letters in the title.

I created a shaker pocket for the heart and added some sequin mix from Cocoa Vanilla’s Daydream collection. These sequins coordinated with this collection beautifully. At this stage, the title was set aside. The background paper for this design came from a Vicki Boutin collection of Ready-to-Use Mixed Media Paper pads. The gold, pink, and peach background was a stunning backdrop for this completed title. In preparation for securing the title to the page, it was backed with Foam Sticky Strips from Taylored Expressions. The photo was placed on a coordinating patterned paper used in backing the title. Once I was happy with the positioning of each, they were both secured to the page.

The page was completed by adding various coordinating embellishments from the These Days collection. The flower cluster, seen at the top left of the photo, was created using various elements from the Floral Ephemera pack. The yellow butterfly was used from the Die Cut Ephemera pack and the small colour-coordinated hearts came from the Puffy Stickers collection. The final embellishments added were the gold heart and the YOU ARE SO LOVED phrase to the bottom right of the title.

When the layout was complete, it was placed in a white shadow box before it was gifted to Gail. She loved her gift and the beautiful reminder of our special friendship. I hope you have at least one friend this special. Here’s to girlfriends everywhere!

Until next time, stay safe, stay well, and Happy Scrapping!

Summer Vibes

This photo of my grandson Owen just sums up everything about summer for me. Spending time at our cottage in Muskoka is our favourite summer activity! My daughter captured this image on another glorious day last summer. My grandchildren love the water and spend most of their day swimming. You can see the look of contentment on Owen’s face – a perfect day, doing the things he loves most in the place he loves most.

The Summer Vibes cut file from Cut to You was the perfect cut file to document this moment. I chose coordinating papers from the Legendary collection by Cocoa Vanilla Studio for this layout. The yellows, oranges and greens were a perfect fit with the photo. I wanted the title to pop on the page and black cardstock helped achieve this look. The letters for the word summer were offset in Silhouette software to back the file, but the yellow letters for the word vibe were cut to fit the outline perfectly. These letters were backed using Taylored Expressions Foam Sticky Strips and placed within the corresponding black letters. This provided texture and dimension to the title. I mirrored this technique in the sun portion of this cut file, backing the two main sun sections and popping up the sun rays. This helped to provide balance to both sections of the layout.

The chipboard trees in the bottom left of the layout came from Scrapaholics. They came in a set of three called Snowy Trees. They too were a perfect fit for the cottage landscape and helped pull more green into the layout. I coloured them with Tim Holtz Distress InksPeeled Paint and Brushed Corduroy before adhering to the page.

Some of the final touches for this layout included adding the stickers to the left of the photo and attaching the “noteworthy” tab at the top of the photo. Both of these elements came from the Legendary collection. The last element was adding the date with doodlebug design inc’s my type cardstock stickers. I feel it is really important to attach a date to a layout as the days and years fly by before we know it!

Thanks for stopping by today, I hope you’ve enjoyed our bit of heaven up north! We will open the cottage soon and we look forward to another amazing year of memories at our happy place! Until next time, stay well, stay safe, and Happy Scrapping!

You Are Some Bunny Special

Did you know the Easter Bunny is 6′ tall and that he has a kind and generous heart equally as large? I am very lucky to have a dear friend Gerry, who rented an Easter Bunny costume to spread some joy to young and old this past Easter. He offered to come and surprise our grandchildren and even brought the chocolate eggs to spread more cheer! We were very honoured to be on his list of visits this past Easter. Maddy and Owen couldn’t figure out who was in the costume. Owen asked me where he came from and I replied that I found him hopping around in my backyard. Owen quickly responded with “No Nana, he drove here – I can see his van in your driveway!”. That boy doesn’t miss a trick! Ben was quite taken with the Easter Bunny. After the visit was over, he kept asking his Mom if the Easter Bunny could come to Easter Dinner! Wouldn’t that be something to see!

Coordinating papers from 3 separate Doodlebug Designs collections were used to complete this layout; Springtime, Hello Spring and Easter Parade. Two cut files were used to create this fun page. The large title cut file comes from Cut to You and is called Some Bunny Special. You can find it here https://createdbygwen.com.au/product/some-bunny-special-title-cut-file/. I selected 5 coordinating patterned papers from the 3 collections listed above to back the title and add further whimsy to the layout.

The bunny cut file in the bottom left comes from Peartree Cutfiles and is called Floral Bunny Ears https://www.peartreecutfiles.co.uk/product/floral-bunny-ears/.

I only wanted to use the head and ears of this file and did not want the floral sections. To achieve this and minimize wasted paper, I positioned the cut file at the bottom of the white cardstock, leaving the floral portion outside the cutting area of the Silhouette mat. Hopefully, this tip will have you looking at some of your cut files a bit differently and get you thinking about how you can manipulate them to fit the vision of your project. The bunny ears were cut from white cardstock and backed with a soft textured white cardstock and coordinating pink patterned paper. This picture provides a closer look.

The banner in the top right of the layout was made by cutting 5 triangles from coordinating patterned papers. Each of these was backed with fun foam to add some dimension to the project.

The finishing touches on the layout included adding sticker hearts (between the bunny ears) and sticker arrows to the left of the word SPECIAL in the title. The photo was matted with 2 coordinating patterned papers. The journaling found in the bottom right was printed on white cardstock and cut to size. These strips were also backed with fun foam. The 3 hearts found at the end of the journaling come from the Rainbow Hearts Shape Sprinkles by Doodlebug Designs. The date was added using Doodlebug stickers called Sunshine.

It has been such a tough year with COVID, the ongoing restrictions, and multiple lockdowns. Thank you Gerry for providing a welcome diversion from our current situation. Your kindness and generosity were so deeply appreciated! This visit by the Easter Bunny was such a bright spot this Spring and a reminder of better times to come. Maybe next year the Easter Bunny will get to come to Easter Dinner! Until next time, stay safe, stay well, and Happy Scrapping!