Explore Dublin

Last Fall we had the good luck to travel to Ireland. We spent 4 wonderful days exploring Dublin. The history of this beautiful city is simply outstanding. This double-page layout focuses on Christ Church Cathedral, just one of many treasures in this gem of a town!

Those of you that regularly follow me, know I have an addiction to designing with Peartree Cutfiles! Therefore, this layout is no exception, as I have used two Peartree cut files to complete this design. I love the versatility of these cut files, as you can use them over and over. This is not the first layout that I’ve used the Explore cut file with, and likely not the last time either. This cut file was also an excellent fit with the paper collection used in this layout. I used Echo Park’s Getaway collection and found the backside of the Adventure patterned paper worked perfectly. The black and white compasses tied in nicely with the compass in the cut file. I used the Adventure paper to back the cut file with the exception of the compass itself. I used the backside of the Planes patterned paper for this element. A small black brad was used to complete the compass.

Drawing on the circle theme of the compass, I used one of the Radiate Stencils from Vicki Boutin’s StoryTELLER collection to stencil a random background on the right-hand side of this page. I was looking for a very subtle background for the Walnut Cream cardstock from Bazzill, and I turned to Tim Holtz’s Pumice Stone Distress Ink to achieve this overall look.

The right-hand page of this double-page layout uses the Film Strips Background cut file. It was part of the March 2023 Pearscription package. I highly recommend you investigate the Pearscription packages. You receive 5 exclusive cut files each month, and I can honestly say that I’ve never been disappointed! This cut file was the perfect way to add multiple photos with lots of detail from our visit to the Cathedral.

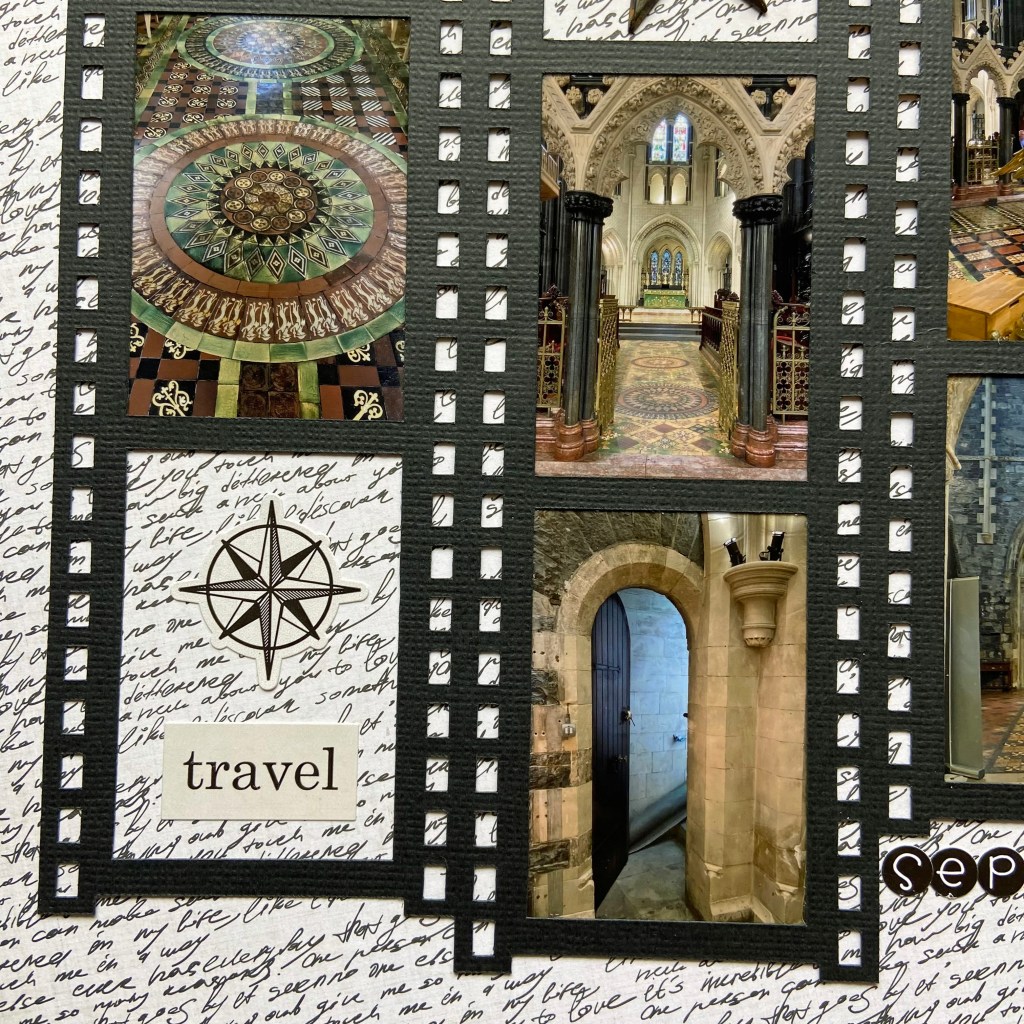
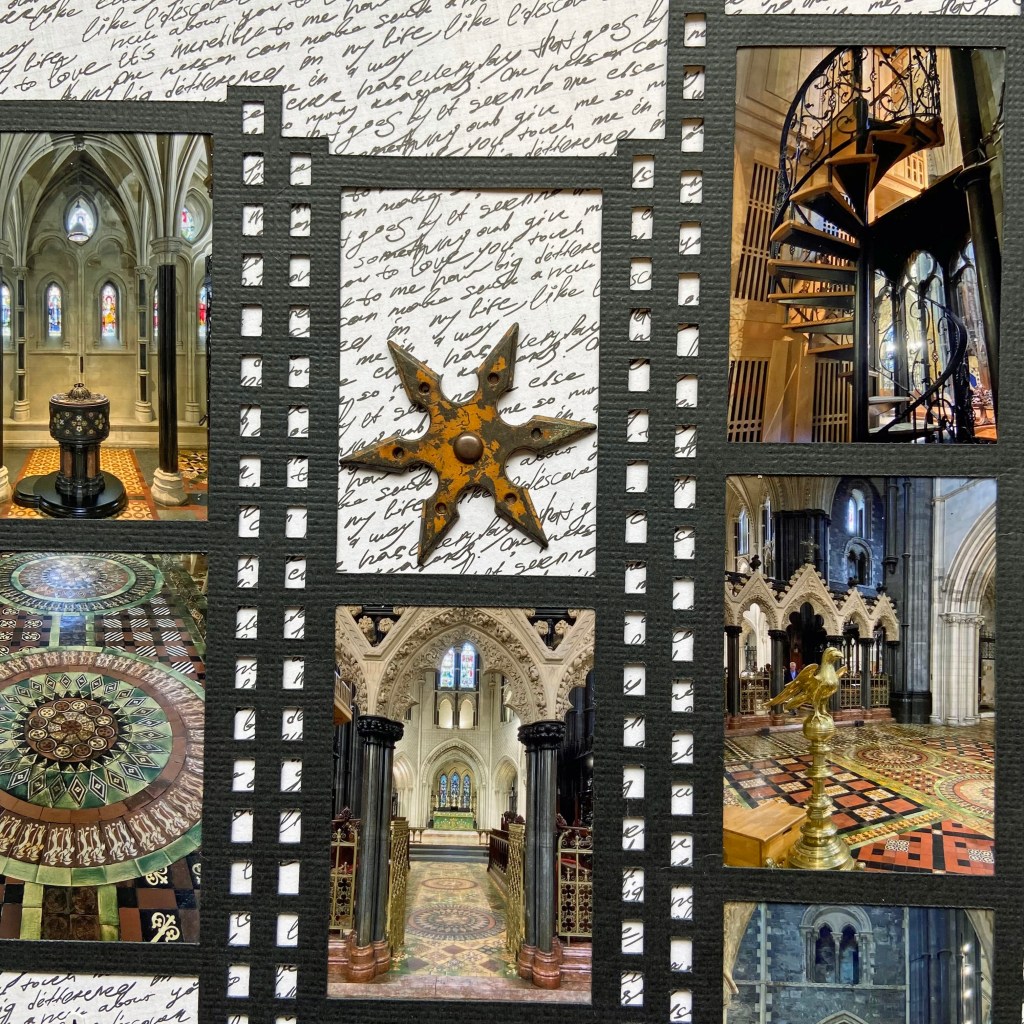
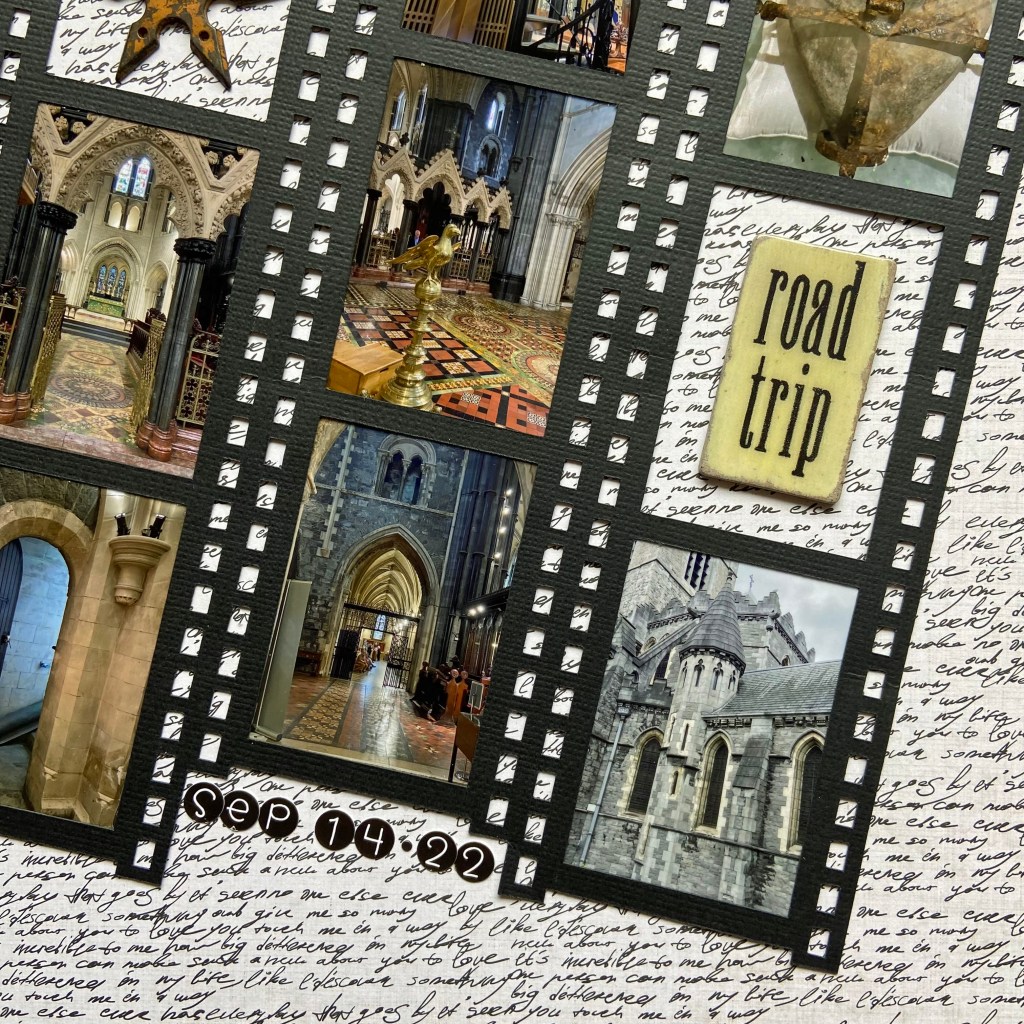
To balance the film strip, and draw your eye to the multiple pictures, I filled 3 separate frames with embellishments. The compass and word travel were stickers in the Getaway paper collection. The rustic star-shaped element comes from a package of Mechanicals by Finnabair and is called Steampunk Blades. I secured it to the layout with a small bronze brad. The third embellishment, Road Trip, is a glazed chipboard piece that’s been in my supplies for years. To complete the layout, I added the date with small round Doodlebug Stickers.

Thanks for stopping in today, I hope you’ve enjoyed a quick tour of Christ Church Cathedral in Dublin. Until next time, stay safe, stay well, and Happy Scrapping!

Party!

I’m long overdue in posting this two-page layout for Ben’s 2nd Birthday! There’s nothing better than a summer birthday when the air is hot, the water refreshing and the birthday cake is ice cream! We are so lucky to have the opportunity to celebrate this sweet boy’s Birthday at the cottage.

The gorgeous ink base pages for this double page layout came from a craft smart paper pad called Rainbow Inks purchased at Michael’s. This paper pad is an excellent alternative for someone like me who is slightly intimidated to create the backdrop myself. I was attracted to the turquoise page with the internal square offset and rotated the second page to balance the double page layout.

I love the Star Cake cut file from Peartree Cutfiles. It was perfect for documenting Ben’s big day. The file was cut from black cardstock and then the interior pieces were offset with coordinating patterned papers from Doodlebug Design’s Party Time paper pack. Lawn fawn’s “holographic 2.0” paper was used to back the stars in this cut file. The number 2 was added to the cake using a chipboard piece from Basic Grey called dark chocolate chip.

I enjoy making my grandchildren shirts for their Birthday and found the perfect design for a two-year-old in the Silhouette Design Store. The Two Nado Birthday Phrase was designed by Sarah Bailey (Design ID#315079). I used black and turquoise Heat Transfer Vinyl to create Ben’s t-shirt. I replicated this design for the second page of this layout. 

The rest of the layout came together quickly using several “odds & ends” from Doodlebug Design’s Dragon Tails ephemera package. The PARTY title, coordinating birthday presents and stars on both pages all belong to this package. The green Happy Birthday stickers are also a Doodlebug Design product and belong to a multicolour cardstock sticker sheet. You can stretch your scrapbook stash when companies coordinate the colours between different paper collections and releases! The finishing touch was to add the date using white Thickers Happy Life foam letter stickers. 

We sure had fun celebrating Ben’s 2nd Birthday, and I’m excited to add these pages to his personal scrapbook. I hope you’ve found some inspiration to scrapbook a special birthday in your family. Until next time, stay safe, stay well and Happy Scrapping!

Summer Vibes

This photo of my grandson Owen just sums up everything about summer for me. Spending time at our cottage in Muskoka is our favourite summer activity! My daughter captured this image on another glorious day last summer. My grandchildren love the water and spend most of their day swimming. You can see the look of contentment on Owen’s face – a perfect day, doing the things he loves most in the place he loves most.

The Summer Vibes cut file from Cut to You was the perfect cut file to document this moment. I chose coordinating papers from the Legendary collection by Cocoa Vanilla Studio for this layout. The yellows, oranges and greens were a perfect fit with the photo. I wanted the title to pop on the page and black cardstock helped achieve this look. The letters for the word summer were offset in Silhouette software to back the file, but the yellow letters for the word vibe were cut to fit the outline perfectly. These letters were backed using Taylored Expressions Foam Sticky Strips and placed within the corresponding black letters. This provided texture and dimension to the title. I mirrored this technique in the sun portion of this cut file, backing the two main sun sections and popping up the sun rays. This helped to provide balance to both sections of the layout.

The chipboard trees in the bottom left of the layout came from Scrapaholics. They came in a set of three called Snowy Trees. They too were a perfect fit for the cottage landscape and helped pull more green into the layout. I coloured them with Tim Holtz Distress InksPeeled Paint and Brushed Corduroy before adhering to the page.

Some of the final touches for this layout included adding the stickers to the left of the photo and attaching the “noteworthy” tab at the top of the photo. Both of these elements came from the Legendary collection. The last element was adding the date with doodlebug design inc’s my type cardstock stickers. I feel it is really important to attach a date to a layout as the days and years fly by before we know it!

Thanks for stopping by today, I hope you’ve enjoyed our bit of heaven up north! We will open the cottage soon and we look forward to another amazing year of memories at our happy place! Until next time, stay well, stay safe, and Happy Scrapping!