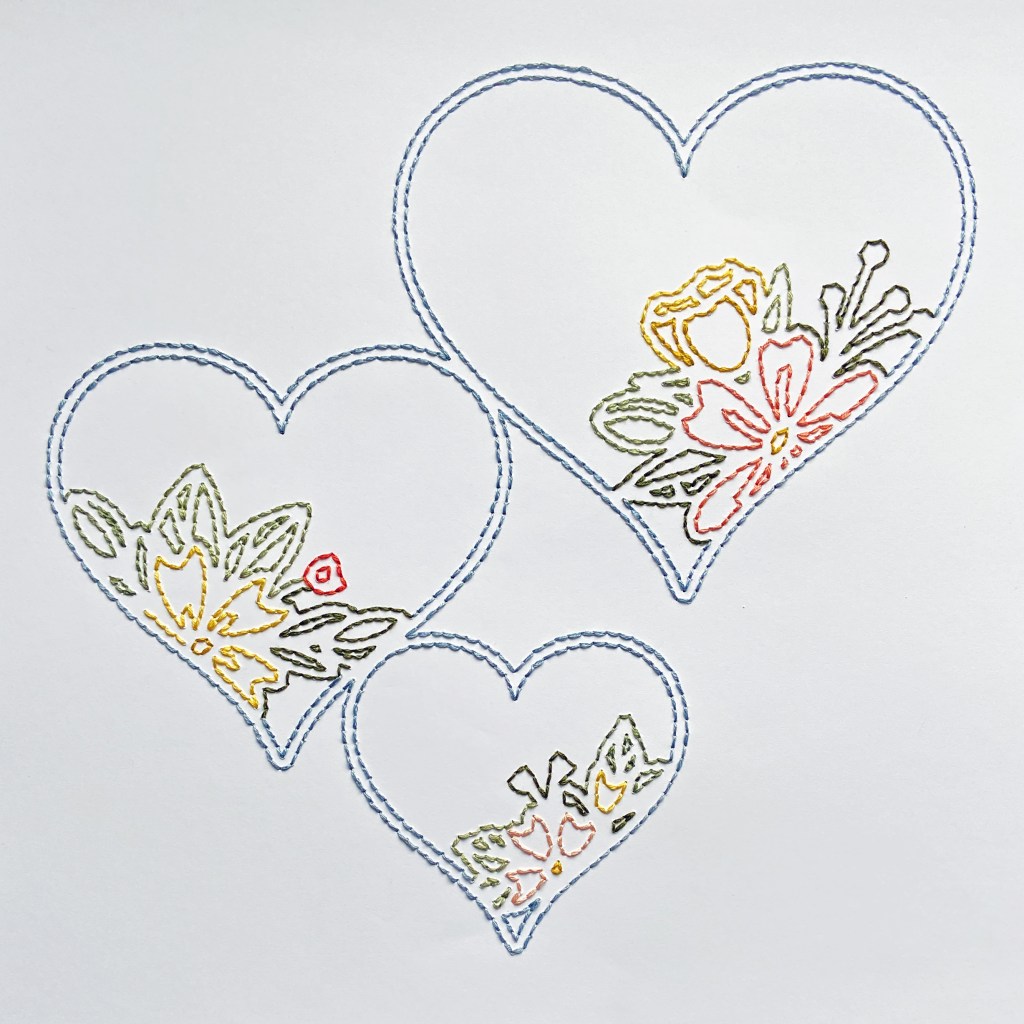
In February, I started subscribing to monthly digital cut files from Peartree Cutfiles, called a Pearscription, https://www.peartreecutfiles.co.uk/pearscription/. I used one of the five exclusive February files to complete this layout. All the files were unique and beautiful, but this Trio of Hearts cut file immediately grabbed my attention. It didn’t take me long to figure out what I’d like to do with it. Three hearts – three grandchildren – it seemed a perfect match!
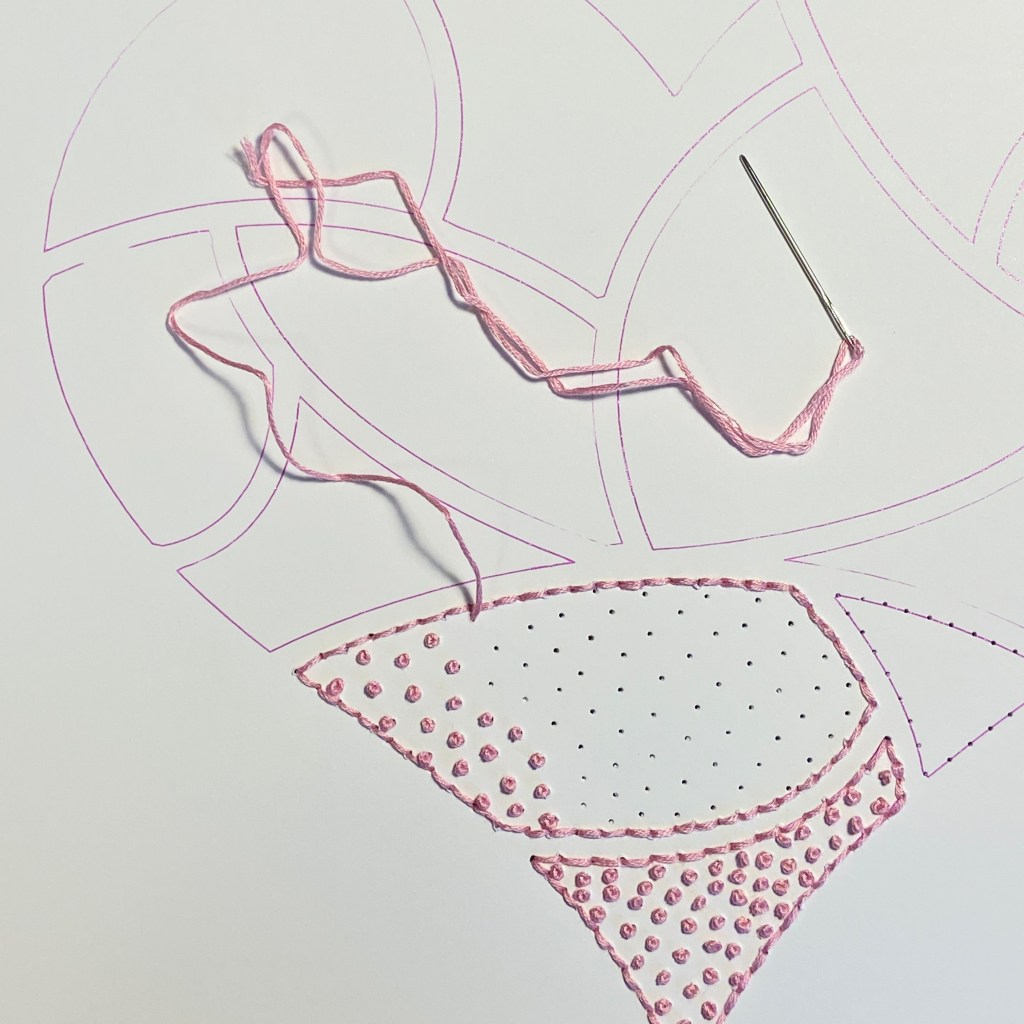
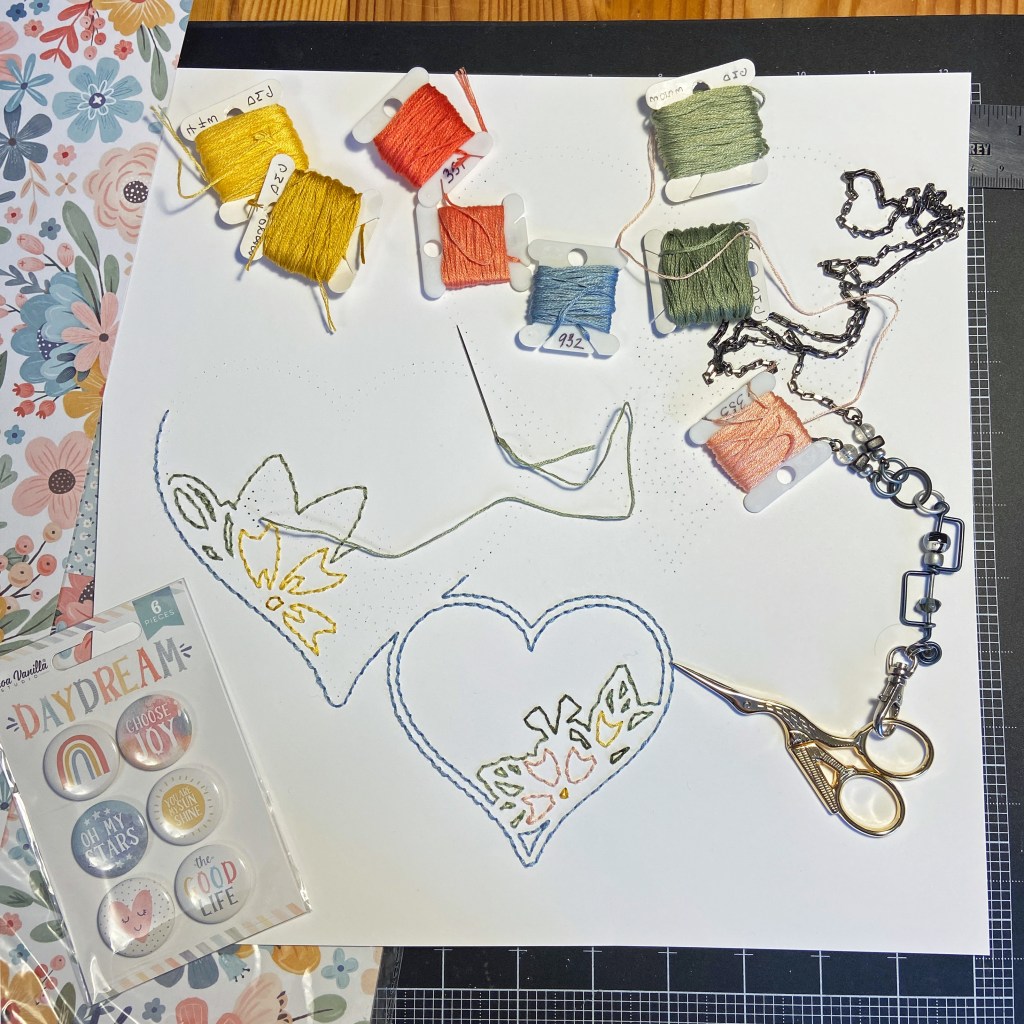
I had two specific plans in place when I started this layout; 1) I wanted to break open the Cocoa Vanilla Studio Daydream collection I’ve had for a while, and 2) I wanted to stitch the cut file, rather than cut it out. I recently viewed an excellent video tutorial by Belinda James that teaches you how to turn a digital cut file into a stitching file on your Silhouette machine (Creating stitching templates with your Silhouette). The video was easy to follow, you can find it here: https://www.youtube.com/watch?v=Fht1LT2dxko&t=635s. It does take some practice to learn the spacing that’s right for you, but truly worth the effort. I would suggest that you do a practice cut the first time round to see if you like the spacing. In my first attempt, I found the spacing between stitching holes too close for my liking. The settings were easily adjusted to give the spacing I desired.
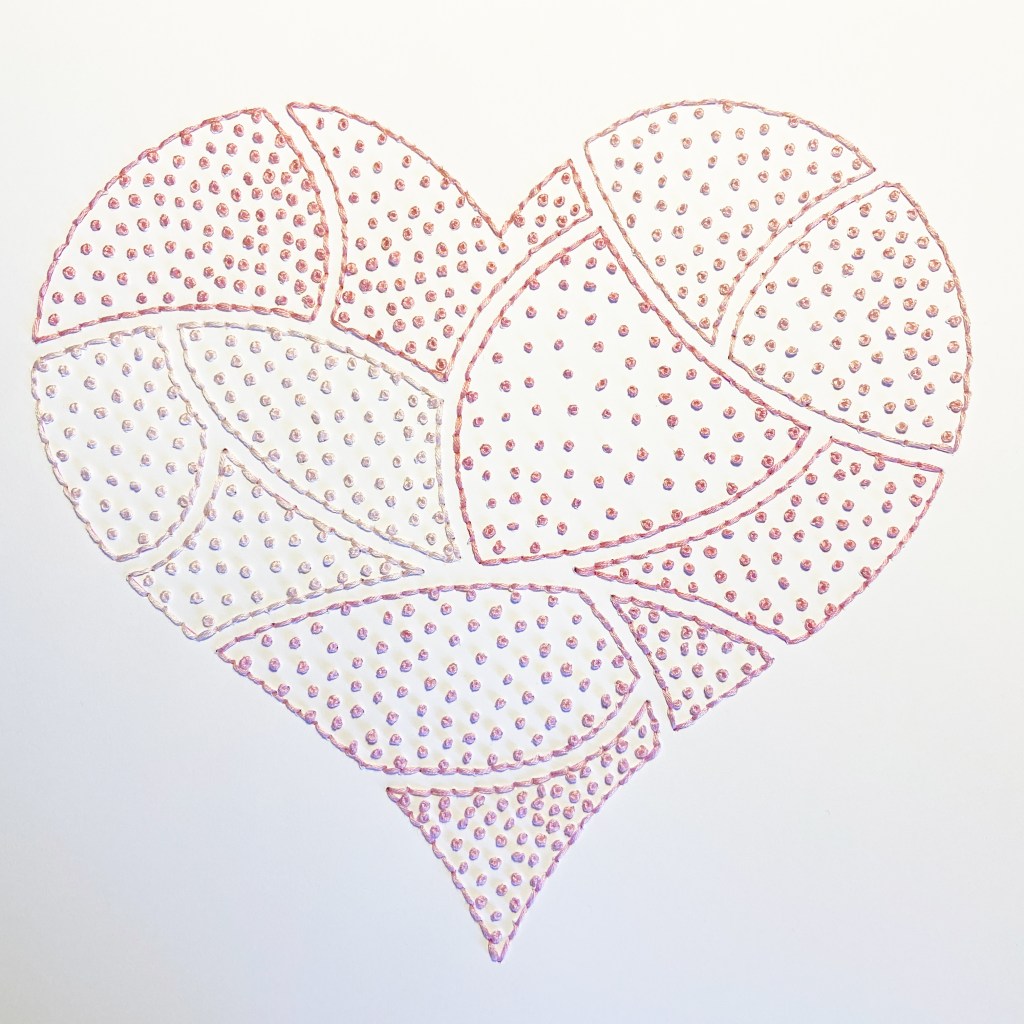
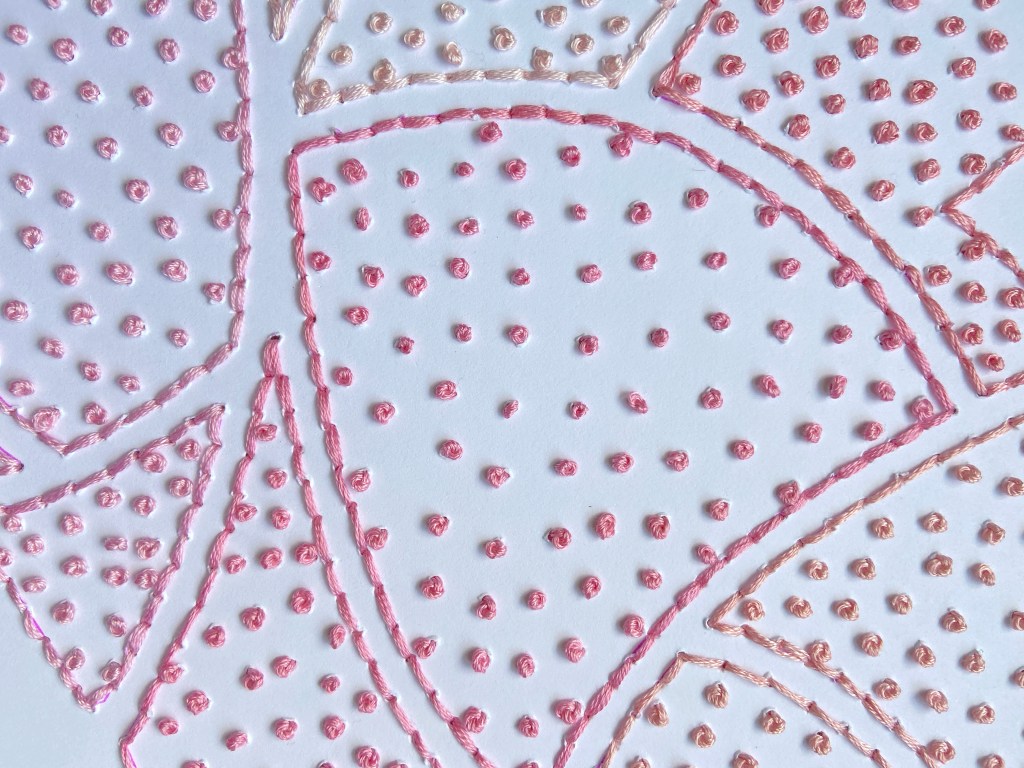
Once I had the stitching file completed, I spent time matching DMC floss to the colours found in the Daydream collection. I planned on using the Garden Variety sheet for the border, so this specific paper is what I used to match my colours too (DMC #351, 352, 353, 522, 743, 932, 3051, 3053, 3820). As I prepared to stitch, it became apparent that the stitching file looked quite complicated to the naked eye (like a hard puzzle) in the areas where the flower clusters lay. So before I started any stitching, I went back to my Silhouette Cameo 4 and used a Sketch Pen in light grey to trace out the cut file. I used this sketch as a template (similar to any stitching project) and coloured the file using markers that matched the colours in my final design. This coloured template helped speed up the overall process when it came time to stitch. Here are some photos of the stitching process for this project.

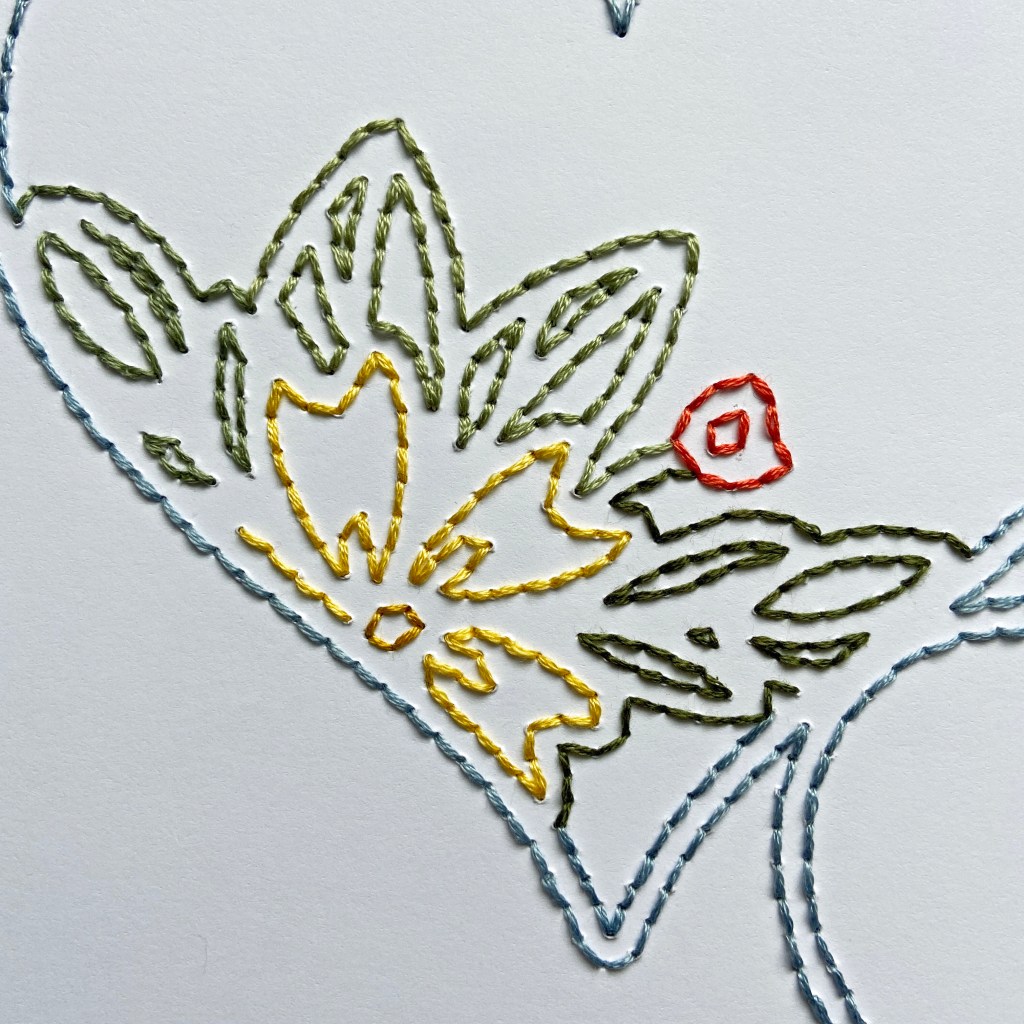

And the final and completed cut file, fully stitched. I love how pretty and delicate it turned out.
Once the stitching was completed, I planned on adding a straight 1/2″ border to the page with the Garden Variety patterned paper. However, at this juncture, I decided it would look better if I kept some of the flowers in the border intact. This involved some careful measuring and fussy cutting. I liked the look of some of these beautiful flowers spilling over from the border. I also dug into the Daydream Die Cut Ephemera pack and found 3 die cuts that were the perfect fit and shape of flowers that I had fussy cut and included in the border. I adhered these to the respective spots on the border with double-sided foam adhesive to provide some additional dimension to the layout. This required some trimming of the die cuts when they spilt over the edge of the page.
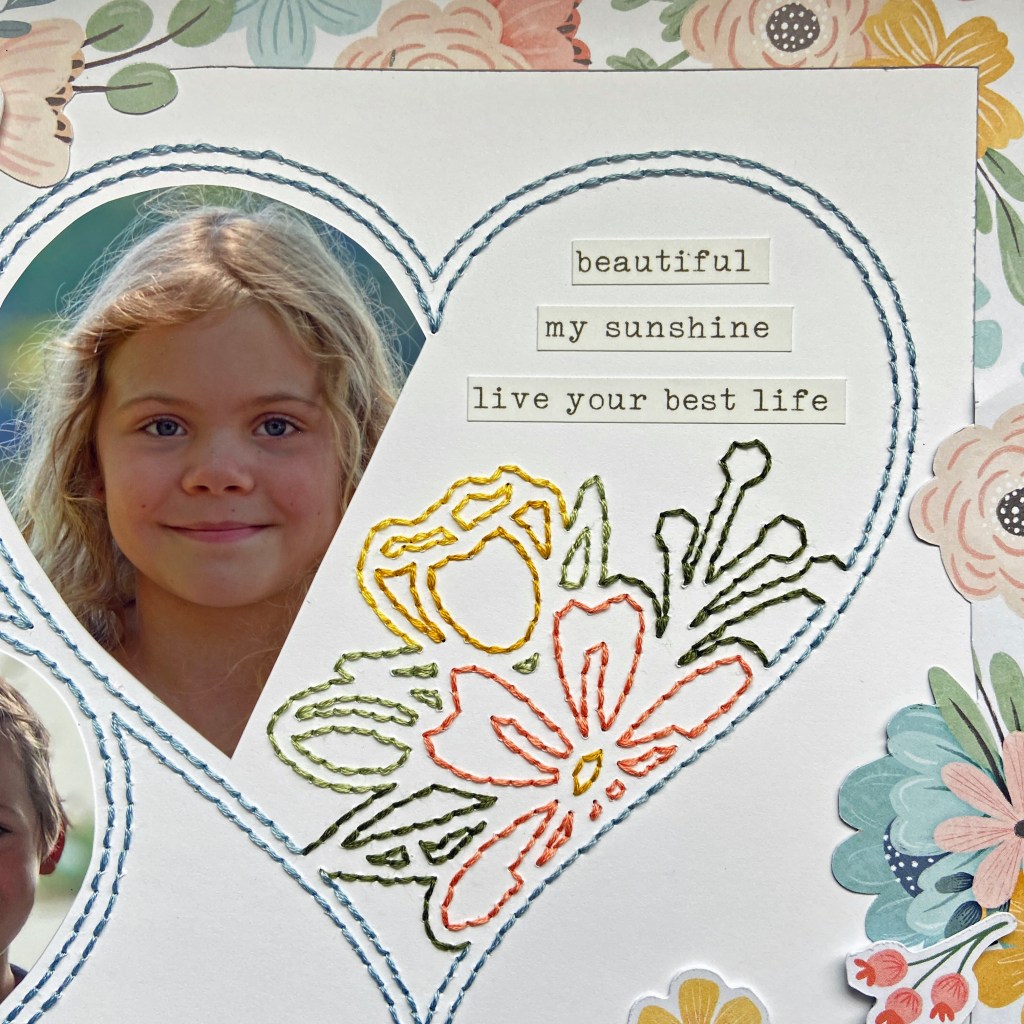
I wanted to add photos to the inside of each heart, but as you can see from the heart shapes, a traditionally sized photo just wouldn’t do the trick. To achieve the photo sizes in the completed layout, I started with a piece of acetate. The first step was to place the acetate over each heart section and use a marker to trace out the area and size for each completed photo. These acetate patterns were cut out and measured to help determine the photo size I should print to achieve this result. Once the photos were printed and ready to go, I simply placed the acetate over top of the photo and traced the shape directly onto the photo for easy alignment and trimming. To give you an idea of how I achieved it, here’s a picture of the layout with the acetate templates in place.

Once the photos were in place, I added small words and phrases from the Daydream Accessory Stickers sheet that came with the full paper pack of this collection. These stickers were centred and adhered within each heart in the white space above each stitched flower cluster. Here’s a close-up of the largest completed heart.
The title for this layout came from a set of Pinkfresh puffy phrase stickers belonging to the joyful day collection. The word love was the perfect size and colour to complement the layout and also express how I feel about these 3 beauties. The final step to completing this layout was adding a few random flowers found in the Daydream Die Cut Ephemera pack to help balance out the remaining white spaces of the layout.
This layout stretched some of my skills to new levels, and I love that this hobby continually provides this opportunity. I hope I’ve inspired you to try something new yourself. Thanks for joining me, stay safe, well, and Happy Scrapping!